
I watch a lot of video content on my Windows PC and would like to be able to capture favorite moments as images. Is there a way to do that with screen capture? Ideally I could step frame by frame to get the perfect image too…
Generally speaking, anything you can see on your computer screen you can capture with a program like the built-in Windows Screen Snip program. But not always. Some standalone apps will let you view streaming content, for example, but have additional software to block screen capture utilities. The result is typically a big black box missing the image you want entirely. Fortunately, most streaming and video options, like YouTube, let you do what you want, so getting a perfect still from a video sequence is a matter of timing more than anything else.
The easiest, of course, is video content that you actually have on your computer, whether you’re using a built-in Windows program like Movies & TV, a video player like VLC or something similar. Let me show you what I mean, using a video I have on my PC that’s a recent unboxing I posted on my YouTube channel. To start, launching this MP4 video brings it up in the (relatively) new Windows Movies & TV player:

I know your first question is what about the name of the video that’s superimposed over the image when you pause playback? Don’t worry, after about ten seconds that goes away. Wait for it to vanish, then you can use Screen Snap or something similar to grab the image. There are lots of screen shortcuts (PrtScn, Windows + Shift + S, etc) but I like to just activate it by clicking on the appropriate button in the Notifications shortcut panel:

You can see “Screen snip” is on the top left. A click or tap and the entire screen goes grey and a toolbar appears along the top:
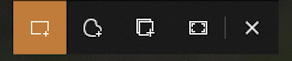
By default, it allows you to click and drag to capture the specified region, but I generally just move to the 3rd choice, capture window. Move the cursor into the video playback window and it’ll look like this:
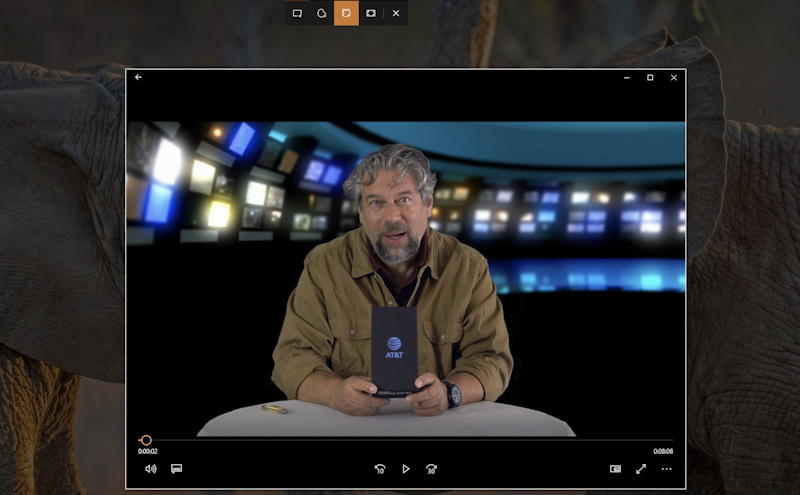
Now a simple press of Return or Enter and it’s captured and saved in the clipboard. On the lower right, a notification should slide into view for a few seconds:

Your best bet is to tap or click on the notification to now crop the image and save it with a memorable name. This opens it up in the handy Snip & Sketch program:
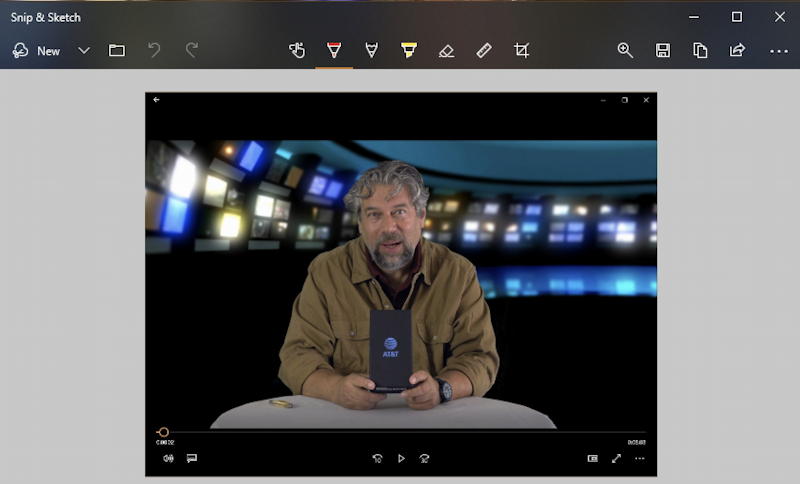
This is a great little app, actually, and lets you annotate to your heart’s desire. In this instance, however, rather than give myself glasses and a mustache, I’m just going to crop the image to work better for sharing. That’s done by choosing the crop tool from the toolbar along the top. It’s a square with a diagonal line going through it, rightmost in the center cluster of icons. Choosing that then adds draggable edges to the image:
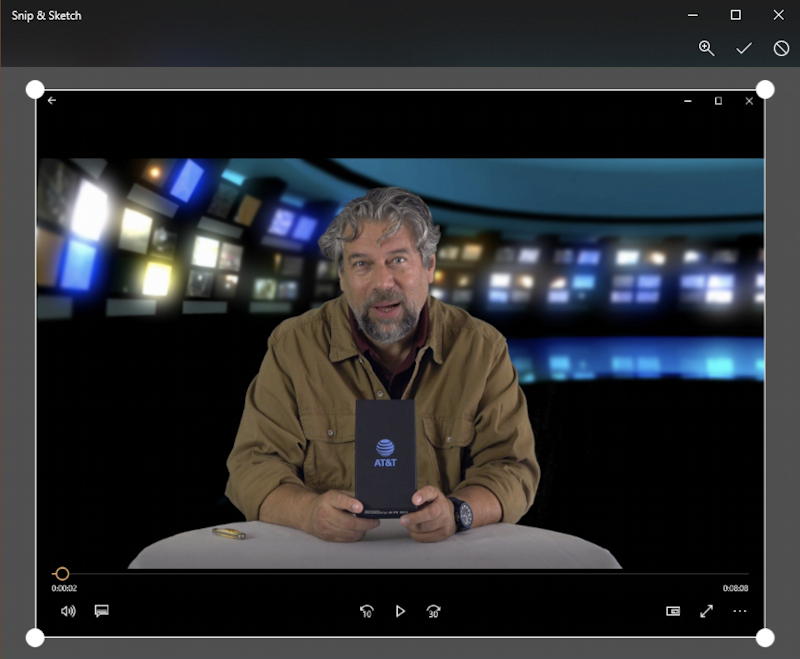
Now just click and drag (or tap and drag) the big white circles — “handles” in user interface jargon – to define the four corners of the resultant image you want. For me, this is just a matter of a few seconds to crop pretty tight on just myself. Looks good? Then click on the checkmark on the top right and the program will crop the image as specified. You’ll know this occurred because the edge around the image will be brighter and the big white handles will vanish:

Done. Now just click on the floppy disk file save icon on the top right and give your new video still photo image a memorable name. I realize this might seem convoluted, but once you go through the sequence a few times, I promise it’ll be quick, easy and logical. Mission accomplished!
Pro Tip: I’ve been writing tips and tutorials on Windows 10 since the first beta release. Please check out my quite extensive Windows 10 help library for tons of useful content that’ll help you get the most out of your PC experience.