
I just bought a new monitor for my Windows PC but when I plug it in, all I get is a mirror of what’s on my existing screen. How do I set it up as a completely separate screen or display?
Congrats on getting a second display for your computer; it’s amazing how much productivity can increase when you have more screen real estate to work with. Once you get it set up properly, that is. What’s great about Windows is that it’s smart enough to recognize different displays that you plug in too, so if you have it configured one way with the big LG monitor at work but want it to work differently with your home projector, it’ll just do the right think like magic.
There are two main areas in Windows 11 where you configure monitor behavior, and the one that’s easiest to reach has the confusing name of “Project”. Yes, even though one imagines that the ratio of people who have PC’s hooked up to video projection systems to displays is probably 1:1000, it’s project that Microsoft uses for the functional shortcuts. Let’s have a closer look…
WIN11 SHORTCUT: PROJECT
I’ve plugged in a ViewSonic portable second display to my Lenovo PC laptop and, like your experience, mine was automatically utilized as a mirror. Fixable. Click on the utility app icons in the Taskbar to bring up the shortcuts window:
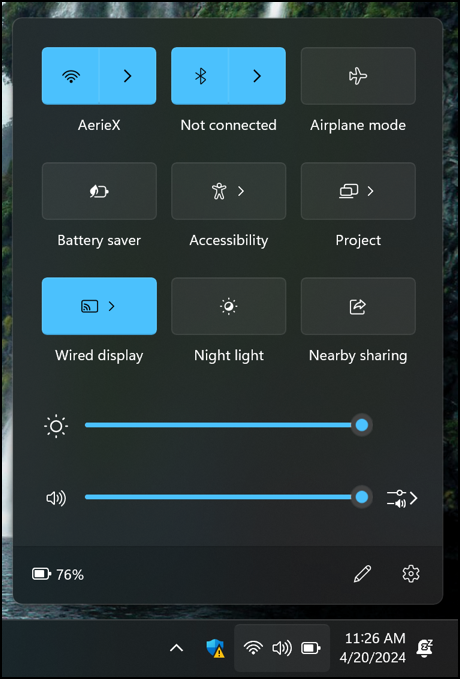
This is a handy way to adjust volume, brightness, check battery status, etc. In addition, it offers (user configurable) shortcuts to your most commonly used system functions and features. Including one confusingly labeled “Project“. Click or tap on it and you’ll see four possible approaches to projecting your system onto a second display:
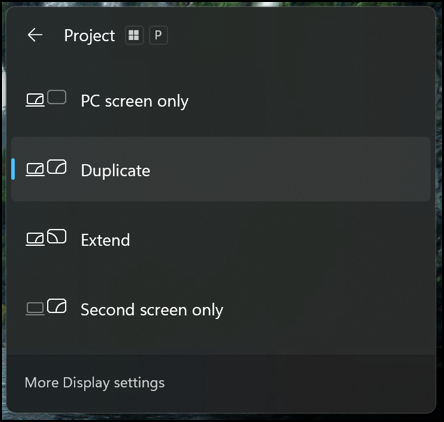
Microsoft calls the current mode “Duplicate”, not mirror, but you can see in the tiny image that it’s showing the same image. You can stop sending a signal to the remote display (though I cannot say why, since you could also just unplug it) or disable the main display entirely, having just the second display in use (helpful if you have a docking setup and a big display you want to use instead). But what we want is “Extend“, which adds additional pixels to the display, showing them on the other monitor.
Choose “Extend”…
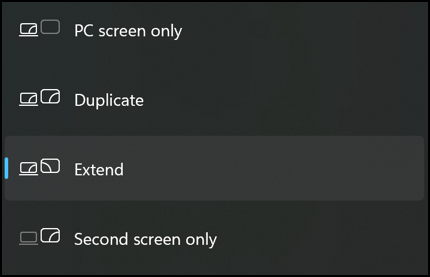
And you should see that second display suddenly become its own PC window, complete with its own Taskbar!
SYSTEM SETTINGS: DISPLAY
Choose “More Display settings” from the bottom of this menu and you’ll be whisked straight into the System Settings, in the System > Display area:
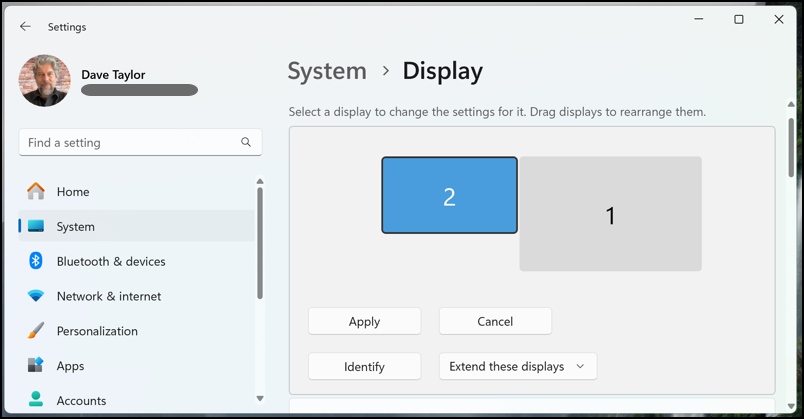
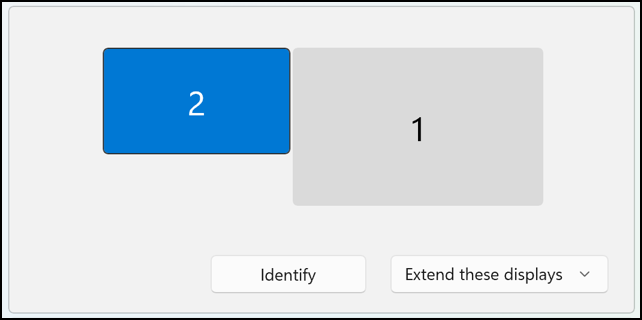
This changes quite a bit when a second display is connected, as you can see! Now you can click and drag to move the second display’s “virtual” location to match your physical setup. In other words, if your new display is to the left of your computer, you’ll want to move the virtual second display to the left too. That’s what I’m showing above.
For fun, click on “Identify” and a big number will show which screen is which according to Windows:
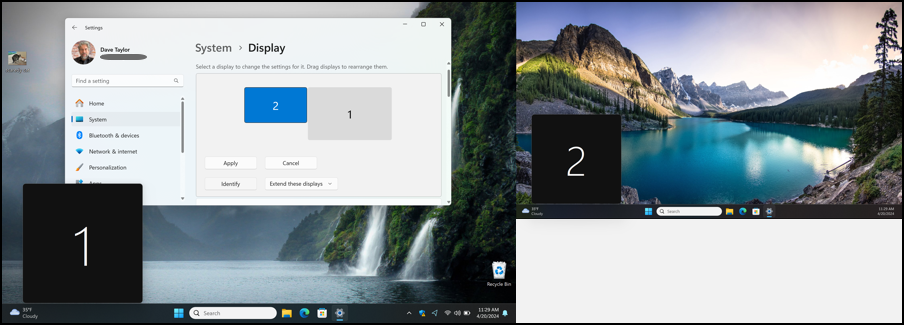
The screenshot utility hasn’t received the virtual location update, so it’s still showing display #2 right of display #1. To fix that, a click on “Apply” will move the display’s virtual location to match how you’ve set it up in Settings. Some of those System > Display buttons will vanish too:
That should get you going with your new display, but there are a few more things to explore.
SYSTEM SETTINGS FOR DUAL DISPLAYS
In the System > Display window, scroll down below the arrangement window and you’ll find some very useful options:

If you’d like to have the second screen as the main display, you can see it’s as easy as a checked box. Choose the second option, “Remember window locations based on monitor connection” and it’ll know to change your layout as desired for each different external display you use. You’ll definitely want to enable “Minimize windows when a monitor is disconnected” too, lest you end up with app windows you can’t access because they’re too far “off screen”.
There are more options if you keep scrolling down…
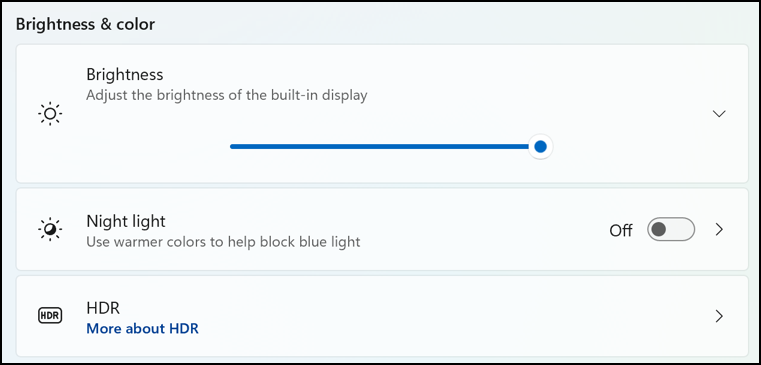
Since you can bring this up on each display, you can ensure that Night light is enabled on them all, for example, or individually adjust brightness to match your work preferences.
Just a bit more below this…
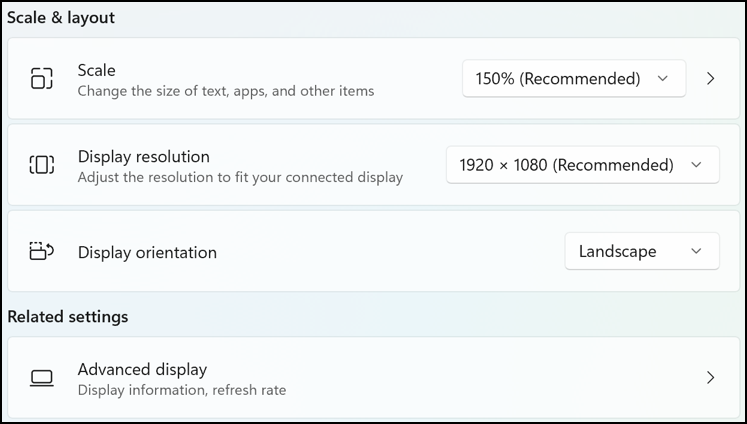
These last settings are also quite helpful even if you only have a single display. And didja notice “Display orientation”? That lets you tilt a screen sideways and use it in portrait, rather than landscape mode!
That’s it. Now you’re a bona fide expert on Windows and external display. Have at it!
Pro tip: I’ve been writing about Microsoft Windows for many years. Please check out my extensive and well-documented Windows help area for over 1,000 useful tutorials!
Great article – particularly explaining the details of arranging screen positions and setting up other preferences.
I frequently switch my Win10 laptop between both screen showing the same content (the external monitor shows what my small laptop screen shows) and extending the monitor function across both screens.
To simplify this I made shortcuts using the system program DisplaySwitch.exe. The ‘Targets’ for the shortcuts are:
C:\Windows\System32\DisplaySwitch.exe /clone
C:\Windows\System32\DisplaySwitch.exe /extend
(You can also specify /internal or /external. There is even a different screen icon for the each option.)
Now switching monitor setups is just a double click.