
My school district is useless with tech but I want to be able to assign students to specific breakout rooms in our Zoom class. In fact, I want those groupings to stay the same across classes! Is that possible, and if so, how can I manage it?
While the path might be occasionally convoluted, there’s not much you can’t do in the Zoom environment nowadays, particularly for academics. It’s not only powerful, but with upgrades and new features every 2-3 weeks (you do keep your version updated, right?) it’s a growing platform with increasingly powerful options too. And yes, it’s complicated, and the interface can be confusing because there are some things you can set up in advance through the Zoom app on your Mac or PC, but most settings need to be done through your zoom.us account through a Web browser. Your school district might have its own account, though, so that URL might be something more like XXX.zoom.us. As an example, I teach through the University of Denver and our Zoom account is udenver.zoom.us
There are basically three ways you can manage breakout rooms in Zoom meetings where you’re the host and creator of the meeting: During the meeting you can create rooms and randomly assign students, you can create rooms and move students into specific rooms, or, before the meeting or class begins you can pre-assign breakout rooms through either the zoom.us interface or by creating a spreadsheet listing rooms and students and then uploading it as required. Lots of options, so let’s have a look!
To start out, you will hopefully have the Zoom host toolbar when you’re running a meeting. This is critical: If you don’t see “Breakout Rooms” you won’t be able to create them in any fashion:

A click and you can choose randomly assigned rooms or move people who are currently connected into different rooms, but that’s stressful if you’re also running the class at the same time. So a much smarter strategy is to pre-define your breakout room assignments!
ASSIGN STUDENTS TO ZOOM BREAKOUT ROOMS IN ADVANCE
All of this revolves around you scheduling your meeting using the Zoom meeting scheduler interface. At the top of the new meeting screen, you’ll see something like this:
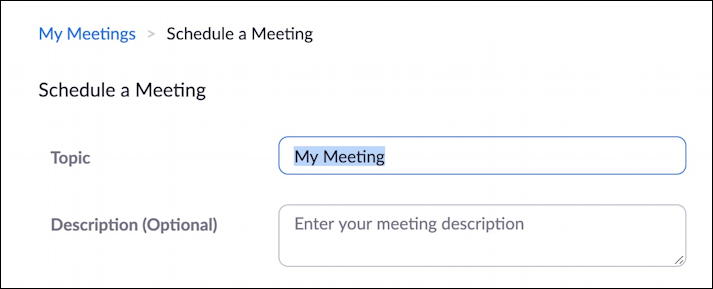
Hopefully that’s quite familiar to you, even if you only ever created one meeting and used the recurring meeting feature to have it reoccur weekly or even daily. In fact, a recurring meeting is best because you can set up your breakout rooms once and then they’ll be available for all subsequent meetings automatically.
A bit lower down on the same screen is an unassuming and easily overlooked checkbox:
![]()
Check the box and immediately a few options appear underneath it:

Let’s quickly have a peek at the CSV (comma-separated values, a simplified spreadsheet output file format) file format because it’s super easy to work with, then we’ll look at the options related to creating rooms within Zoom itself.
ZOOM BREAKOUT ROOM PRE-ASSIGN CSV FILE FORMAT
Zoom doesn’t actually have much documentation on the file format but instead offers a sample file for you to use. Click on the “Import from CSV” link and it pops up a window with a big file drop target for easy drag-and-drop:

I downloaded the sample CSV and opened it up on the Numbers program on my Mac but Excel and Google Docs can handle the file too:

Easy enough! It’s basically two fields per line, the name of the breakout room and the email address of the student assigned to that room. Create this once (or use the downloadable template as a starting point), export it from the spreadsheet program (don’t “save” it, you need to be able to choose CSV format) as something like “spring-science-350-breakouts.csv” and you can upload it to your new Zoom class meeting by clicking on “Import from CSV”. Quite doable!
CREATING BREAKOUT ROOMS WITHIN ZOOM MEETING SETUP
If you don’t want to mess with the CSV file – which is understandable if you’re not a tech enthusiast – you can also create the breakout rooms and organize them within Zoom itself as part of the process of creating your class meeting calendar event. To do that, click on the “+ Create Rooms” link just under the checkbox. A new window pops up:

You will again need to know everyone’s name and/or email address, but I bet you already have a roster of students so that should be no problem. First step will be to ascertain how many groups you want. For some situations, groups of 2-3 might be ideal, while other assignments might require groups of 5 or more in a big class. With that in mind, click on the “+” adjacent to “Rooms” on the left column and a new room will be created, ready for its first student to be assigned:
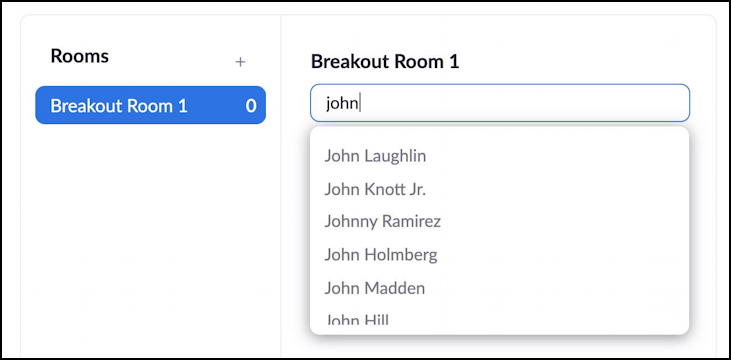
The University of Denver has quite a few students, faculty and staff, so I will need to be careful to identify my students for my breakout rooms. You might not have such a big pool of users so it might be a lot easier. Either way, identify an individual student with a click, then you’ll be able to add more students to the same breakout room as desired.
Eventually you’ll have multiple students assigned to multiple breakout rooms:

Looks good! I have three students in breakout room 1, three in room 2 and Stuart and Roger by themselves in room 3. Unfortunately in the Web interface there’s no way to rename breakout rooms, but you should be able to do that once the meeting is live if that’s important.
Click “Save” on the lower right – don’t forget! – and now your meeting scheduler will have something different under that checkbox:

That’s it. Done. Ready to proceed with your next class.
Note: I wish there was a way to export your breakout room configuration – including renamed rooms – to a CSV format file that you could then import for the next meeting, but as of now I have not found that as an option in Zoom. Perhaps in the next update!
Pro Tip: I’ve been writing about Zoom since way before the pandemic. Please check out my extensive Zoom help area for lots more useful tutorials on how to get the most out of this popular video conferencing system!