Ask Dave Taylor
  • Facebook
  • Instagram
  • Linkedin
  • Pinterest
  • Twitter
  • YouTube
  • Home
  • YouTube Videos
  • Top Categories
  • Subscribe via Email
  • Ask A Question
  • Meet Dave
  • Home
  • Windows PC Help
  • How to Enable Windows 10 Storage Sense?

How to Enable Windows 10 Storage Sense?

May 22, 2018 / Dave Taylor / Windows PC Help / 2 Comments

I keep running low on disk space. But Windows 10 has a new feature to help out called “Storage Sense”. How do I get that running?

Like every modern operating system, Windows 10 has a way of slowly filling up all the available space on your hard disk. Log files record what you’ve done, upgrades leave install files around, programs create and then fail to delete temporary work files. You download files and forget to delete them or find you don’t need them at all. And so it goes.

Fortunately the Microsoft team must have the very same issues because one of the nicest features in Windows 10 is called “Storage Sense” and it can automatically delete old, unused files and trim those never-shrinking log files to help keep your system slim and healthy! If you turn it on, that is, because by default it’s disabled and doing you no darn good at all.

To jump right to the correct place, do a Cortana search for “storage” and choose “storage settings”. You’ll end up here:

windows 10 win10 storage sense disk space management

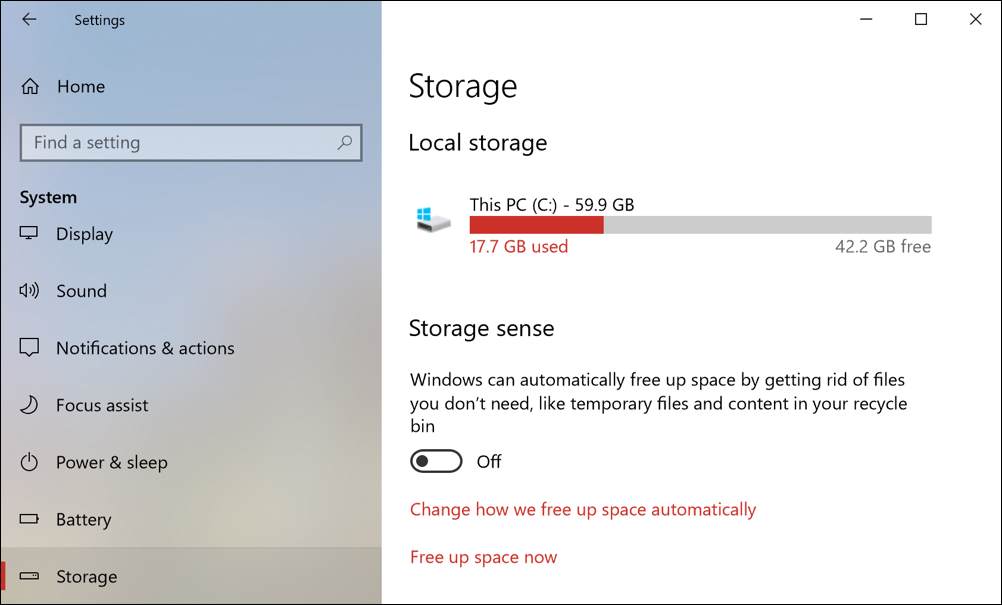
You can see that I don’t have a ton of space on my Win10 PC – 60GB – but that it’s mostly free and that I’m only actually using a svelte 17.7GB of that space. Still, I don’t want things to automatically grow and expand without me realizing, so I’m going to enable storage sense.

That’s done by clicking on the switch so that it says “On” not “Off”, as shown above. Two more steps so you can get a sense of what’s going on. First, click on “Free up space now“.

win10 storage sense - free up space now

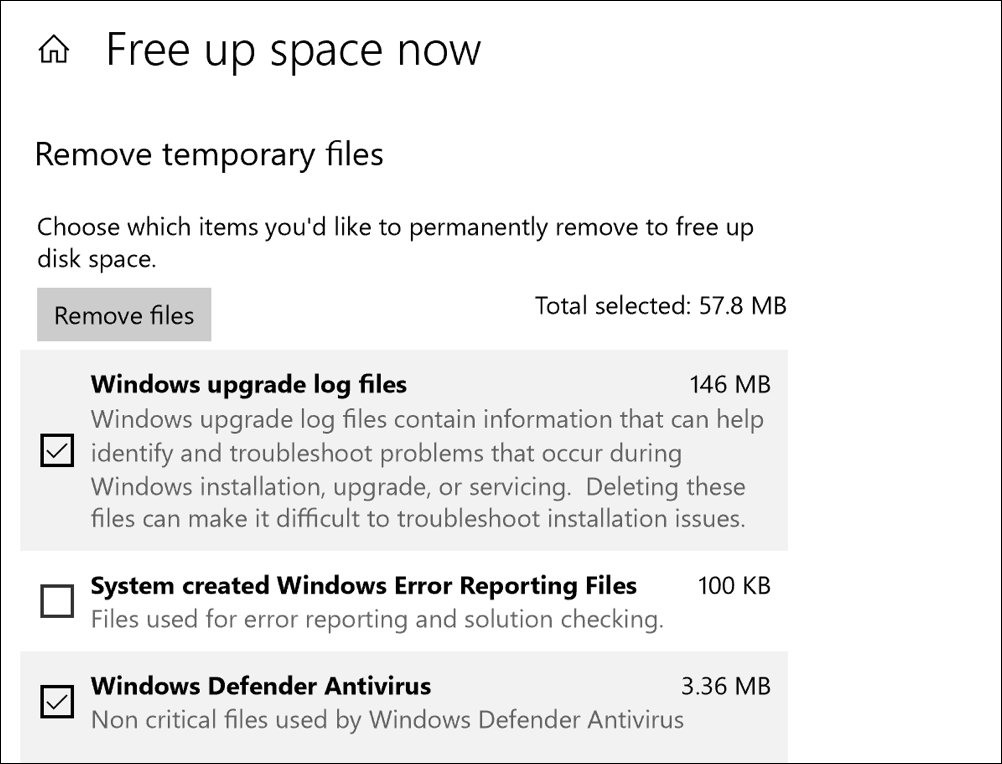
Eagle-eyed readers will note that the math doesn’t work above: How can 3.36MB + 146MB = 57.8MB? We’ll just call this Microsoft math, okay? 🙂  Regardless, you can see what it’s found in various categories and how much space is being wasted by each type of file. For some systems it’ll be similarly small but your system might have multiple gigabytes of these junk files laying around!

Click on “Remove files” and they’ll all vanish, freeing up more disk space for you!

The other thing to do is to go back to the Storage window and click on “Change how we free up space automatically” so you can see what’s included and what is excluded. Here are the basic options:

configure settings storage sense win10

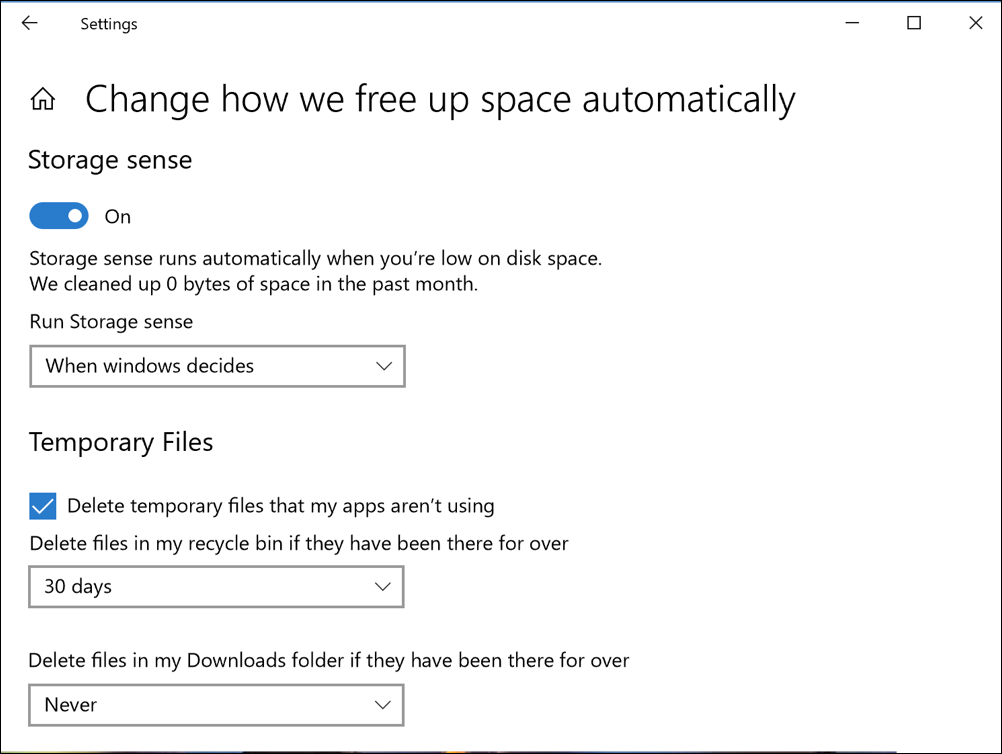
I suggest that you can leave all the defaults, but read carefully through before you switch to something else and forget forever that Windows is now automatically deleting old, unused files for you! 🙂

And that’s it. You’re up and running with Storage Sense.

Pro Tip: I’ve been writing about Microsoft Windows for years and years, so why not peruse our extensive Windows 10 help area for other useful tutorials?

About the Author: Dave Taylor has been involved with the online world since the early days of the Internet. Author of over 20 technical books, he runs the popular AskDaveTaylor.com tech help site. You can also find his gadget reviews on YouTube and chat with him on Twitter as @DaveTaylor.

Let’s Stay In Touch!

Never miss a single article, review or tutorial here on AskDaveTaylor, sign up for my fun weekly newsletter!
Name: 
Your email address:*
Please enter all required fields
Correct invalid entries
No spam, ever. Promise. Powered by FeedBlitz
Please choose a color:
Starbucks coffee cup I do have a lot to say, and questions of my own for that matter, but first I'd like to say thank you, Dave, for all your helpful information by buying you a cup of coffee!
dead files, disk space, out of disk space, storage sense, trim disk space, unused files, win10 disk management, windows 10, windows storage sense

2 comments on “How to Enable Windows 10 Storage Sense?”

  1. Thomas Buckley says:
    May 27, 2018 at 10:43 pm

    I just started getting pop-ups of “local E: disk is getting full” how do I dump the excess junk in this file? I also turned on Windows 10 Storage Sense, does this help?

    Reply
  2. Bill Pytlovany says:
    May 27, 2018 at 8:21 pm

    Thanks for the tip. I now have 1.92 GB free that I didn’t need or want.

    I always say, “Computer storage is like your paycheck. No matter how much it grows, you’ll still find a way to use all of it.”

    Bill

    Reply

Leave a Reply Cancel reply

Your email address will not be published. Required fields are marked *

Search

Recent Posts

  • How Can I Stop Sharing my Xfinity Internet Connection via xfinitywifi?
  • Guide to Identifying and Blocking Off-Facebook Data Tracking
  • How Can I Share My Netflix Account With My Friend? [Updated for 2023]
  • How to Check Energy Recommendations on your Windows Laptop
  • How Do I Customize New Tab Windows in Safari for Mac?

On Our YouTube Channel

Audeze FILTER Bluetooth Conference Speakerphone -- DEMO & REVIEW

How to: Replace a Switchbot Door Sensor Battery

Categories

  • AdSense, AdWords, and PPC Help (106)
  • Amazon, eBay, and Online Shopping Help (163)
  • Android Help (226)
  • Apple iPad Help (147)
  • Apple Watch Help (53)
  • Articles, Tutorials, and Reviews (346)
  • Auto Tech Help (15)
  • Business Advice (200)
  • ChromeOS Help (31)
  • Computer & Internet Basics (780)
  • d) None of the Above (166)
  • Facebook Help (384)
  • Google, Chrome & Gmail Help (188)
  • HTML & Web Page Design (247)
  • Instagram Help (49)
  • iPhone & iOS Help (623)
  • iPod & MP3 Player Help (173)
  • Kindle & Nook Help (99)
  • LinkedIn Help (88)
  • Linux Help (173)
  • Linux Shell Script Programming (89)
  • Mac & MacOS Help (911)
  • Most Popular (16)
  • Outlook & Office 365 Help (33)
  • PayPal Help (68)
  • Pinterest Help (54)
  • Reddit Help (19)
  • SEO & Marketing (82)
  • Spam, Scams & Security (95)
  • Trade Show News & Updates (23)
  • Twitter Help (220)
  • Video Game Tips (66)
  • Web Site Traffic Tips (62)
  • Windows PC Help (947)
  • Wordpress Help (206)
  • Writing and Publishing (72)
  • YouTube Help (47)
  • YouTube Video Reviews (159)
  • Zoom, Skype & Video Chat Help (62)

Archives

Social Connections:

Ask Dave Taylor


Follow Me on Pinterest
Follow me on Twitter
Follow me on LinkedIn
Follow me on Instagram


AskDaveTaylor on Facebook


microsoft insider mvp


This web site is for the purpose of disseminating information for educational purposes, free of charge, for the benefit of all visitors. We take great care to provide quality information. However, we do not guarantee, and accept no legal liability whatsoever arising from or connected to, the accuracy, reliability, currency or completeness of any material contained on this site or on any linked site. Further, please note that by submitting a question or comment you're agreeing to our terms of service, which are: you relinquish any subsequent rights of ownership to your material by submitting it on this site. Our lawyer says "Thanks for your cooperation."
© 2023 by Dave Taylor. "Ask Dave Taylor®" is a registered trademark of Intuitive Systems, LLC.
Privacy Policy - Terms and Conditions - Accessibility Policy