
I want to try out Windows 11 on my computer and am unclear about the differences between “dual boot” and a virtual machine. I’m on a Mac system and ideally don’t want to rely on Win11, just try it out safely.
Whether it’s for testing purposes or out of an abundance of caution, savvy tech folk know that their computer can run more than one operating system and that rather than choose on install, they can choose on boot instead. Of course, if you have a spare computer that’s often the best way to run a new operating system you’re exploring – like Microsoft Windows 11 Beta – but who has a spare computer?
All told, there are three basic ways you can add an operating system to your system: You can replace your current OS, you can partition your system and use a multi-OS boot utility like Apple’s Boot Camp, or you can install the new operating as a virtual machine image. Let’s go through all three…
REPLACE YOUR CURRENT OPERATING SYSTEM
While not every operating system can run on every computer, it’s surprising how flexible modern systems are when it comes to hardware requirements. In order of least flexible to most, I’d say MacOS is very particular, Windows is pretty open, and Linux can run on just about anything, from your ancient PC to the latest liquid nitrogen-cooled gamer rig.
So one option is always to ensure compatibility, then just install the new operating system over your current system. This is pretty all-consuming, however, so you must have a reliable backup because you’ll not only lose all your personal files, you’ll probably lose every file on the system as part of the install.
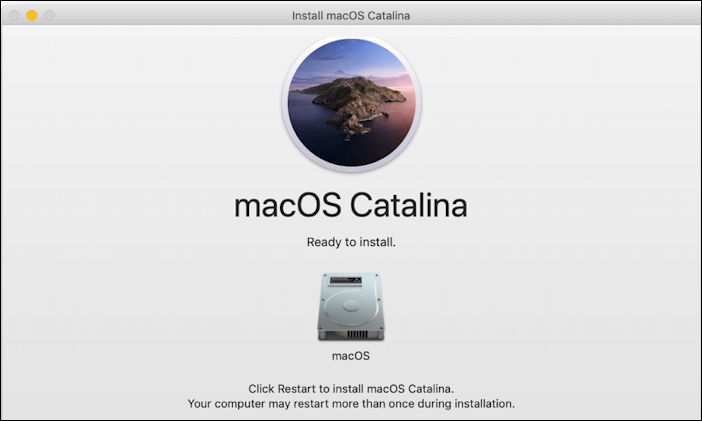
Upgrading from one OS to a more recent version of the same OS is usually not quite so dramatic, of course, so going from MacOS X to MacOS 11 or Windows 10 to Windows 11 isn’t digital armageddon for your files, but… it’s always a good idea to have a reliable backup, and maybe even a redundant second backup (in the cloud, perhaps) because backing up your critical files before a crisis is always easier than recovering them after one.
The big limitation with a full OS replacement is that it’s often quite difficult to go back if you change your mind or the new OS proves to be unstable.
Note: What’s an “unstable” operating system? One where things don’t work, apps crash, the system freezes or restarts without you requesting it, etc. Most beta releases are unstable to some degree which is why they’re still “in beta”. Beware, particularly if you’re not used to buggy software.
Again, good backups are your friend, because if you do end up in a pickle, you can always yet again install a new OS over the current one, but this time maybe it’s the latest release version of Windows 10 replacing a beta of Windows 11.
I almost never recommend a replacement OS unless it’s an incremental update (e.g., the OS has a new release) or you’re a developer with the savvy to make the process safe and painless.
LIVING IN THE DUAL BOOT WORLD
Most people don’t realize it, but your hard drive – whether a solid-state drive (SSD) or physical spinning disk – can be split up into multiple virtual disks. This is known as “partitioning” and it’s a great way to turn a really huge drive into a couple of smaller drives that operate autonomously. For example, if you’re worried about a program corrupting your personal files, you could partition a PC and set it up as E: or F: for files you want to protect. Macs can do this too, though it’s always easiest (and safest) to repartition a drive before you’ve spent years using it and spreading your files across the system.
On the Mac there’s a disk partition feature within Disk Utility (part of MacOS, it’s in the Applications folder) but the recommended way to set up your Mac for dual boot is to use Apple’s Boot Camp program. It’s pretty slick, actually, and one of the steps involved in installing it is repartitioning your existing hard drive:
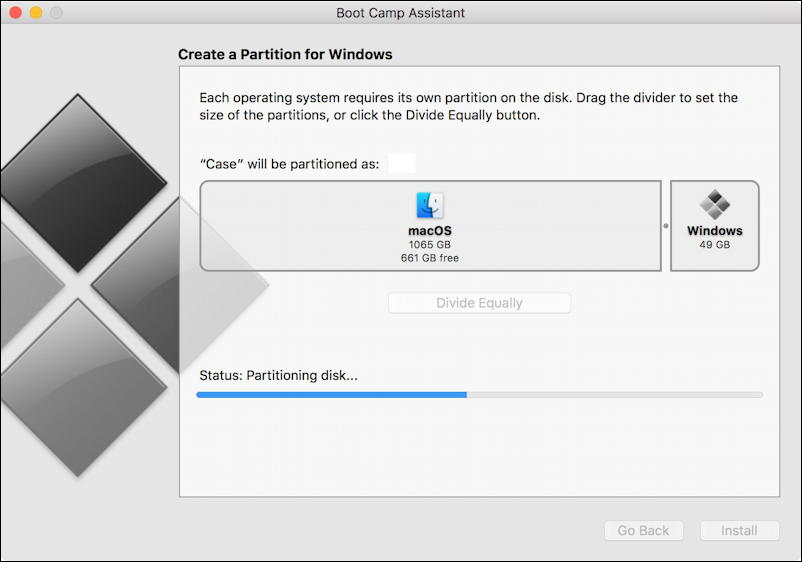
50GB might a bit small, but for testing purposes it works great.
With Boot Camp installed, all you need to do is hold down the Option key while the system is rebooting and instead of automatically launching into MacOS it’ll stop part-way and let you choose which of the operating systems it can find as your “active” OS:

Simple, but effective. Linux has a similar utility with the charming name of GRUB. Odd name, but darn useful:

In the above, I could choose Ubuntu Linux, a memory test diagnostic or, at the bottom, Windows 10.
The advantage of dual boot as a way to run a second operating system is that it runs completely independently. You have the full experience of the OS, no simulations, no shared resources, nothing. If you boot into Windows, you’re running Windows. Ready to go back to MacOS? Restart, hold down that Option key, and it’s easily done.
The disadvantages are that you have to partition your disk which if it’s already pretty full comes with some risk of file loss (backup, backup, backup!) and it’s clumsy to partition and then repartition if you decided you wanted to reclaim the space.
RUNNING WITHIN A VIRTUAL MACHINE
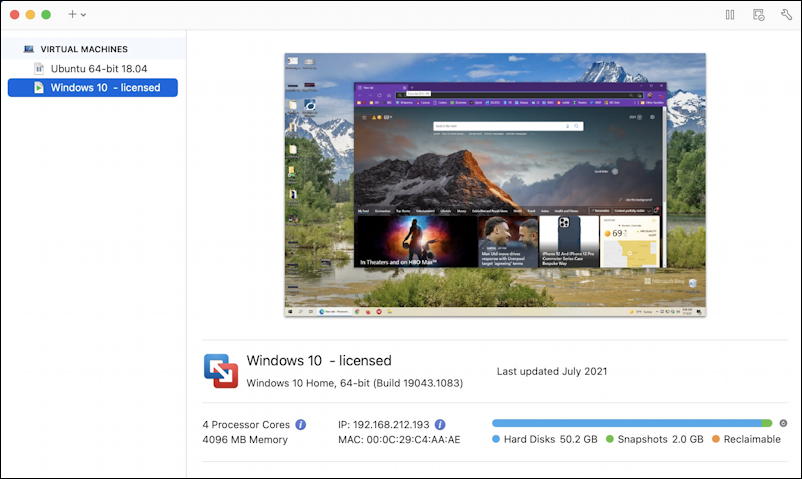
The solution that I’ve been using for many years is to use a virtual machine. This is a rather complex program that runs the target operating system as another application on your Mac system. So it runs within MacOS. You are literally running both programs, both operating systems, at the same time. It’s pretty fantastic once you get it set up properly, and no disk repartitioning required!
There are three primary options in the virtual machine world for a Mac user: VirtualBox, an open source option from Oracle, Parallels, and VMware Fusion. I run the latter, though I also have virtualbox on my system if I need to run a VirtualBox virtual machine. I have both Windows 10 and Ubuntu Linux installed in their own virtual machines in Fusion, as you can see:
The particular challenge with Windows 11 beta as a virtual machine, however, is that you need to have a Trusted Processor Module or TPM for it to run properly. This is a new security feature Microsoft’s imposing on Win11 to help create a safer computing environment and it’s also leaving a lot of older PCs in the dust too.
Fortunately, there’s a solution! A few weeks ago I wrote a tutorial on How to Add TPM 2.0 Support for a VMware Fusion Windows 11 Machine.
The install on a virtual machine is usually pretty darn easy too because it boots up and behaves as if it was a new PC. You’ll have to go through the various steps for a new installation, of course, and you’ll want to already have downloaded an OS “ISO” image (a monster file that replaced the previously ubiquitous CDROM install) but it’s doable.
In fact, I’ve written about that too, though it’s a few years old at this point: How to install Windows 8 into VMware Fusion. The basic concepts outlined in the article are identical, however, even if the graphics are a bit outdated!
The advantage of using a virtual machine is massive flexibility. You can delete your virtual machine (VM) at any point, you can copy it to a new computer, and you can leave it running full screen in a MacOS “Spaces” screen, acting for all the world like it’s the only OS on your computer. It’s not quite as fast, perhaps, and you are sharing your file system so some discretion should be taken with permissions to ensure you keep your Mac files safe too. And if you have a cloud backup system, you might want to omit the VM image as they can be crazy big, like 50GB or more.
THOSE ARE YOUR MAIN OPTIONS
That’s about it for options; either replace your OS with Windows 11, set up a new partition on your system for Windows 11 and utilize Boot Camp, or tap into one of the many virtual machine options as a more flexible choice. However you proceed, good luck and let us know what you think of Windows 11!
Pro Tip: I’ve been writing about the Mac since the days of Finder and Multi-Finder! Please check out my extensive Mac help library for hundreds of useful tutorials and how-to guides. Thanks.