
I work with really big data files and need to share some with a client who only has a Windows PC. A pain, since we’re a Mac-exclusive design firm. How can I use a USB flash drive to give them access to our data?
While Windows computers tend to turn a cold shoulder to the Mac community, Apple has always ensured that interoperability between Mac and Windows is a breeze. In fact, when you plug that USB flash drive into your Mac system, it’s quite likely it’s formatted for Windows and you aren’t even aware that the OS is translating file formats invisibly. Not only can the Mac work with PC drives, though, it can format any drive or storage device to be Windows native too.
But there are additional wrinkles and nuances because Windows computers work with a variety of file system formats too. The most common is “FAT” (which stands for File Allocation Table, not a judgment on the user’s weight!). Problem is, FAT has a hard limit on file sizes because of how it was designed: If you have a file bigger than 32MB you’re out of luck. So almost all FAT file systems are really FAT32, which bumps the max file size up to 4GB. Still not that huge for modern systems and I have video files I share with clients that are considerably larger than FAT32 max file size. There’s another variation on the theme, ExFAT, that offers massive, thousands of terabytes, max file size.
Fortunately, the Mac Disk Utility program supports ExFAT along with FAT32 so you’re going to be in great shape. Let’s check it out!
First off, plug in your flash drive and use Get Info to see what kind of file format it has:

I’ve highlighted the info on this particular drive: Mac OS Extended (Journaled). Pretty common, but completely incomprehensible to a Windows system, whether it’s a swanky Surface Pro or an old clunker tower PC.
Make sure there’s nothing on the flash drive you want to keep and launch “Disk Utility” from the Applications > Utilities folder. Click to choose your drive and it’ll look something like this:
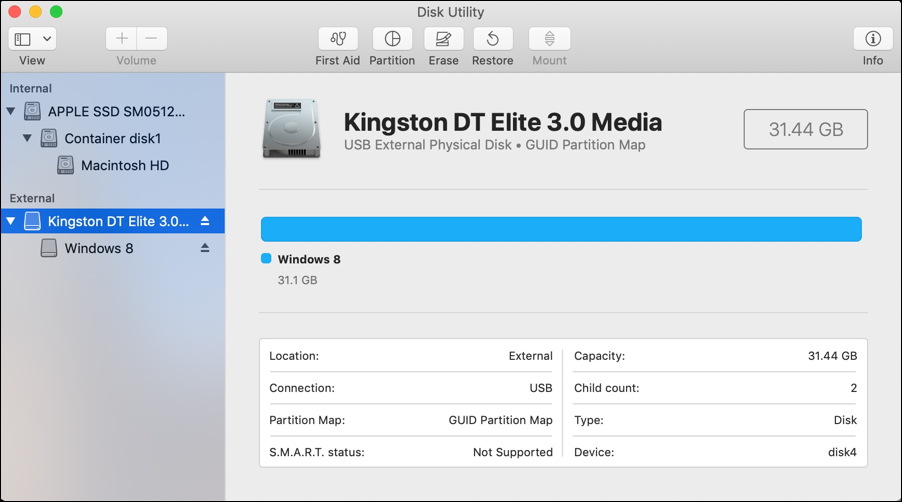
You can see here that the drive – a Kingston DT Elite 3.0 – has a 32GB capacity (it shows 31.44 because there’s always a little bit of space taken up by the file system structure itself) and while it’s called “Windows 8”, it’s actually in Mac format (as Get Info showed). Right, then. Time to reformat it.
Warning: Reformatting will irretrievably delete every single thing on the drive. Make sure you don’t need any of the data. And make doubly sure you’ve chosen the correct drive in Disk Utility too: Pick the wrong one and oh, it can be catastrophic!
You can reformat a drive by choosing the drive – note that the one above is in the “External” category, do NOT choose an Internal drive! – then clicking on the “Erase” button off the very top set of icons. You’ll now have to choose what file system format to utilize:
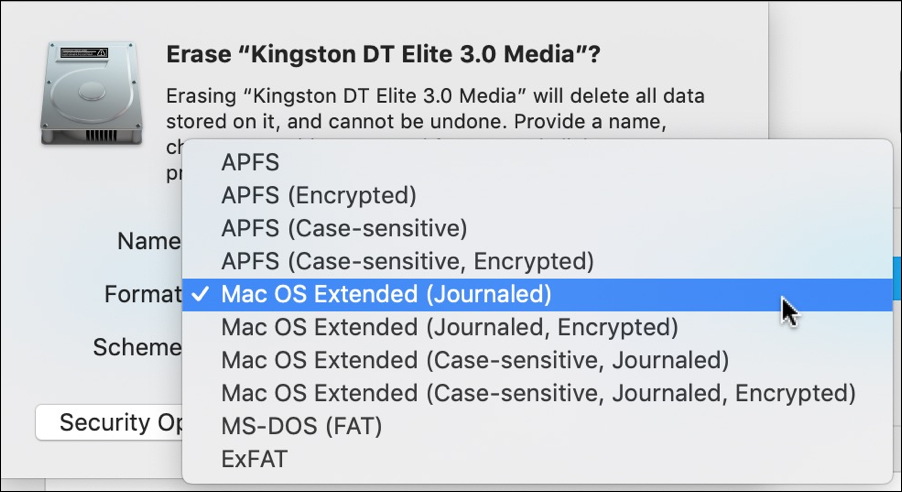
That’s really a ridiculous number of options (did you realize that the Mac supported so many file systems?) but the most recent version of MacOS X is built around APFS, Mac OS Extended is the previous generation file system, and at the bottom you can seem “MS-DOS (FAT)” (really FAT32) and “ExFAT”.
Choose “ExFAT”, then come up with a name for your drive as desired too:
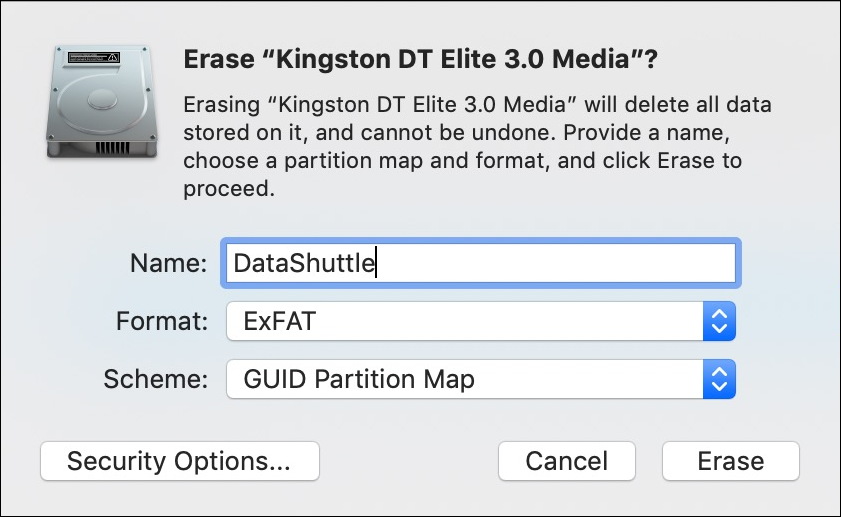
Ready? Sure you want to proceed and don’t need anything on the drive?
Okay. Click on “Erase” to proceed and it’ll go through a variety of steps pretty quickly, ending with this:
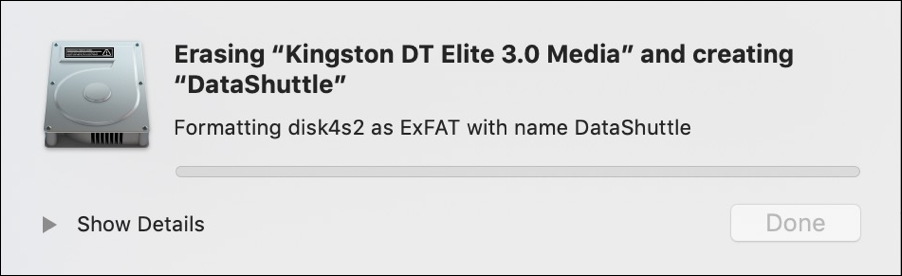
Looks like it’s working – formatting as ExFAT – and once it’s done you’re back here again:
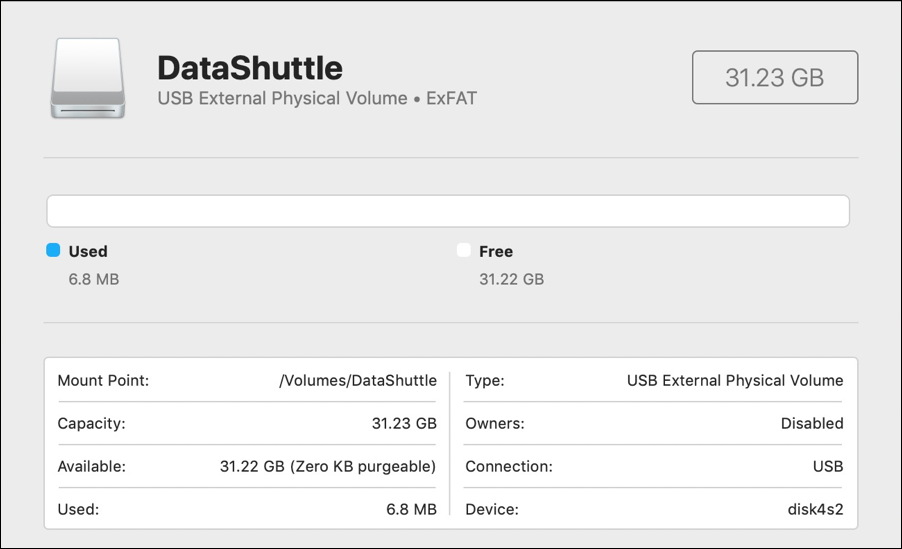
Notice just below the drive name it shows “ExFAT”. Sweet. Not only that, but ExFAT is slightly more efficient so we’ve picked up just a smidge of additional space from the flash drive. Pretty cool.
And now you can copy massive files onto the device, as I do in the below:
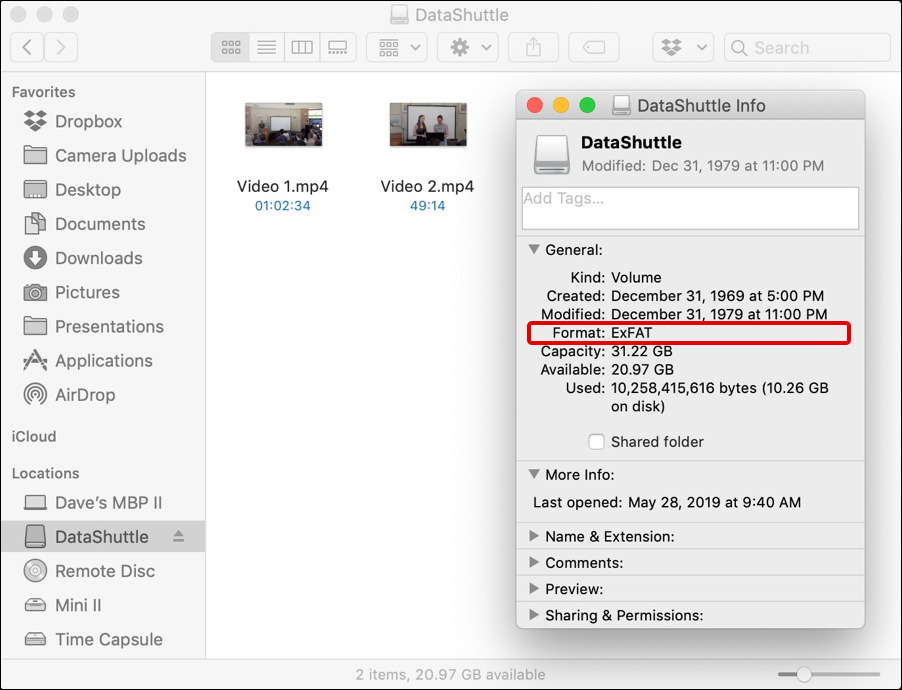
Notice that Get Info shows ExFAT, as hoped. Those two files? Together they’re 10GB in size, so they’re definitely bigger than FAT32 can handle. Lucky I reformatted it, eh?
Pro Tip: I’ve been writing about the Mac system since MacOS 9. That’s a long time. Please check out all my MacOS help while you’re here and you can see just how many topics I’ve covered!