
Last time I logged in to Pinterest I found that there was a prompt for me to verify my Web site that’s listed in my profile. Why would I want to do that, and how do I accomplish the task of verifying my Website for Pinterest?
Like so many other social media sites, Pinterest has a challenge: how do other people know that you’re really who you say you are? It might not be a big deal if you’re only using the site to share your latest quilting design or hair style with a half-dozen pals, but as you become more visible, verifying identity becomes increasingly important. You can imagine if you’re a celebrity like Martha Stewart or an artist like Sean D’Anconia, giving people the confidence of knowing that a Pinterest profile that purports to be you on the service really is yours can be pretty darn important.
The good news is that it’s easy to do and you end up with a cool “verified” graphic that will help you stand out from the masses of Pinterest users who don’t have something as cool. It’s also easy to accomplish if you have the ability to upload files to your Web server. If you need to email things to an admin or someone in IT, it’s still doable, but if you have no access to the site you’re listing as your own (for example, an author who lists amazon.com as their Web site), then you won’t be able to succeed.
Let’s make the assumption you have your own Web site and do have this level of access, though, and step through what’s needed.
First off, here’s what you’ll see on your Pinterest home page when you’re logged in if you are eligible for the verification program:
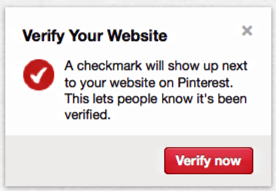
Sounds like a good plan, proceed by clicking on the big, red “Verify now” button.
It’ll show you what will happen when the verification process is successful:
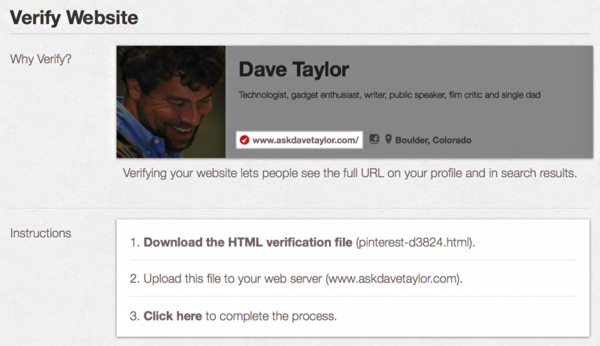
Note the instructions: Download a file, upload it to your Web server, click “Click here” to complete the process. Easy enough, so click on “Download the HTML verification file” (in my case it’s called pinterest-d3824.html but yours will have a slightly different filename).
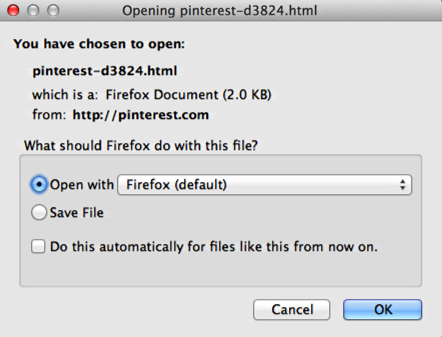
That’s as expected. Save the file (no reason to open it) and make sure you remember where you saved it.
I use a great little Mac program called Fetch to securely upload files to my Web server, so I just find and click on the program icon to proceed…

Cute, eh? A quick upload — the file’s tiny — and I’m ready for step #3.
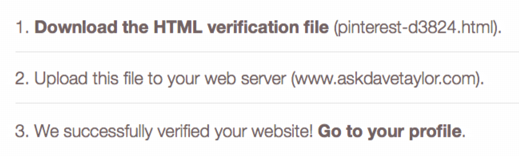
Back to the Pinterest Web page and a click on “Click here”. It checks for the file, finds it (hopefully!) and I’m good to go!
If the verification fails, make sure that you’ve put it in the “root” of your Web server, the directory that also contains “index.html” and other top-level items on your site. If necessary, move it so it’s in the right place, then try again.
The result? Here’s what you’ll see if you check out my profile on Pinterest:

So now you know. It really is pretty darn easy.
Brilliant article… I had never thought of this !!! Very clearly written!!!! Thanks very much!!!