
I use Spaces on my Mac all the time and really love the ability to organize my work apps. Is there an equivalent feature for ChromeOS on my new Chromebook?
The original Chrome OS definitely did not include virtual workspaces or anything like it. The original vision, after all, was to have an operating system within a Web browser. Virtual browsers within a browser? Not yet something anyone’s attempted since that’s what tabs are for, right? Somewhere around ChromeOS 75, however, Google did add a virtual workspace feature similar to “Spaces” on the Mac. They call it virtual desk and as they keep adding new features, it’s clearly popular!
My first observation, then, is that you need to be up-to-date with your Chrome OS for this to work. If you’re running Chrome OS 91 or more recent, you should be good, but you might want to quickly check How To Update Chrome OS On Your Chromebook if you aren’t sure how to force an update to the latest and greatest. Why? To ensure you have the features automatically enabled for Virtual Desk on your Chromebook.
With that in mind, let’s check out how to use it!
HOW TO CREATE A NEW VIRTUAL DESK IN CHROME OS
Before we proceed, let’s define a few unique Chrome OS keys on your keyboard. Here’s my Lenovo Chromebook keyboard as a reference:
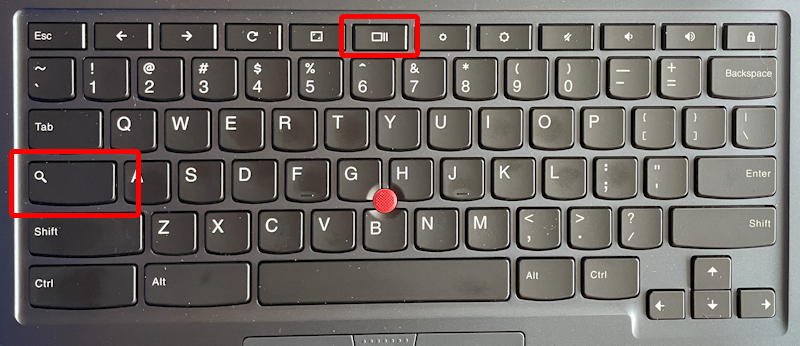
The two keys I’ve highlighted are Search (on the left), and Show Windows, along the top. Both are important for getting to Virtual Desk. In fact, a press of the Show Windows key along the top. Your window will shrink a little bit and a new Virtual Desk bar will appear along the top:
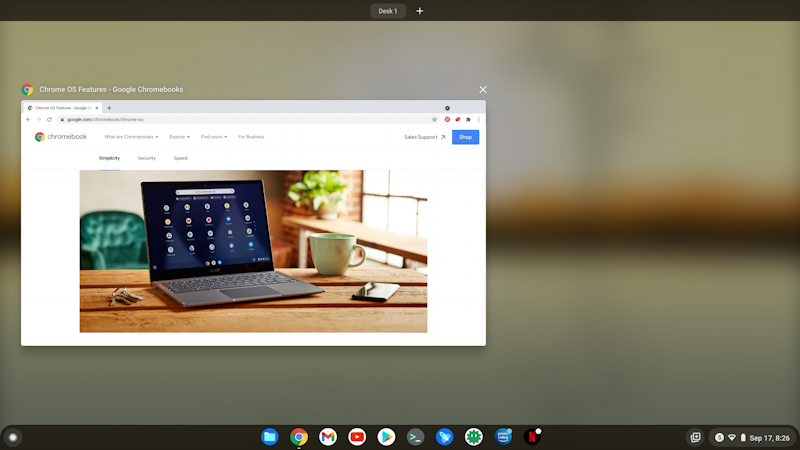
In the above you can see it’s a slim bar with “Desk 1” and a “+” symbol. Move the cursor into that bar and it expands!
Press or click on the “+” (now shown as “New desk“) and a new space opens up with the cursor poised, ready to let you name it:

You can create a bunch of spaces – errrr, virtual desks — and switch between them by simply clicking on the Virtual Desk you want to use.
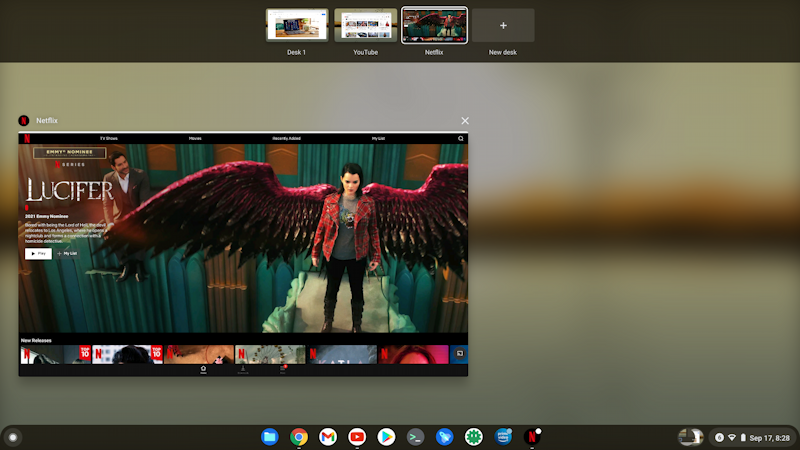
Launch a program or window within a specific Virtual Desk and it’ll stick, showing up when you’re in that space, and hiding when you’re not. I like to set mine up by functionality, so “Desk 1” is my main desk, but then “YouTube” is running the YouTube app and “Netflix” is running, well, Netflix:
Pretty cool, right?
WORKING WITH VIRTUAL DESKS IN CHROMEOS
Here’s another cool thing you can do: Move apps between Virtual Desks! Press the Show Windows key, then simply drag the shrunken window into the desired Virtual Desk space on the top bar. Really. It’s that easy.
But what you’ll really love are the keyboard shortcuts. Here’s a summary:

What I really like is the fact that if you four-finger-swipe your trackpad, it’ll move between Virtual Desks. This turns out to be great because you can very quickly zip back and forth without ever using the Show Windows key. You’ll be 5x faster instantly.
EXPERIMENTAL VIRTUAL DESK SETTINGS
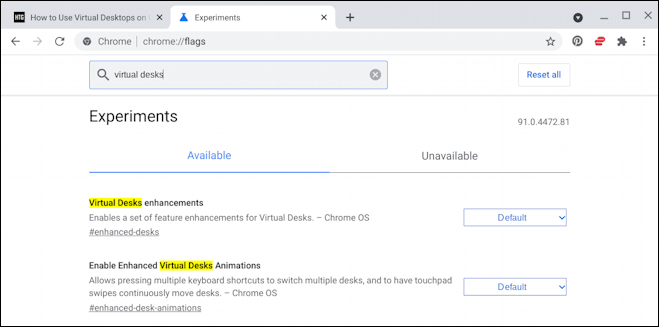
Google’s not done with its implementation of Virtual Desk in Chrome OS either, as you can see if you go to chrome://flags and search for “virtual desks”. In Chrome OS 91.x here’s what I see:
I enabled both, though I haven’t noticed too many changes in the behavior of my Virtual Desks.
To enable an experimental feature, click on the “Default” and a window of options appears:
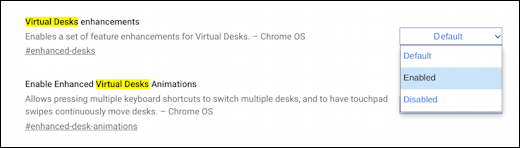
Choose “Enabled”, then make sure to restart your Chromebook. There’ll probably be a handy “Restart” button on the lower right to remind you that you have to save to have them work.
And that’s it. Now you know how to create and work with Virtual Desk desktop virtual spaces on your Chromebook, along with some handy keyboard and gesture shortcuts and even how to move windows between Virtual Desks. Have at it!
Pro Tip: I’ve been writing about operating systems for many years, including Chrome OS. You can find a lot more useful tutorials in my Chrome OS Help area here on the site too. Why not check it out while you’re visiting?