
How do I get sounds when I receive email messages in Gmail? I’m running Microsoft Edge on Windows. Also, there’s a yellow bar on the top of my window that shows the message “End Now Vacation Settings”. How do I get rid of it?
Because there have been so many malicious and malware apps popping up notifications on computers, it turns out that it’s not easy to enable or disable notifications nowadays. This is a good thing because if you remember the era of endless pop-up advertisements on pages, you’ll appreciate the improvements wrought by these additional roadblocks and limitations. Still, it can be a pain and you can end up with your favorite program doing weird things that seem rather inexplicable. Not making an audio notification when messages are received and a permanently enabled vacation mode are just two of many oddities possible in Gmail!
Shortcuts: Windows Notifications | Gmail Notifications | Gmail Vacation Responder
Fortunately, most everything is controlled from within the Settings area. I have to admit, though, Gmail’s settings haven’t been updated or improved in many, many years, something I find rather inexplicable when online email apps like Outlook.com have beautiful, highly explanatory settings and preferences. Be that as it may, I suspect that you need to enable one setting and disable another, so let’s dig in!
ENABLE NOTIFICATIONS ON YOUR WINDOWS PC
The very first stop on our solution journey is to go into the main Settings app on your Windows PC. Once there, search for “notifications” or go to System > Notifications and you’ll find this:
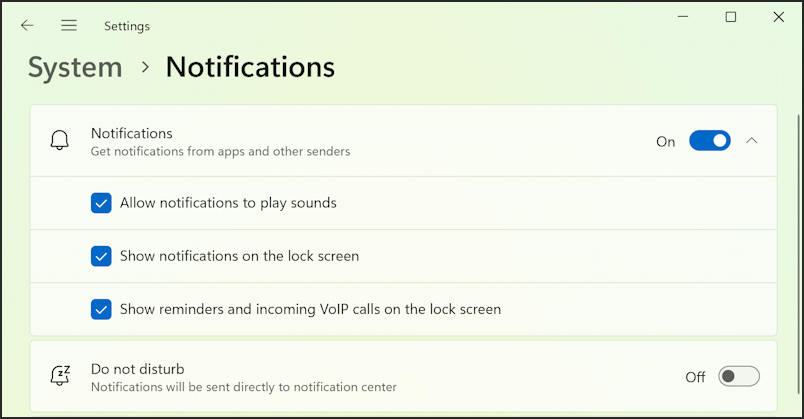
To reiterate, this is the Windows settings area, not the Gmail settings area. Ensure that you have Notifications ON (as shown, above), then click on the tiny triangle to reveal the three options and enable ’em all, as desired. The most important here is “Allow notifications to play sounds”. You can now close the Settings program.
Also make sure to disable the focus option on your PC as that can suppress audio alerts from every app. Check in the Toolbar’s clock slide-out window for your current “Focus” settings.
NOTIFICATION SETTINGS IN GMAIL
Open up Gmail in your Microsoft Edge browser. You might still see the yellow vacation notification bar, but we’ll deal with that in a few minutes. For now, click on the gear icon in the top right of the Gmail window itself. A small pane will appear with some of the basic appearance and layout settings:
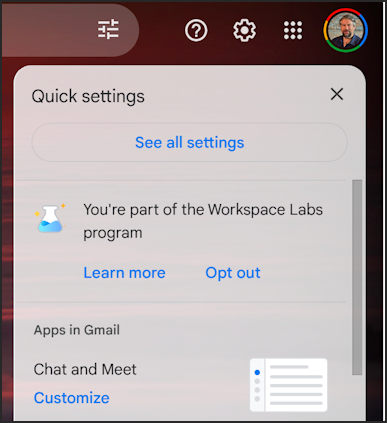
Find “See all settings” (it’s near the top) and click on it. The entire window will be replaced with the extensive, but poorly organized Gmail settings. These are the same across all your Gmail windows, so if you are also logged in on a work Mac or your Android phone, most of these changes will affect those too.
Choose the “General” settings along the top (it’s usually the default) and scroll down past the many settings and options until you finally reach “Desktop notifications“:
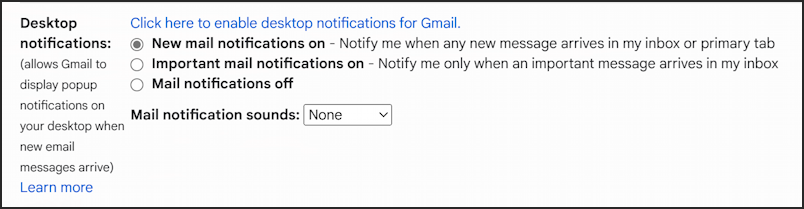
Choose either “New mail notifications on” for all messages to produce a notification or “Important mail notifications on” if you want to limit the interruptions. Don’t want notifications? Choose “Mail notifications off”.
You can also choose a specific alert sound from the menu:
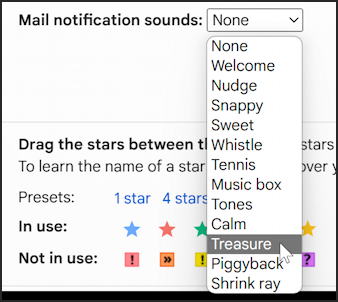
Note: If you can’t hear samples of these sounds as you chose different ones from the menu, your volume might be set to zero, your audio might be muted, or you might have an audio problem with your PC. It’s an easy test!
Don’t forget to also click on “Click here to enable desktop notifications for Gmail” too. That might produce this pop-up window:
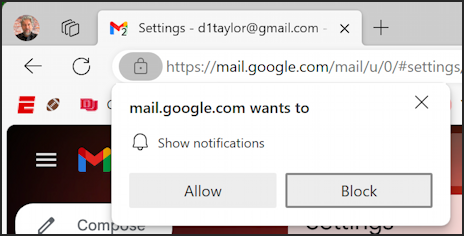
Click “Allow” to allow these notifications.
Once you’ve made your changes to Notifications, make sure you scroll to the very bottom and choose “Save Changes” to ensure that Gmail remembers what you’ve tweaked and modified. Done. Now, about that yellow bar…
VACATION MODE IN GMAIL
If you’re taking a week off from work, heading to Paris for a conference or even Bali to soak up some sun, you can easily set up your Gmail to let people know, rather than coming back to “did you get my previous email?” and “are you okay?” messages. In fact, it’s in exactly the same place in the Gmail Settings area. First, though, here’s the yellow bar you’re seeing:
![]()
You can turn it off by clicking “End now” (which usually works) or click on “Vacation Settings” to see what’s actually enabled (which sometimes gets you to the right place). Or you can just go to Settings > General and scroll to the very bottom as Vacation Notification is the very last option on that screen:
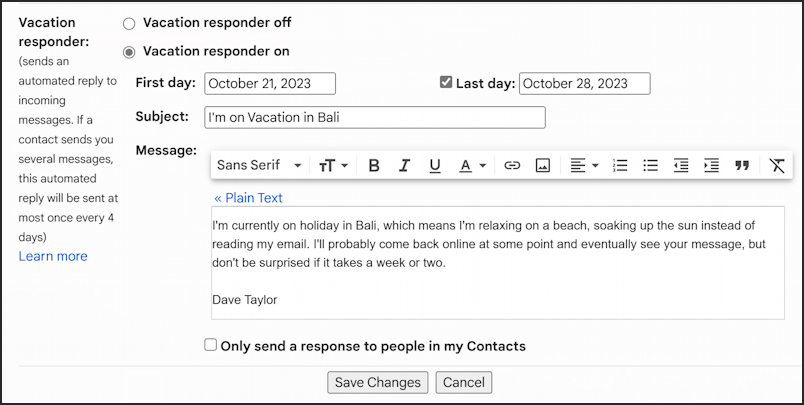
You can see that I have the Gmail vacation responder ON (the top option), and have set it to start today, Oct 21, and run through Oct 28. The subject (which becomes the subject of auto-responded messages and the alert in the yellow box you see) is easily edited, and you can also update the message that’ll be sent, even including images, type styling, and links. No-one ever does, but it’s good to know your message can be helpful or entertaining!
Finally, the option that’s probably the most important is “Only send a response to people in my Contacts“. The reason that it’s important is because you don’t want to be auto-responding to people who send messages to a list you might be on or to other people in your organization who have Bcc’d you or similar.
To turn off the Gmail vacation responder completely, simply choose “Vacation responder off” and then remember to click on “Save Changes”. Done. Me? I’m off to Bali…
Pro tip: I’ve been writing about Google tools and especially Gmail for many years. In fact, I’ve been on Gmail since it was an invitation-only service! Please check out my Google, Chrome and Gmail Help area for lots more useful tutorials on AI and much, much more!