
I’ve been in the habit of uploading photos from my iPhone to my computer so I can edit them before I share them on social media. Seems inefficient! Can you help me get started with photo editing on the iPhone itself? I’m running iOS 11.
There’s much to be said for the easy of working on images on a big computer screen and even a 12-inch screen seems enormous versus a smartphone screen! There are lots of good tools for your computer too, but you might be surprised how many of them have mobile versions and how darn many mobile tools that are exclusively designed for your iPhone too.
But the good news is that for a lot of your photo editing, you don’t have to go any further than the Photos application, which has some pretty decent editing features and capabilities built right into it. And as a default Apple iPhone / iOS app, you already have it on your phone and don’t need to get or buy anything else to be able to crop, rotate, and fix up your photos.
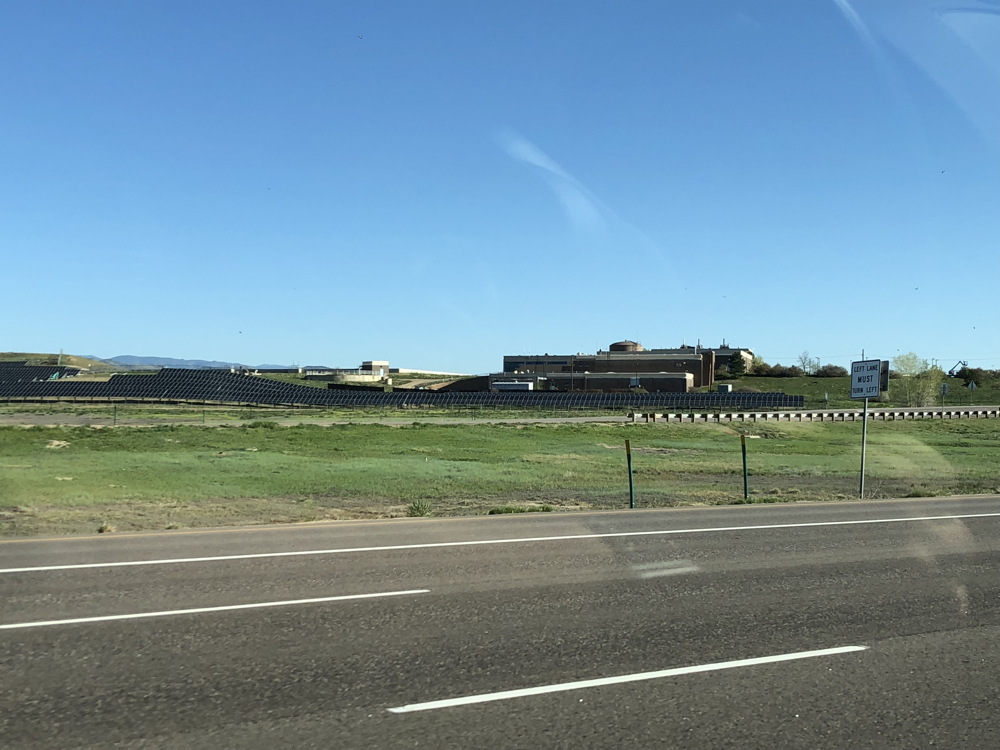
Let’s have a quick look. To start, here’s a photo I took on my iPhone X this morning. Good, but it really needs a tight crop to help you see what I’m trying to share:
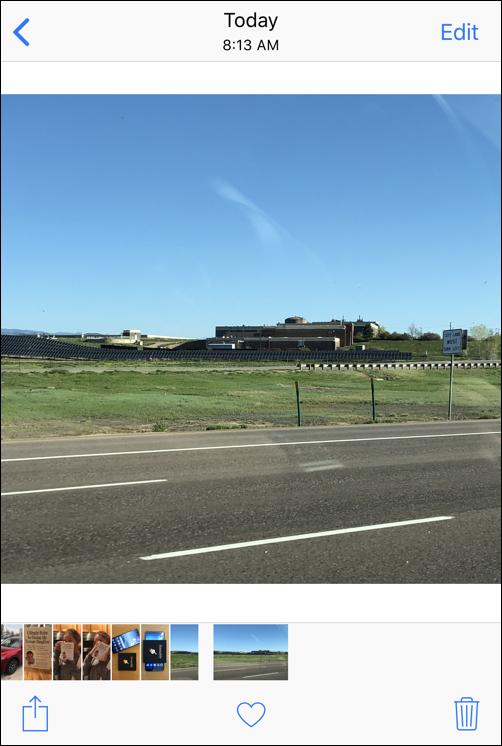
I’m viewing the photo in the Photos app. A single tap on the screen and the photo shrinks and some options suddenly appear:
Note that I’ve switched the phone to a vertical orientation and am cropping these screen captures to omit the big empty spaces that will otherwise appear on your phone. You can edit in horizontal orientation too, but the bottom-of-screen menus tend to be a bit more difficult to work with, in my opinion.
There are a bunch of different areas to check out in this view, and hopefully you’re familiar with all of them already. The bottom row is the share button, like button (there’s a separate album that’s just photos you’ve liked, which is the point of this feature) and the delete button if it’s just not a keeper. The row above it is the “scrub row” where you can tap and drag to very quickly move through your photo album, whether it’s the camera roll or another album.
Above that is the photo itself, of course, and on the very top is the most important link: “Edit“. Tap on that.
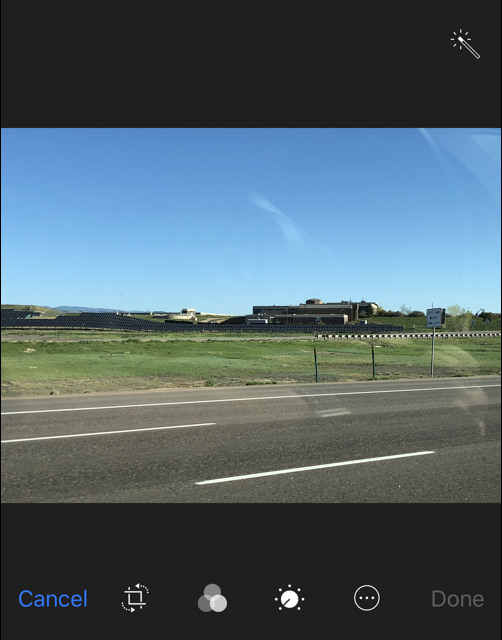
Now you have a bunch of edit features, though it’s all darn subtle. The top right is the magic brush which does a bunch of enhancements and makes it really easy to automagically improve your photos, especially portraits. Try it and know you can undo if you want.
The bottom has the main edit features, however: Cancel (that’s obvious, right?), the crop / rotate button, the set of pre-defined photo filters (think Instagram or Snapchat), the color & exposure adjust features, a “•••” button that gets you to more edit options (currently just a scribble feature for annotation) and “Done”, which becomes an active option once you have applied one or more changes or edits to the image.
Since you’re interested in cropping the image, tap on the crop/rotate button. Now it immediately goes into rotate mode and not infrequently seems to auto-rotate a few degrees from finger bounce. Of course, that might just be my sloppy fingers 🙂
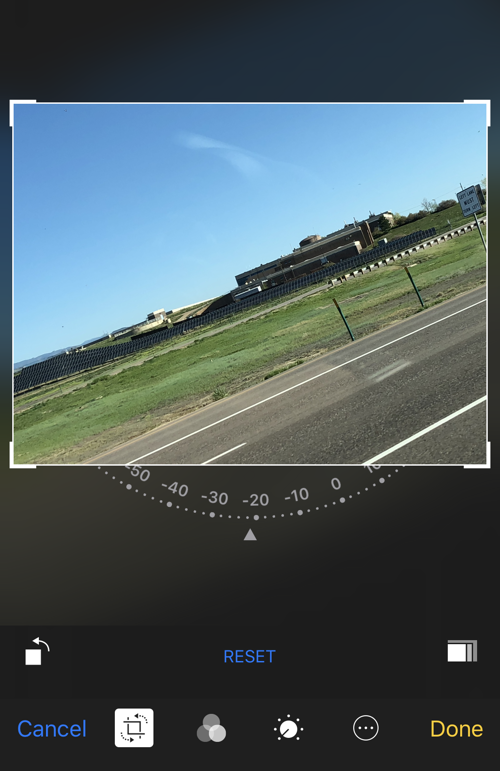
In this instance, the dramatic angle probably doesn’t enhance the photo, so tap the dial and slowly slide your finger until it’s back to 0-degrees. It snaps into place. Lift your finger and you now know how to rotate your photo.
To crop, tap and drag any of the four corners of the crop box on the photo. It’ll look like this:
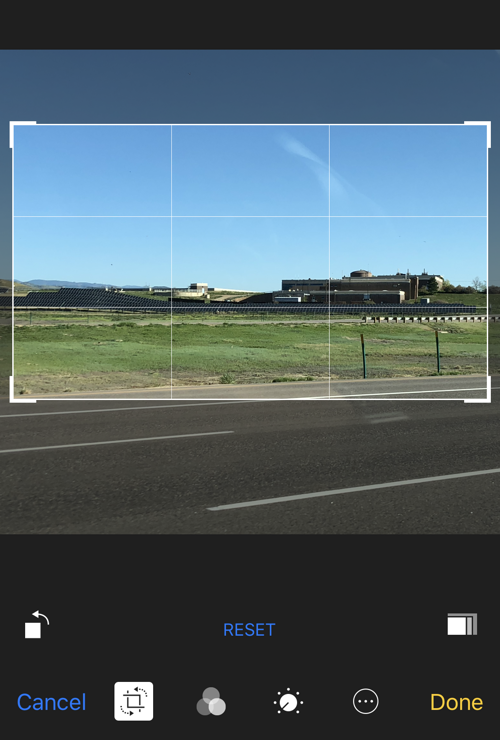
Once you lift your finger, it’ll zoom in and all the cropped region will vanish. Don’t worry, if you touch the crop box edges again, it’s all restored so this is just an edit step. I like pretty tight crops so that’s how I’m going to crop it.
Before I wrap up, however, a tap on the three overlapping circles brings up the array of pre-defined photo filters:
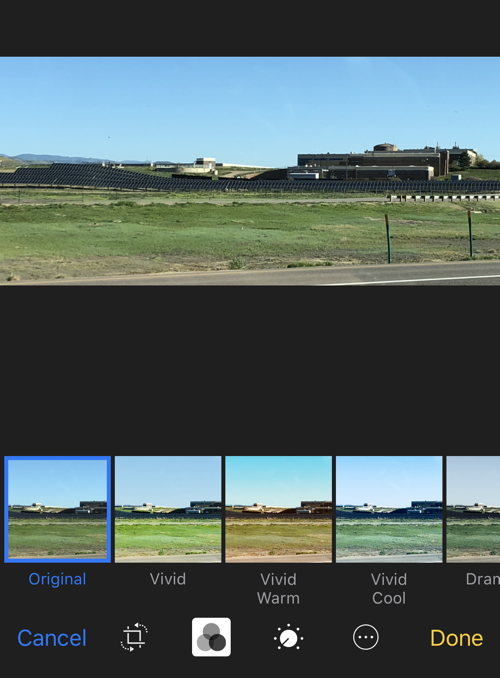
As you can see in the little preview strip, there are lots of filters that do dramatic things to the images. Fun stuff, actually, and it can really make things look surprisingly different. In this instance, however, I’m going to stick with “Original” and instead tap on the adjustments icon to bring up some other options:

There are more than just Light, Color and B&W, but a tap on Color shows that you again get a strip that shows the image with a range of different saturation levels:

I tend to add a bit of saturation to make photos pop a bit, but you can obvious adjust to taste. Some photos can become quite a bit more dramatic will all the saturation pulled out, or very low saturation to make them look like photos from the 1950’s or 1960’s too.
At this point you can commit all the changes and lose the original by tapping “Done” or if you’ve just been experimenting, you can tap on “Cancel” and all the edits will vanish. I’ll accept the crop and here’s my final result:
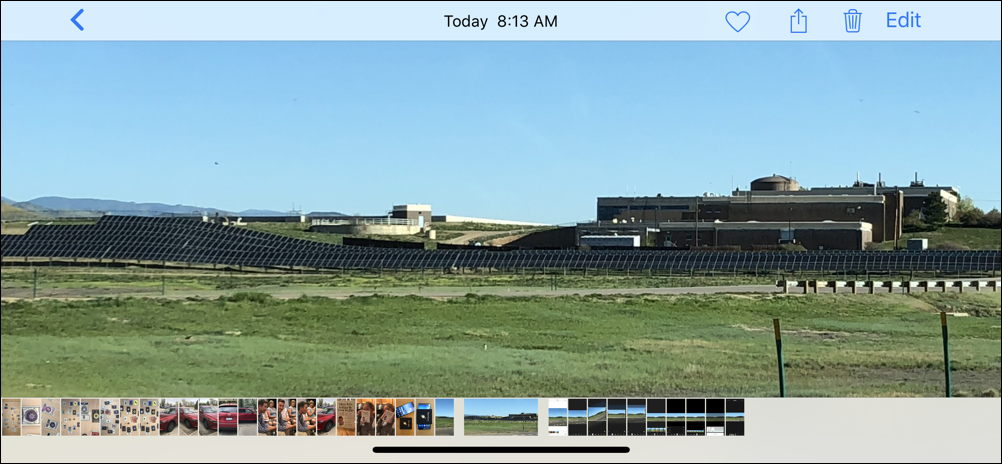
Now you can really see that it’s a solar farm in a way that was impossible in the original photo.
And that’s how you edit and crop photographs in the Photos app on your Apple iPhone!
Pro Tip: While we’re talking about the iPhone, do check out all my iPhone help too!