
I have hundreds of DVDs and would like to bring along and watch a few shows while I’m visiting my grandkids. They don’t have a DVD player, however! Can I somehow copy them onto my PC laptop before I leave? What’s a solution that doesn’t involve buying new digital copies of them all, Dave?
One of the costs of our increasingly sophisticated technology is that every so often we hit a jump point where technology moves forward in a way that leaves the classic solution in the dust, immediately obsolete. Cassette tapes did that; people who had amassed a collection suddenly had no way to play them, not even in cars. Albums? Kind of the same way, though there’s a bit of a movement back to this retro analog technology that has breathed new life into record players. The most painful, however, are DVDs. There were millions of them produced and everyone has at least a half-dozen, if not hundreds in their collections.
The rise of digital archives and streaming, however, means that it’s far easier to simply find it online than to fuss with putting the disk in the player and switching inputs for it to be viewed. As a consequence, suddenly these libraries feel obsolete too, and if you don’t have a DVD reader on your computer, well, what can you do in that case? Let’s have a look…
HOW TO READ A DVD ON YOUR PC
Most modern PCs omit any sort of optical drive because it’s been many years since any software was distributed through that mechanism and most drives therefore just collect dust. If you want to watch a movie, though, that kinda leaves you out of luck. Fortunately, there are surprisingly inexpensive external optical drives that work just as well and offer the flexibility of being able to plug into Mac or Windows computers, as desired. For example, I use a Pioneer BDR-XS06 external DVD and Blu-Ray player device for maximum flexibility. Only have DVDs? Then the LG GP65NB60 – for $22 – might be just what you need.
I want to rewatch a series I bought years ago called A History of Britain, but, like you, I only have it on DVD. So here’s what I have, hardware-wise:
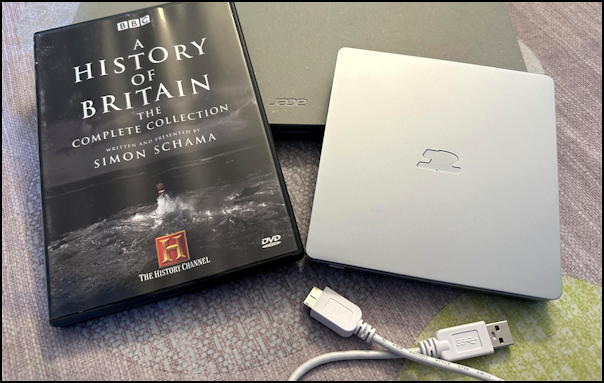
You can see my Acer PC – without a DVD drive! – the Pioneer Blu-Ray/DVD unit, its cable, and, of course, the DVD I want to rip too. Plug it in and the show is watchable on the PC, but you can’t just drag and drop the episode onto your hard drive for later viewing because of what’s known as DRM. DRM, or Digital Rights Management, is intended to ensure that people don’t just make copies of these physical drives. This means you need to circumvent DRM so that you can make a digital copy of your physical media.
There are a number of different commercial programs in this segment to consider, but I’ve always had good experiences with Winx DVD Ripper Platinum, a program that’ll cost you a few dollars, but then can help you make copies of as many DVDs as you want. Use it for one favorite movie and buying a digital download would have been cheaper, but if you want to convert a DVD or two each day to gradually archive your entire collection and this is going to save you potentially hundreds of dollars or more. Download and learn about license costs here: WinX DVD Ripper Platinum. [There’s a Mac version too that works identically if you’re on a Mac, not a PC]
WINX DVD RIPPER PLATINUM BASICS
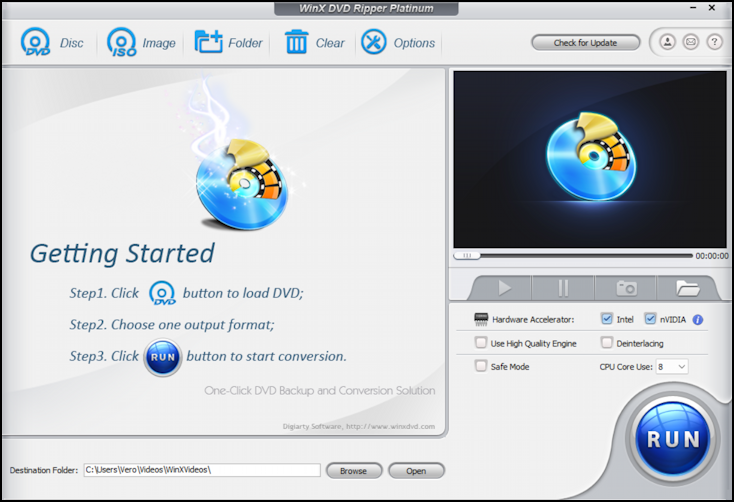
I’m going to launch the program on my Acer PC. The main screen is bright and colorful, but once you look through all the areas, it’s pretty straightforward too:
At this point, there’s nothing to do, yet. Plug in the DVD drive and slide in the actual disc and the Windows computer will pop up a notice to indicate the hardware’s working fine:
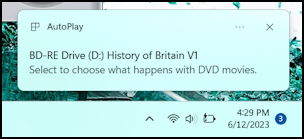
You can click on this notification or just ignore it. Meanwhile, WinX DVD Ripper Platinum has also seen the new DVD show up and automatically scanned it. Click on “Disc” on the top left and it’ll show you what it’s detected:
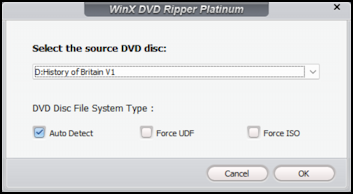
The default of “Auto Detect” is just fine, so click on “OK” to proceed. Next you’ll need to choose an output format for the ripped media content:
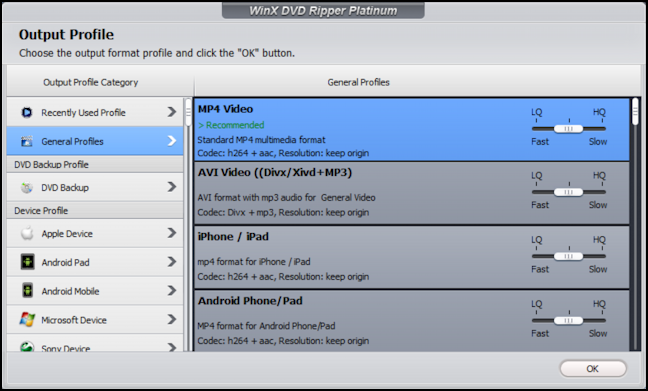
You can choose very specific output formats optimized for things like your smartphone or a smart TV, but generally speaking the default of an MP4 video with the same resolution as the original content on the disc works fine. Choose that as a default. Want to have the output file be a bit smaller? Choose “LQ” for lower quality, faster processing, or “HQ” for a bigger file but better results, or leave it in the middle for the compromise result. Click “OK“.
WinX DVD Ripper Platinum will now scan and analyze the disc and show you all the media content it’s identified…
CHOOSING CONTENT TO RIP FROM A DVD
The display can be a bit confusing at first glance:
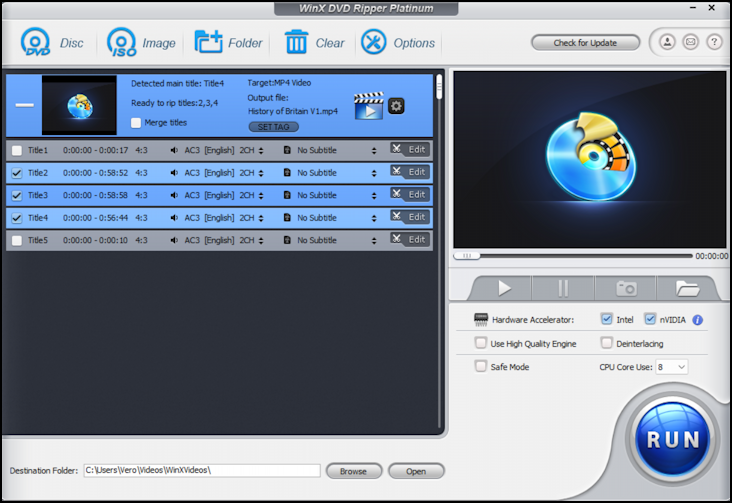
There are five tracks that have been identified on A History of Britain, as shown. The key to examine is the time range: The first track, for example, runs from 0:00:00 – 0:00:17. It’s 17 seconds long. This is going to be the background video loop over which are superimposed the DVD menu entries. Not something you care much about. Similarly, the last track is 10 seconds long and can also be easily ignored. Check the tracks that you do want – each of these episodes are 57-58 minutes long, as shown.
Not sure what’s what? Choose a track then click the play button on the right side and the mini-preview will show you the actual video content:
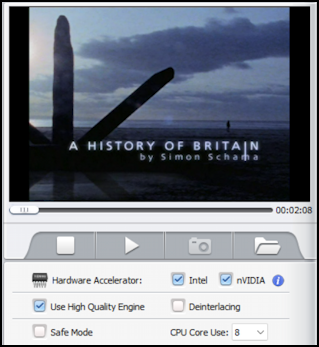
Notice that I’ve checked “Use High Quality Engine” and let the program utilize all 8 of the CPUs on this Acer. Fast = winning! Double check all your settings including the Destination Folder shown on the lower left and you’re ready to go!
RIPPING A DVD’S CONTENTS
Click on the big blue “Run” button on the lower right once you’ve got everything set up, and go grab a cup of tea. It’ll display a progress window that includes estimated time to completion:

Notice this window is on a per-track basis, so that remaining 7:12 isn’t for all three tracks, just this first one being converted. In fact, the three one-hour tracks, in total, took 15 minutes and 47 seconds to rip and save onto the PC’s drive. The result is immediately shown:
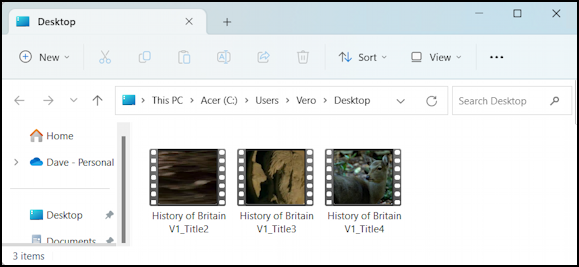
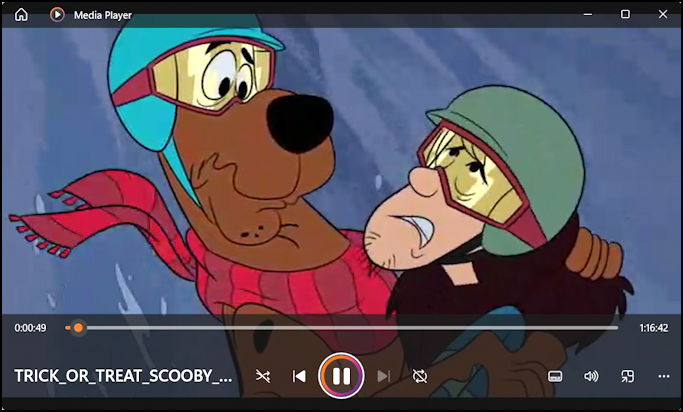
Notice that it didn’t get all fancy with “season 1, episode 1” or similar: It’s up to you to rename the files appropriately so you can keep track of what’s what, but three video files on disk rather than on the DVD. In 15 minutes. Not too bad. I’ll double-click on one of these files to check it in Windows Media Player and it looks great!

These digital files are far more portable and easily managed: You can even copy them all onto a little USB thumb drive and have dozens of your favorite movies and TV shows in your pocket! Ain’t technology grand? 🙂
WHAT ABOUT RIPPING A DVD MOVIE?
What if you choose a lower quality setting to get better speed? Then it gets pretty amazing, depending on your computer hardware. Movie discs can have a surprising number fo tracks, however, as demonstrated with this physical copy of Trick or Treat Scooby Doo:
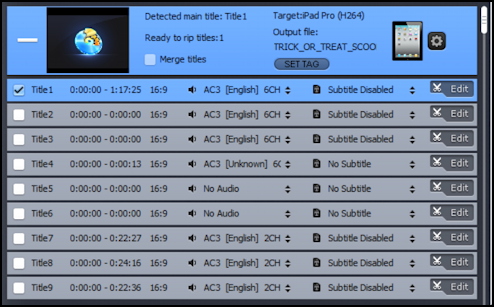
Again, look at the duration: Only “Title1” is actually movie length – 1:17 – and that’s the only thing I’ll actually rip. I chose just that box and click on “Run” to proceed again. This time I’ve specified low quality MP4 and it completes the entire scan, analysis, and rip in an impressive 6 minutes and 11 seconds. Six minutes to rip a 77-minute movie. Not bad!
The file sizes are not tiny, but they’re not enormous either:
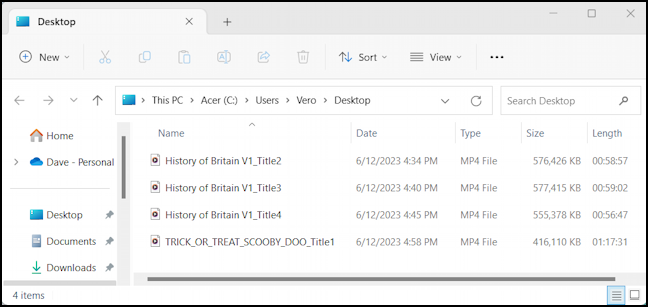
The movie ended up 416MB (an HQ rip would be bigger) while the individual hour-long episodes of A History of Britain are about 560MB each. I encourage you to experiment with quality versus file size as it’s surprising that a medium or even low quality rip that takes the minimal file size possible can still look quite good. For example, Scooby Doo is animated, so it lends itself to higher compression:
That’s it. Turns out that for a relatively modest investment in hardware and software, you can immediately start converting all of your physical DVDs – and Blu-Ray discs – into digital content that you can watch on your iPad, Mac, PC, or even carry on a thumb drive to slip into the TV in a hotel room for later viewing. Darn convenient!
Disclaimer: Once you have a digital copy of your media, it’s all too easy to share it with friends. At that point you’re violating the law, however, so I discourage you from sharing your digital content. Also, Digiarty sent me a license for WinX DVD Ripper Platinum so I could write up this tutorial, which is greatly appreciated.
Grab a copy of Winx DVD Ripper Platinum for your PC [or Mac] to get started!
Become a Power User: I’ve been writing about Windows for many years and have an extensive Windows 11 help library here. Please check it out while you’re visiting. Thanks!
Does this program work with a Mac? Do you have a tutorial for that?
There is a Mac version and I have used it a number of times with good results. The interface is 99% identical, so I haven’t written about it since the Windows version is more popular, but check out https://www.macxdvd.com/mac-dvd-ripper-pro/