
We weren’t able to travel this year, but I want to show photos of my kids in various exotic locations on my social media anyway. Why not, right? The question is how can I change backgrounds in a photograph?
Back in the day, changing something as complex as the background of photograph or portrait would involve a professional photo editor and cost you a pretty penny. Today, however, it’s all about AI and smarter software algorithms, and can be done online without paying for any special software or utilities. Even better, you can do it whether you are on a Windows PC, Mac, or even a Chromebook!
Having said that, there are still a few things you’ll need to figure out and, of course, you need both a good foreground and background image from which to work. For the foreground, hopefully you have some good portraits you’ve managed to capture as the year has progressed. The backgrounds can be easily obtained through a Google Image Search or similar; I’ll talk more about that in a minute or two.
REMOVE THE BACKGROUND OF A PHOTO
I’ve previously written about Adobe Express Online, a powerful photo editing and manipulation tool that’s free to use through your Web browser. That’s a good place to start: How to Remove a Photo Background. What I didn’t cover in that other article was how to use your own background image too, which is definitely more complex than simply using a stock image from the Adobe library.
I’ll go through the process in an abbreviated form for this tutorial. My starting image is this picture of my three kids and our dog:

Looks like a very complex foreground and background, but Adobe Express does a remarkable job of identifying the key image elements. I simply go to express.adobe.com and choose “remove background” from the quick actions list on the home page. When I upload the image, it does great!
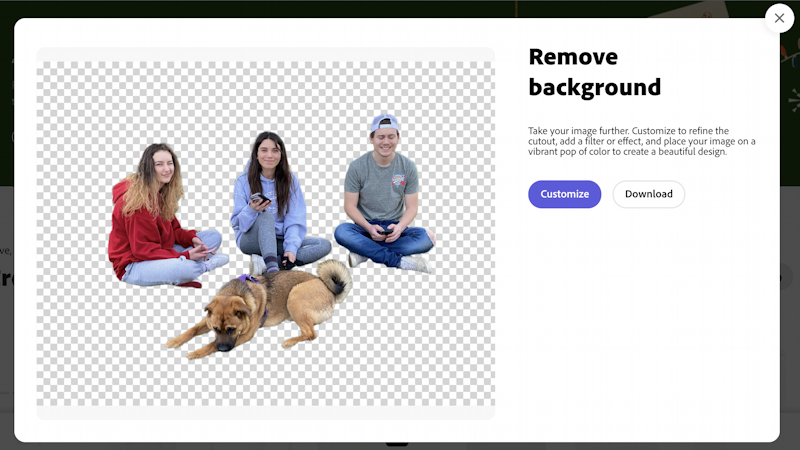
I could just download this image if I have my own photo editor, but let’s use Adobe Express instead. To proceed, I’ll click on “Customize“, which brings up the main edit window:
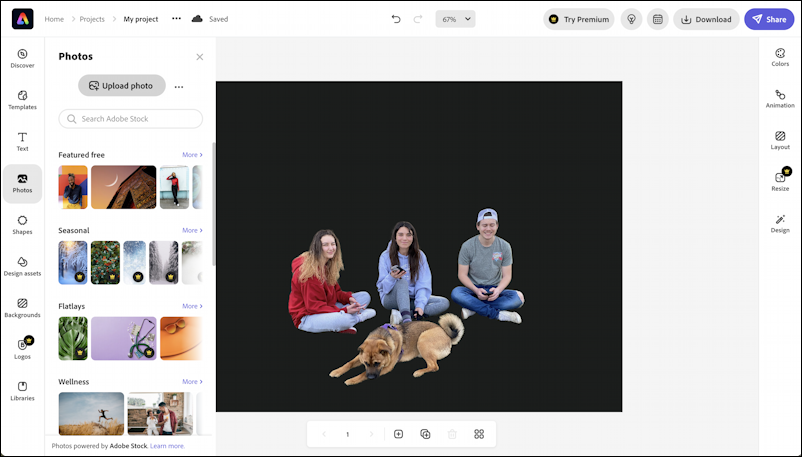
A rather surreal effect having them against the black background, but the program remembers it’s transparent, as we’ll see in a moment or two. The next step is to upload our desired background…
UPLOAD A NEW BACKGROUND TO ADOBE EXPRESS
On the left, click on “Photos”, then click on the “Upload photo” button (which you can see in the above image too). I’ve already grabbed a photo of a lush field that I’m going to use as the background, so that’s what I’ll upload. The results are rather concerning!

Adobe Express – built on the same photo editing engine as Adobe Photoshop – works with layers, however, so the new background is “above” the people. Click and drag on the background image to have it expand to the full size of the image, then click on the “layers” button on the floating toolbar. It offers the following options:

Simply choose the have the top layer move down and it’s suddenly below (or “behind”, perhaps) the original background-free image elements:

That’s getting there, though there are some problems with the image. Still, not a bad first attempt.
FIXING UP THE FOREGROUND/BACKGROUND LAYERS
One issue is the location of the different elements, but there’s a subtler problem too; the grass is rather oversaturated (the color’s too intense) which looks strange against the people and our dog. To start, though, let’s move the people relative to the scenery. This can be done by selecting them with a click on anyone:

Now that the foreground people image is selected, it can be moved and resized. More importantly, you can click on either and tweak elements, including, finally, color saturation. You can see in the below I’ve made the foreground image a bit smaller, moved it to the left a bit, and, most importantly, fixed the colors:

Looking better, though it’s still a bit inexplicable that my son’s sitting in the flower bed. We’ll chalk that up to it not being the very best possible background image for this task!
To save it when you’re done fiddling, use the “Download” button from the top right:

And, the final result:

Not perfect, but plenty good enough to include in a Christmas letter or a social media post, I think! With more effort, you can definitely improve further on it, but the real challenge is to get the light source and lighting of the foreground and background images to match. That’s a tutorial for another day, however.
Pro Tip: I’ve been writing about technology and the digital community for many years. You can find lots of my articles here in the Computer and Internet Basics area!
Basically it’s great what lets it down is there are no shadows, even on a dull day, & this didn’t appear to be a dull day, people & animals cast a shadow of sorts. They all look as if they are floating in thin air.
Yeah, that’s definitely a factor. Good deepfakes are a bit more tricky than what I show, for sure!