
I have some great photos of my kids, but the backgrounds are often awful. Are there free online tools that let me replace photo backgrounds with something more attractive, and if so, how easy are they to use? I don’t want to pay just to find the tool doesn’t work either…
Image processing and analysis have taken enormous steps forward in the last decade, much more so than most people realize. Sure, the visual effects in movies and TV series are much better, but those involve millions of dollars worth of computing. Turns out that much of the same visual analysis technology has migrated to more modest tools too, and in the last few years much of that tech is now accessible directly through your Web browser! No software to install, no licenses to buy, with no worries about what version of the app or OS you’re running. These will even work on Chromebooks or a Linux system.
Lots of machine learning and AI-based software has cropped up with narrowly focused utilities, but one of the best photo editing tools ever created now has a fantastic – and completely free! – online version: Adobe Photoshop Express. You can check it out at express.adobe.com but there’s a shortcut URL that takes you directly to its powerful background removal tool, so let’s check that out instead.
REMOVE PHOTO BACKGROUND WITH ADOBE EXPRESS
Before we start, it’s useful for you to sign up for an account to streamline the download process. You might already have an Adobe account, actually, in which case just log in. Go to the Background Removal page and click ‘login’ on the top right if it’s shown. The URL to get directly to the right spot is express.adobe.com/tools/remove-background and yes, I have that URL bookmarked in my own Web browser…
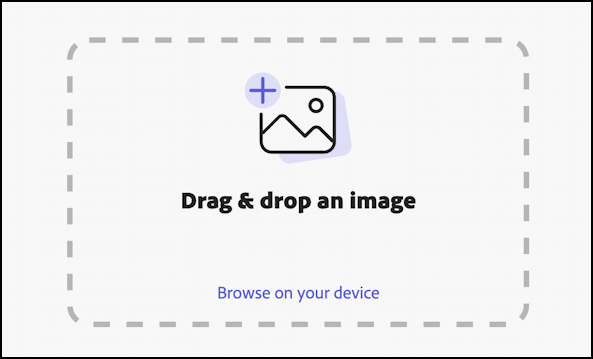
Following the instructions, simply drag and drop your image. Let me show you the starting point for my experimentation before I do so, however, so you can see the cluttered, messy background:

It’s a nice shot of me, but the clutter of the branches and the random building behind the trees make the background pretty unattractive. No worries, Adobe can help me fix it. In fact, when I drop this exact image onto the drag-and-drop target it immediately begins processing the photo:

After about ten seconds it shows the result, and it’s pretty dang impressive:
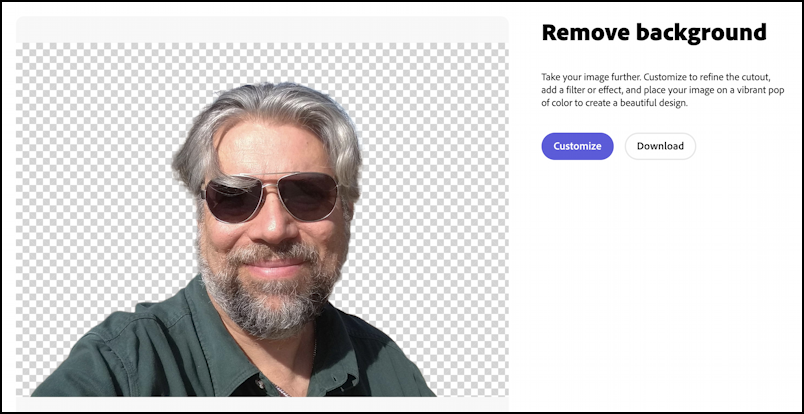
In some contexts, this is sufficient. For example, an image that might be added to a Web page that already has a background color or pattern. In that instance, “Download” saves a copy on your computer. If you haven’t seen this sort of checkerboard pattern, it’s a standard way in photo and graphics editors to indicate a color that is “transparent” and will allow the background to bleed through.
CHANGING THE BACKGROUND ON A PHOTO
Now that it’s done such a remarkable job of removing that cluttered background, let’s use Adobe Express to replace it with something a bit more attractive. That’s done by clicking or tapping on “Customize”, which opens up the full Express toolkit:
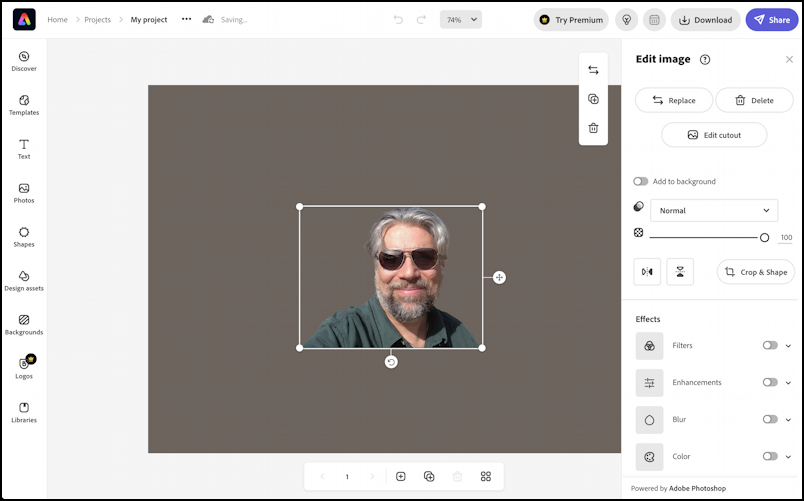
That checkerboard has been replaced by a neutral grey background. You can enlarge the image by clicking and dragging on any of the four corner circles, rotate it with the circular arrow on the bottom, and move it to a different spot on the background canvas by clicking and dragging in the center of the image (or the “+” on the right). On the left side are a column of tools: Discover, Templates, Text, Photos, Shapes, Design Assets, Backgrounds, Logos, and Libraries. Lots to explore if you want to utilize the full power of Adobe Express, but for now let’s just focus on the task at hand.
A click on “Backgrounds” reveals that there are hundreds of options, organized into categories. I’ll choose “Space” just to show how it works:
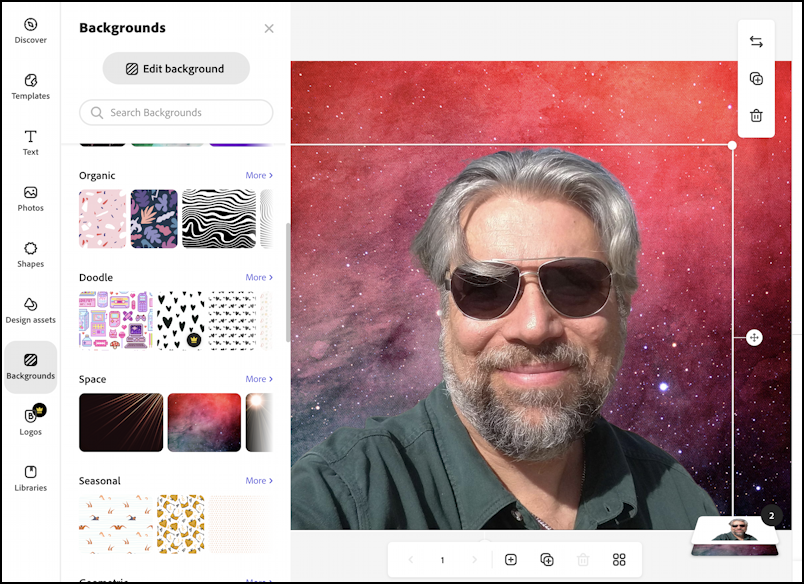
Notice I’ve made myself bigger on the overall canvas to have the photo work better. Also note how seamless and clean the background is, with no rough edges or pixelating. Very nice.
But… this isn’t exactly the background I was envisioning for this sunglass selfie. As you proceed with your experimentation of different backgrounds, I’ve found it works best to try a background, undo that, try another, and so on. The Undo button is along the top, a curved arrow that lets you go forward or background through all the steps you’ve applied. You can see undo and redo at the top of the following image (adjacent to the zoom menu):

This time I’ve gone into Nature > Landscapes to find some that are a bit more what I envision. A click and…

That looks terrific! I could edit the background or further tweak the image, but this works really well and I’m going to just save it…
SAVE PHOTO WITH NEW BACKGROUND WITH ADOBE EXPRESS
Saving is surprisingly easy – at least if you’ve remembered to either login or set up a free account – and accomplished by clicking on the “Download” link on the top right:

The PNG (“ping”, progressive network graphic) format is going to be the best for most instances, but you could also choose JPG (“j-peg”, joint photographic experts group) format if you want to go old school, or get a PDF (“pee-dee-eff”, portable document format) version if you prefer. Not sure when that would be the optimal choice, but it’s no surprise that the company that invented PDF offers it as an option.
A click on “Start download” and after just a moment or two a copy of the updated photo is on my computer, ready to save, share, email, text, print, whatever:

The results are pretty darn terrific and it’s a significant improvement over the original image with its sloppy background. Imagine the fun you can have with this sort of tool, moving people – or pets – from mundane locations to exotic ones. The possibilities are endless.
Tip: You can learn a lot about Adobe Express by checking out the tutorials on the site too!
That’s all I’ve got for now. I want to experiment a bit more with those space backgrounds, however, so I’m going to wrap this tutorial up here. Good luck with your own photo editing.
Pro Tip: I’ve been writing about technology and the digital community for many years. You can find lots of my articles here in the Computer and Internet Basics area!
Can I insert my own background?
I would poke around to see if that’s a capability with the free version of the Adobe utility!