
I want to start using Google Pay, which apparently involves me entering in all my credit card information. Okay. Where and how do I do that on my Android phone?
SHORTCUTS: Add Payment | Enter Card Info | Google Pay Security
A decade ago it would have been really weird to think that you’d be able to pay for products and services with your smartphone, whether you were running an iPhone – Apple Pay – or an Android – Google Pay – or even a Samsung phone – Samsung Pay. Nowadays it’s not only common for people to be using their phones for payment, but smartwatches too, whether you have an Apple Watch, Samsung Galaxy Watch or one of the rumored new Pixel Watches coming out very soon now. What’s just as surprising is that the systems being used are sufficiently secure that banks and credit card issuers have signed up for the services too.
This still leaves us consumers having to figure out how the heck to add a credit card or two to our “digital wallet” so we can participate in this great revolution in payment. But we don’t just want to get hooked up, we want it all to be reasonably secure too, so that someone can’t grab our phone and run up an enormous bill at the local Best Buy, Target, or Walmart. With that all in mind, let’s look at how to add an Amazon / Chase VISA credit card to Google Pay on an Android phone.
ADD A PAYMENT CARD TO GOOGLE PAY
The first step is to find and launch the “Wallet” program on Android. If yours is anything like mine, it starts up already knowing some loyalty card info, as the program helpfully explains the first time you launch it. Once you “Okay” that info, you get to the main screen:
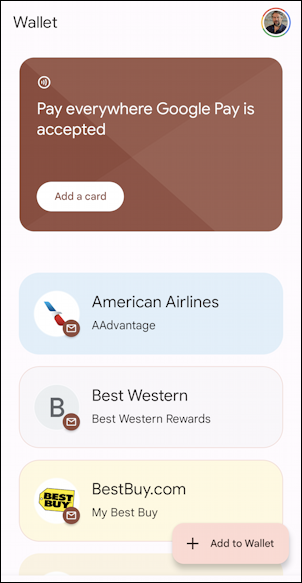
You can see it’s already scrounged my American Airlines, Best Western and Best Buy loyalty account info simply by scanning my Google Mail (Gmail) account. Not 100% sure I signed up for the program to extract all that information from my inbox, but… that’s another conversation. For now, you can either tap on “Add a card” on the big brown display at the top or, if that’s not an option, tap on “+ Add to Wallet”. I’ll choose the latter so you can see the range of information that can be stored in the Google Pay Wallet on Android:
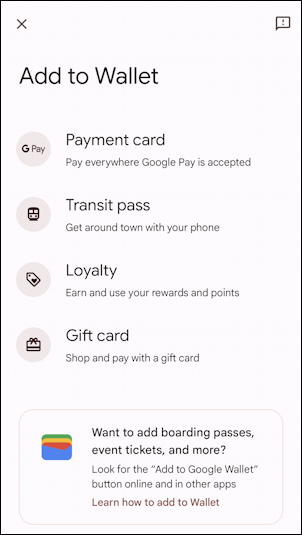
If you’re an urban dweller, adding your transit pass is a huge boon, no question. For our task, however, tap on “Payment card” to proceed.
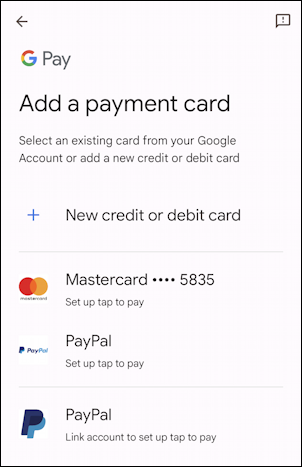
Since Google is a master at centralized data management, it appears that it already knows about one of my credit cards – a Mastercard – which makes things easy. But that’s not the card I want to add, so I’m going to tap on “Add a payment card“.
This shows off some of the image recognition Google’s developed because if you then point the camera at the side of your credit card with numbers shown, it’ll figure out everything and pull it into the Wallet program. Or, like me, you can see if it can x-ray through a card:

So far, no x-ray feature, so it failed to see the numbers on the obverse of my Visa card, Phew! Instead, I’m going to “Enter details manually“, the link on the bottom of that screen.
ENTER GOOGLE PAY CREDIT CARD INFO MANUALLY
Tap on the “Enter details manually” link and it will prompt you to enter each and every key informational field, starting with the card number:

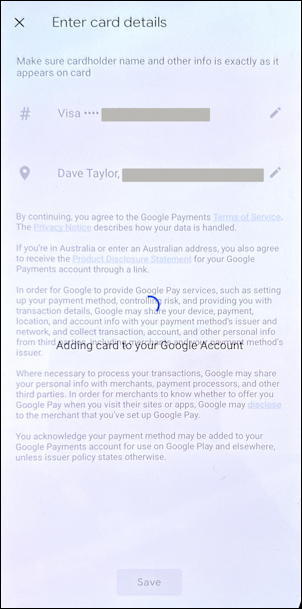
You’ll also need to enter your billing address and registered phone number, all of which are used with fraud check software to ensure you’re a legit card holder. It’s a bit tedious but hopefully won’t take more than a minute or two. Then you’ll have some legal terms and conditions to read and consent to, after which it will show “Adding card to your Google Account”:
This can take anywhere from a few seconds to 10 seconds or longer, so be patient. Once it’s done you’ll see that the Wallet program itself still has to do its thing too, so you’ll then move to this progress indicator:

Once this step is done, you’re basically ready to go, though the program might have a couple of more prompts…
GOOGLE PAY AND SECURITY
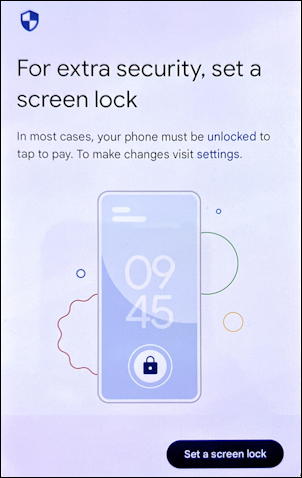
One thing to be very aware of is that you really, really need a screen lock on your smartphone now. In fact, Wallet will insist you either set one or double check that it’s configured properly:
Once you’ve got that all set up, you’ll have achieved digital payment nirvana and have a credit card all set up and ready to use:

That’s it. Now when you launch Wallet you’ll see that a replica of your credit card appears, all ready to utilize:
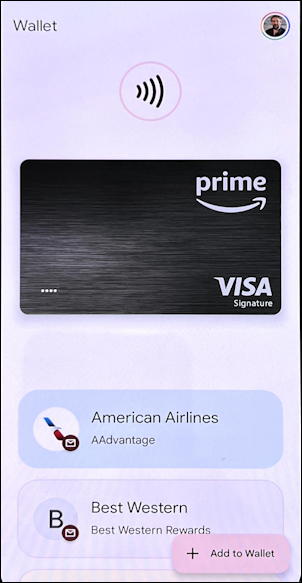
And that’s it. Easy, actually. Now, go pay for stuff!
Want to also set up your Apple Pay on an Apple iPhone or iPad? Here’s how to do just that: Add a Credit Card to your Apple Pay Account.
Pro Tip: I’ve been writing about Android and Google forever! Please check out my extensive Google help area and Android help area for lots more useful tutorials and guides! Thanks.