
I read through your blog entry about how to take panoramic photos with iOS 6 and an iPhone 5 and got enthused. I’ve taken a bunch now. But when I include them on my Web page or blog, they’re long and skinny and, frankly, not very interesting. On another site I saw they had an interactive photo where you could zoom in or pan around. Awesome. How do I do that with the photo panoramas on my own blog?
You’re opening up quite a can of worms with this one, though I too have been very curious what you can actually do with some of these fascinating panoramic photos that people are starting to post online. Indeed, on one industry blog, I saw they predicted that panoramas were going to be The Next Big Thing now that there are millions of iPhone 5’s in the wild. Not sure about that, but it’s pretty cool to see a wide shot of a scenic spot, whether it be a room full of friends or the edge of the Grand Canyon or Yosemite Valley!
Problem is, I’ve seen the same thing: people are posting filmstrips, which isn’t too surprising when the original resolution of an iPhone panorama is 8640 x 1894. I mean, scale it down so it’s only 600 pixels wide and that leaves you with a height of 131 pixels. That ain’t much.
Fortunately, there are a few interactive panorama hosting companies and while some require you use their own panoramic software to produce the image, others are perfectly happy hosting your images even if they were taken with the new iOS 6 photo app.
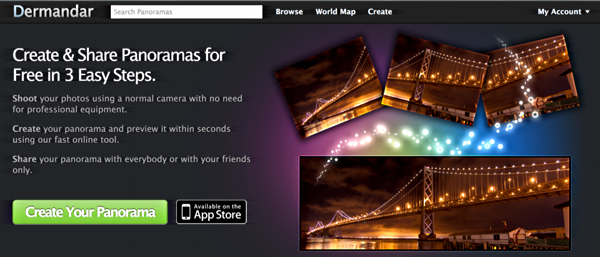
One such service is Dermandar.com, a little startup out of Lebanon and primarily offering a slick panorama app for the iPhone called… surprise… Dermandar [iTunes link].
I tapped their service to upload and host the fullsize version of the panorama that I show at the end of the article you read, and at the end of this article, you’ll be able to see it in its high res, zoomable, pan-able glory. It’s pretty darn slick.
To start, take a panoramic picture, then upload it to your Mac or PC. Either will work. Now, sign up for an account on Dermandar and log in.
Now the fun begins…
Click on the green “Create Your Panorama” button and it’ll ask what kind of image you’re uploading:
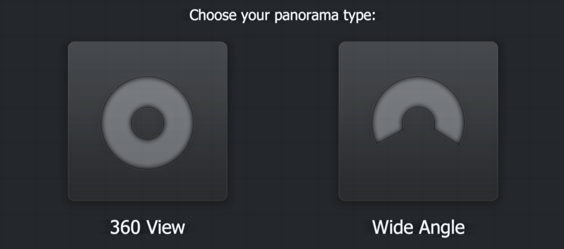
iOS 6 lets you take about 270-degree panoramas, not a full 360-degree circle, so click on “Wide Angle” to proceed.
Dermandar will open up a file selection dialog. Go ahead and select the image you just downloaded off your iPhone, and…

AUUGGH! Turns out that the iPhone panoramic photos are a bit too wide for the service at this point. Possibly by the time you try this it’ll be fixed, but in the meantime I just used GraphicConverter to open up the massive file and resize it horizontally to be 8191 pixels. Total elapsed time, maybe 20 seconds.
I again selected “Wide Angle” then specified the image file in question. Now we get a bit further!
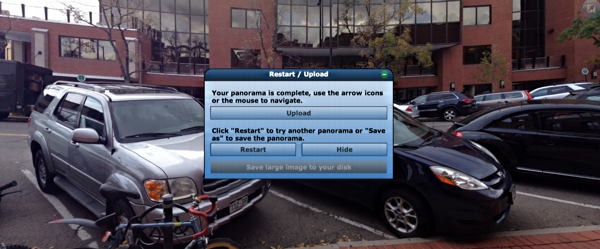
As you can see, it offers a preview of the image and basically gives you the option of either restarting, which tosses this away, hiding the image, which, as far as I can tell, does the same thing, or uploading the image by clicking on the big “Upload” button in the middle. Take the latter option, and it’ll prompt for some information about the photo:
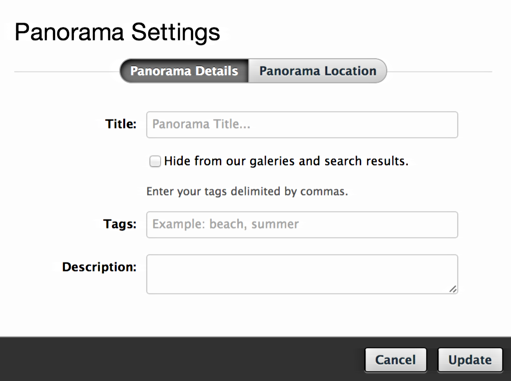
I found the location feature way too hard so skipped it, but a title, a few tags, a description, are always good to help others find your image. Why not?
Finish up, and click “Upload” in the lower right corner.
It’ll confirm the information you’ve filled in:
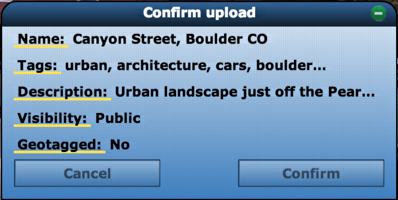
All looks good! Click on “Confirm” and the upload will start!
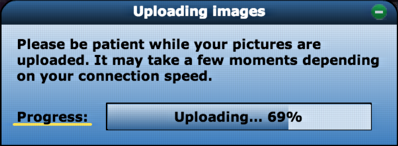
I’m skeptical that their servers are located in Lebanon because it’s way too fast: My big image only took a few seconds to upload.
Once it’s done you’ll get this rather confusing dialog box:

Don’t click on “Close”!! Instead, click on the first “here” to close and ensure that the image is actually saved on the server.
Done.
Now to find the panoramic photo so you can test it out with zoom and pan features, then, of course, find how to get the embed code so you can add it to your own site!
To do that, click on “My Account” on the top right.
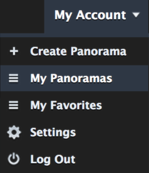
From this menu, choose “My Panoramas” and you’ll see a page with everything you’ve uploaded to their server:

Click on your newly uploaded photograph and it’ll show you a lot of different information on a page that looks like it’s been inspired by the latest YouTube interface. Which is good!
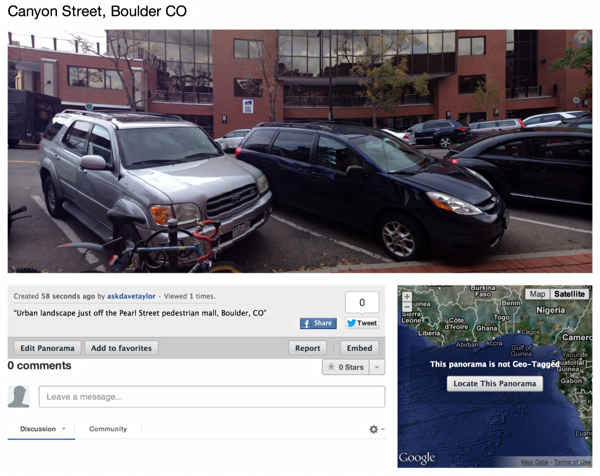
There’s obviously a lot to see here and the photo can indeed be zoomed and panned, but let’s get the embed code instead. Do that by clicking on “Embed”, and…
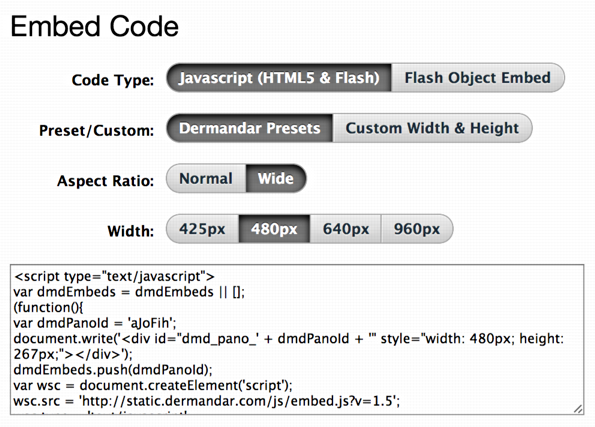
Tweak the code to meet your needs and it’s good to go. Just copy and paste into a page like this one and here’s what’s produced:
Pretty slick, actually. Now, try it: double click anywhere in the image to zoom in. Double click again to zoom back out. click and drag left or right to scroll around too. Amazing, isn’t it?
It’s an admittedly complicated process with third party apps involved in resizing and lots of steps needed to host and list your panoramic photo, so you’re probably not going to post a half-dozen of these every day. But when you do have one of these cool panoramas on your iPhone? Now you know exactly how to embed it as an interactive image on your own Web page or blog!
I am impressed with the concise, accurate, and instant information! Thanks!
New to this world in general, yet equipped with a Mac, lots of creativity and enthusiasm…need to know plenty from scratch, art, music, photos, video, web design, programming…my curiosity oozes!
Hi Dave,
This post is very helpful to me, since I’m planing to create a blog for all my iPhone 5 panoramic photos.
Thanks again.
Sam