
I want to update the picture I see when I go to log in to my Windows PC, but I don’t want to break anything with a third-party app. What’s the correct way to update my profile photo, Dave?
Imagine the days when we used text-only displays or had crude 16-color graphical displays. Accounts? Account photos? You were lucky if you had a pixelated feather or cow head. Nowadays a typical PC might have a half dozen user accounts, each with a different name, profile photo, and password, not to mention separate file spaces on the hard disk too. Which leads to the obvious question; how do you change your profile picture so it’s one you like? Having no picture is boring and while a generic icon or clipart might be easy, it’s not very fun either.
Now I’m a bit curious why third-party applications might offer to change your profile picture, but I’m also sure that it’s a bad idea; You don’t want an app written by an unknown developer changing your account and system settings because who knows what else the program might do while it has your authorization. Instead, let’s go through the correct and “normal” way to see your profile picture and change it as desired. Ready? Let’s do it!
IDENTIFYING YOUR CURRENT PROFILE PICTURE
Does your Windows PC auto-log into your account so you go straight to the Desktop? Lots of people have their systems set up that way, which is great if it’s in a secure location and a fairly dangerous choice if it’s in a more public spot. If you’re logged in, save your work across all your apps, then choose “Log out” from the Start Menu’s lower left indication of your account. Here’s what I see on the login screen:

Truth be told, that’s a pretty old photo of me. My hair is a lot more grey at this point, a feature of time and of having three children!
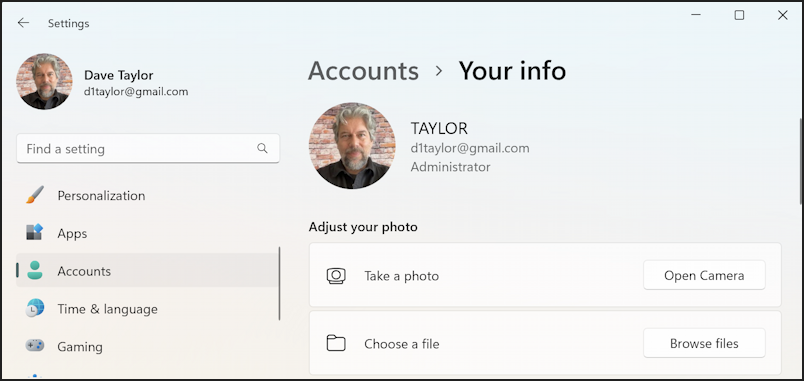
Sign in and then you can go to Settings > Accounts to find this:

You might think that you can click on the photo to change it but… no. That won’t actually work. Instead, scroll down a bit until you find these entries:
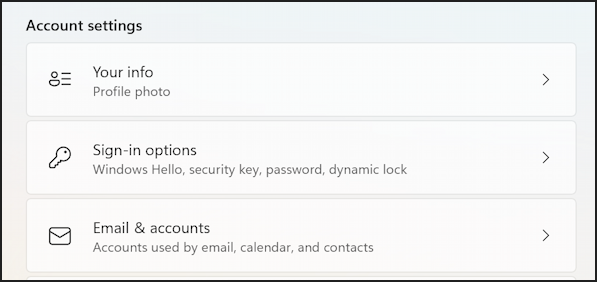
Choose “Your info” from this list of options.
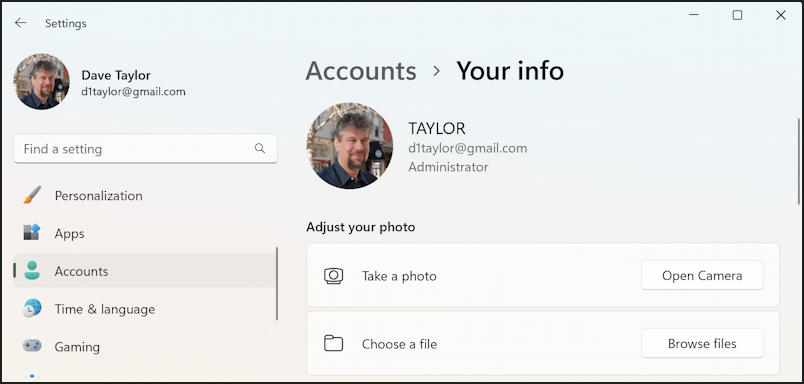
You can see that there are two primary options from which to choose: Open Camera or Browse files. If you have an image or photograph that you really like already saved on your computer, choose “Browse files“. I’m going to use the Camera app to take a new photo instead, so I’ll click on “Open Camera“.
TAKE A PHOTO, BUT CAMERA APP IS MISSING?
Surprisingly, it turns out that the Windows Camera app isn’t actually installed on this Windows PC. This is immediately obvious when the next thing I see is this error message:

I could choose “No” and find a photo on the computer, but let’s follow through this process to fix the problem and have a fully functional camera app on my PC! A click on “Yes” opens up the Microsoft Store with the correct app already chosen:
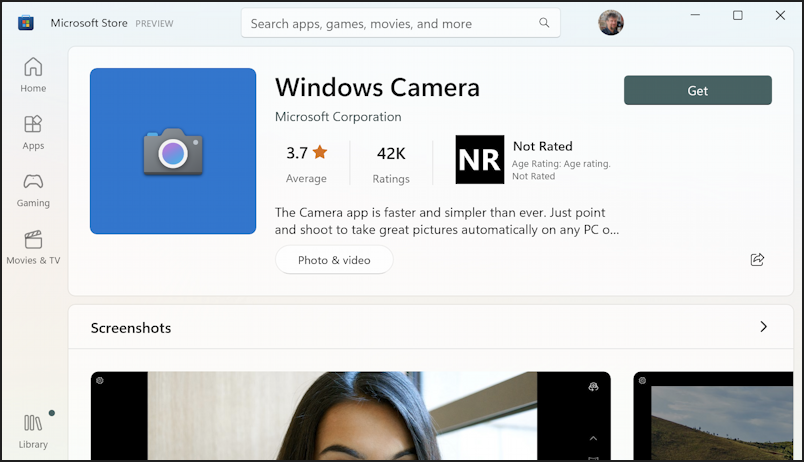
Looks good and it’s free – as one would hope! – so let’s proceed. A click on “Get” starts the download:

At least it’s a small program so it’s not going to eat up lots of disk space. After a few moments, the progress wheel changes:
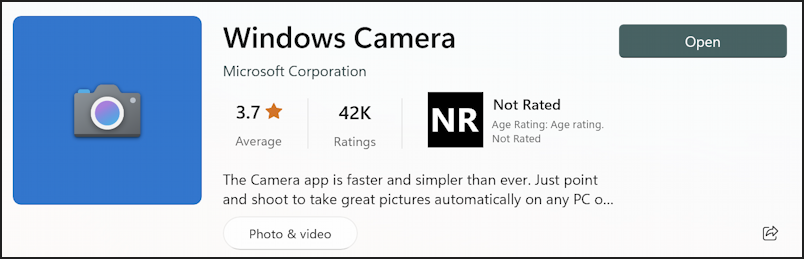
I’m not going to open the app, however. Instead, I’m going to go back to Settings > Accounts > Your info and again press on that “Open camera” app. This time it opens up normally because there’s no missing application.
TAKING A SELFIE WITH THE WINDOWS CAMERA APP
The program opens up and requests permission to access your camera and microphone. Why the microphone? Because it can record video too. Once granted, here’s what I see:
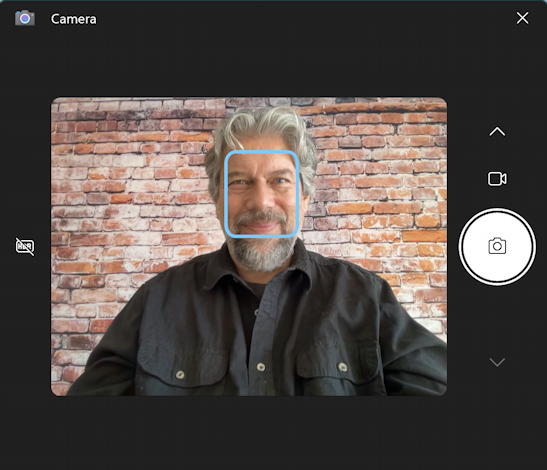
Make sure you choose the camera icon on the right, not the video icon. I have the camera icon chosen. The blue rectangle shows where face recognition in the program is determining where to have the focus, which is exactly correct in this instance.
Tap or click on the camera icon (ideally while looking at the camera, not the screen). My results are good:
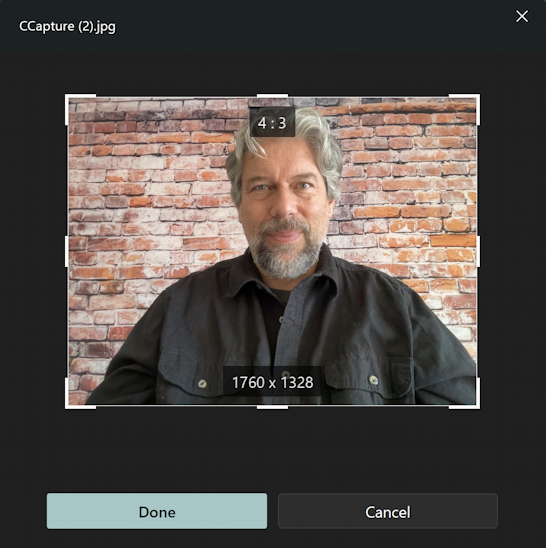
I recommend you clicking and dragging the corners of the selection box to have a fairly tight crop on your head and the top of your shoulders, for best results. Ready to proceed? Click “Done“.
NEW PHOTO AS YOUR PROFILE PICTURE
It might take a few seconds to process, but you’ll then be back in Settings with the new picture being shown:
Looks like I have a lot more grey hair, as I said earlier. 🙂
Log out again and you’ll see that the login prompt has the new photo too:

That’s it. Mission accomplished, no third-party apps or software needed (well, other than Windows Camera, which really should have already been on my PC in the first place). Good luck getting your profile picture as you desire!
Power Tip: I’ve been writing help articles about Windows for years and have an extensive Windows 11 help library here on the site. Please check it out to find lots of additional tutorials and guides while you’re here. Thanks!