
Hello, I would like to know how to change the file type of HEIC / HEIF photos on my iPhone to JPEG before I move them to my PC. I have changed settings so that future pics are jpeg but I still have many on my phone with the HEIF file type.
You’re not the first person to bump into the problem of having lots of photos in Apple’s High-Efficiency Image Format (HEIF, and its encapsulation HEIC for High-Efficiency Image Container). The original JPEG format has actually been around for quite a while. Known more formally as Joint Photographic Experts Group, it was first introduced way back in 1992. You might bump into Progressive Network Graphics Format (PNG) too, which is almost as old, having been introduced in 1996 as a replacement for Graphics Interchange Format (GIF) image files.
Yeah, that’s a lot of formats! And I haven’t mentioned Google’s 2010 image format addition known as WebP either…
Introduced in 2017, HEIF is one of the best formats for highly compressed photographs, but it’s not compatible with every possible program and device platform. Fortunately, there are a couple of ways you can convert images on your iPhone or iPad. Not only that, you can also use Microsoft Photos on your PC to convert images too, as I detail here: Convert HEIC to JPEG on a Windows PC.
CONVERT HEIC PHOTOS TO PNG ON AN IPHONE
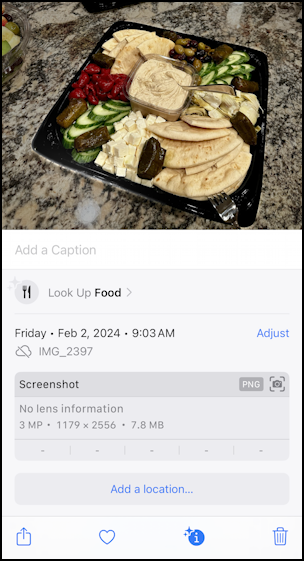
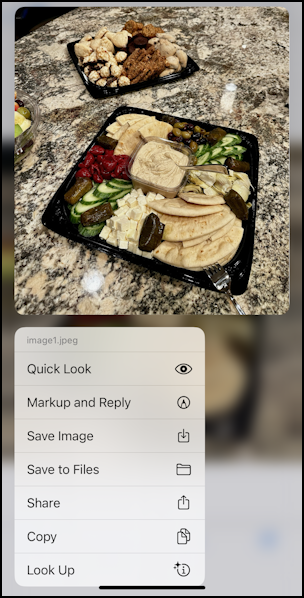
iOS is pretty subtle about image formats but there is a way in the Photos app to see what format each photo is saved in. Let’s start with a photo that my daughter sent me and that I saved into my Camera Roll:

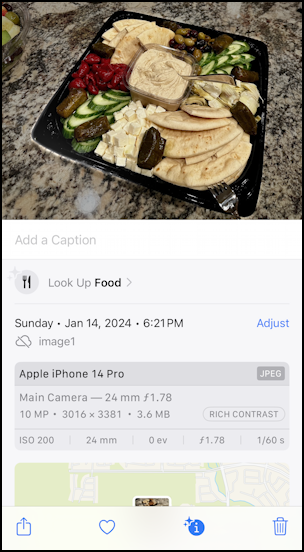
Tasty looking food, but let’s not get sidetracked! Tap on the “i” along the bottom and it reveals quite a bit about the image in question:
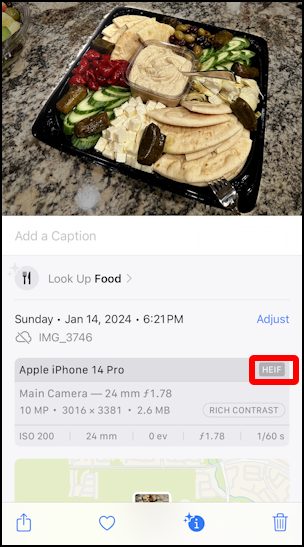
I’ve highlighted it above: See where it shows “HEIF”? That means this particular image, taken on an iPhone 14 Pro, is in that High-Efficiency Image Format. Notice what else is stored too, including geolocation map information. Turns out that how we convert the image format will also strip out all of this additional information, as you’ll see.
We’re actually going to use one of the oldest tricks in the computer book: copy and paste. Turns out that as part of the process, the image will change formats. Handy! Now, to get that started, tap on the “•••” icon on the top right. A big menu of options appears:
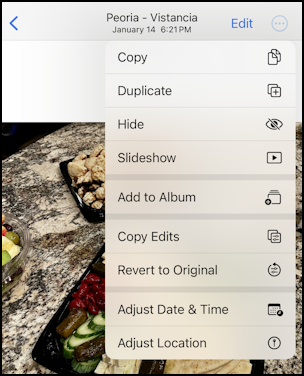
Choose the top option, “Copy“. Halfway!
PASTE TO CREATE A NEW COPY OF THE PHOTO
Now it’s time to switch to an app on your iPhone or iPad that you might well have never used before: “Files“. You might have to search for it, but it offers a way to see what files are actually on your device. Swipe up to get to the very bottom of the screen…
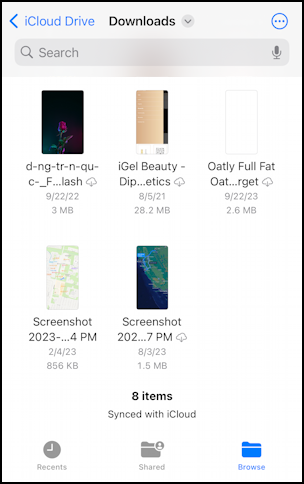
Here’s the tricky bit: Tap and hold your finger over a blank spot in the app. I’ll utilize the spot immediately below the image with the name “Oatley Full Fat Oat…rget”. After a few moments, a menu pops up:

Ready? Tap “Paste” and like magic, the photo you copied out of Photos will show up:
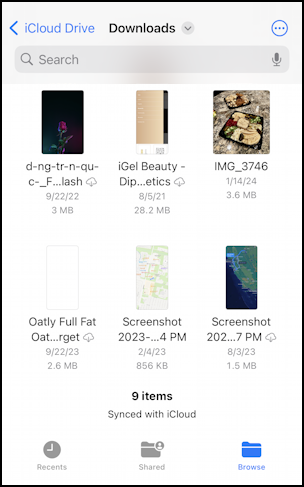
It even retained its original name of IMG_3746, interestingly enough.
Jump back into Photos, find the new image, tap on the “i” icon again and this time the image format is different!
Success! You have just converted a photo from HEIF to PNG by using the iPhone. Clumsy? Yes. Doable as needed so you can proceed? Yes. But what if you really want to get JPEG as the output instead of PNG? You can do that by fiddling with the iPhone apps too, but it’s a smidge more convoluted…
CONVERT HEIF TO JPEG WITH APPLE MAIL
It seems quite unlikely, but Apple Mail has the ability to convert images that you attach too, and when it converts the image, it produces JPEG, not PNG. Don’t worry, it’s not too difficult.
Open up Mail and create a message you’re going to send to yourself, then tap on the paperclip icon near the bottom and add the HEIF format photo. It’ll look something like this:
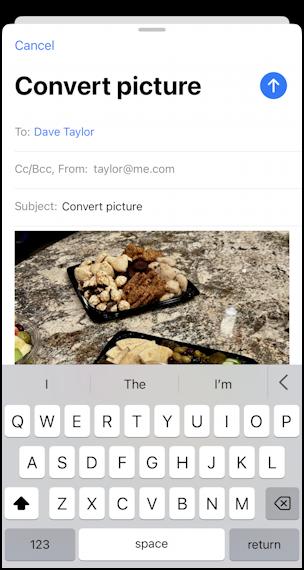
Note that it says “Convert picture” because that’s the subject I specified, not because it’s required for the conversion to transpire! This looks good to go, so I’m going to tap on the blue arrow to send the message. When you do, it’ll prompt you to reduce the image to make the message smaller:
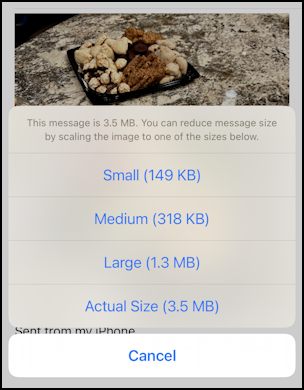
Choose “Actual Size” for the best possible results. After a few moments, the new message with the embedded (actually attached) photo will show up in your inbox.
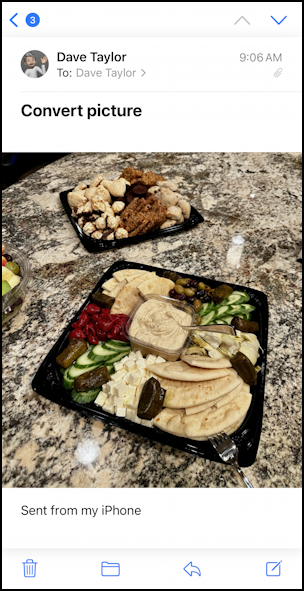
Almost done! Now simply tap and hold your finger on the image and yet another menu will appear (are you getting the idea that tapping and holding your finger in iOS is a smart strategy for finding useful features?)
Now tap on “Save Image” and you’re done. Without any notification or other info the new version of the image will be in JPEG format, as you can confirm by opening the newly saved image in Photos and tapping on the “i” icon:
That’s it. Two different ways you can convert an HEIC / HEIF photo into another format without any additional apps on your iPhone or iPad. Hope that helps out!
Pro Tip: I’ve been writing tutorials for the Apple iPhone since it was first released. Please check out my extensive iPhone help area for lots and lots of useful content.
You should also mention how to convert HEIC images to jpeg/jpg for those of us who do not own any apple devices. [ed: I do, of course, at How to Convert HEIC to JPEG on a Windows PC ]
I receive HEIC images from an iPhone owner on my Windows 7 PC. I need to see these images because she and I work on the database of 603 members of our high school graduating class. She sends me obits from the newspaper. I don’t live in the same city so I don’t usually read that city’s newspaper.
I had no desire to upload images and convert online. I was very happy to discover a program called Copy Trans HEIC for Windows. I am been happily using the program for several years.