
I noticed the other day that a colleague sitting next to me pressed the fn key on his MacBook Pro keyboard and it let him switch between English and Chinese input. Very handy! What can I do with that fn key and how do I assign an app to it?
Apple has been through quite a few different designs and iterations on the keyboard, particularly the MacBook lineup. There are (in)famous technology changes with the types of keys, but the general layout often changes in subtle ways. The latest generation of MacBook Pro has had a pretty consistent key on the lower left corner of the keyboard, however, what Apple calls the fn/Globe key. What people don’t realize is that you can actually assign different tasks to that key, making it one of the most helpful on the entire keyboard.
Where you assign that, however, is not obvious, and if you have it set to do nothing by default, you might well have already decided that it’s just a dead key and stopped using it. But it’s not so! There are three major capabilities that can be accessed from the key, depending on how you configure it. But let’s go through this step by step…
THE MACBOOK PRO FN/GLOBE KEY
Let’s start out by pointing out which key I’m talking about on my own M1 MacBook Pro keyboard:
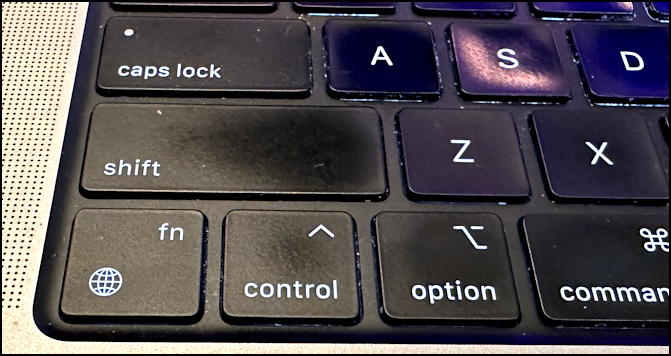
You can see it on the lower left corner with both the globe symbol and the ‘fn’. That’s the key we’re talking about!
Now, how to assign it to a function…
MACOS SETTINGS: KEYBOARD
Fire up System Settings… from the Apple menu, then scroll down on the left side until you find Keyboard. Click on it.
Note: If your Settings is more of a grid of icons, you’re running an earlier version of MacOS. You should still see the same basic layout in the “Keyboard” area, however.
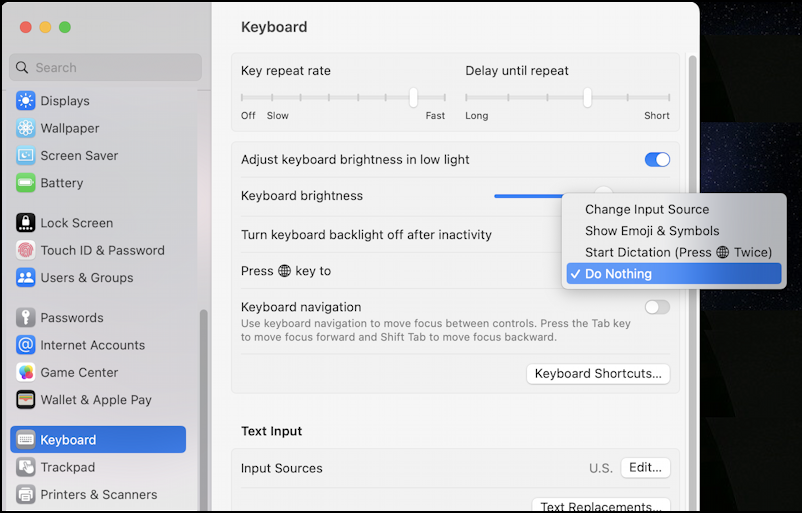
The menu of choices is associated with the “Press 🌐 key to…” prompt. It’s easy to overlook.
The four options are: Change Input Source, Show Emoji & Symbols, Start Dictation (Press 🌐 Twice), and Do Nothing. Notice that the default setting for my computer is Do Nothing. Not optimal.
GLOBE KEY: CHANGE INPUT SOURCE
Most people probably use their Mac system with a single language keyboard, but if you use more than one, it can be very helpful to assign the Globe key to allow quick switching. This is what your colleague did. If I enable the Latin American keyboard along with the US English keyboard, pressing on the key produces this display on screen:
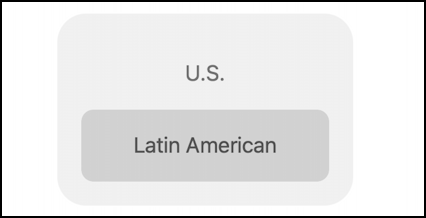
Press it a second time and it’ll choose the next, and so on, allowing you to switch between even four or five inputs as needed. Very handy!
GLOBE KEY: SHOW EMOJI & SYMBOLS
My favorite of the choices, however, is the emoji utility which makes it a breeze to find obscure symbols and unusual emoji. That’s how I found the 🌐 symbol, for example. Change the Globe key assignment to “Show Emoji & Symbols” and pressing that key produces a very different result:

Want to insert one? Just double-click on it. You can do that a half-dozen times if you really want. 😎😎😎😎
Then push the fn/globe key again to have the utility window vanish again. VERY helpful.
GLOBE KEY: START DICTATION
The third possibility is that you can use it as a shortcut for starting dictation, a powerful feature in MacOS that lets you talk to your computer and have it convert what you say into text. In Stickies, for example, I can double-press the fn/globe key and have this:
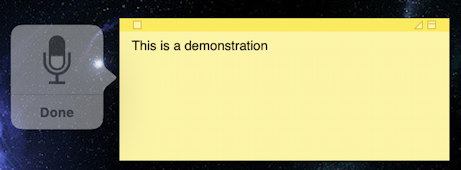
Quite handy, but most MacBook systems also have a microphone key to enable dictation too (often F5).
Those are the three options. I suggest you try each of them to see which will work best for me. As for me, I’ll stick with the Show Emoji & Symbols choice, it’s a great utility that I use quite a bit.
Pro Tip: I’ve been writing about the Mac since the very first system was released. I even started my computing career using an Apple II. Please check out my extensive Mac Help Library while you’re visiting. Thanks!