
I’ve taken the jump to Windows 10 (win10) and am mostly happy, but I can’t figure out how to add or delete tiles to my start menu. In particular, how do I add a start tile for an app I can’t even see?
Congrats on the jump to Microsoft Windows 10, aka Win10. We’re already running the Creators Update which will go out to the public in a week or two, so our screen might be slightly different to yours, but the basic approach remains the same. The general idea is that everything’s about the right click, and that it’s important to remember that if you have the Start Menu (e.g., the start tiles show up as part of your old-school Windows Start Menu) then that’ll also have a list of all known apps, but if you have a Start Page (first gen Windows 10) then the all-apps window is below your start screen.
Easier to show you what I mean than to try to explain it, right? So let’s do that.
To start, if you click on the start menu icon on the lower left and a Start Menu shows up, complete with Start Tiles, you’re running Windows 10.1 or newer and have the “hybrid” start menu design:
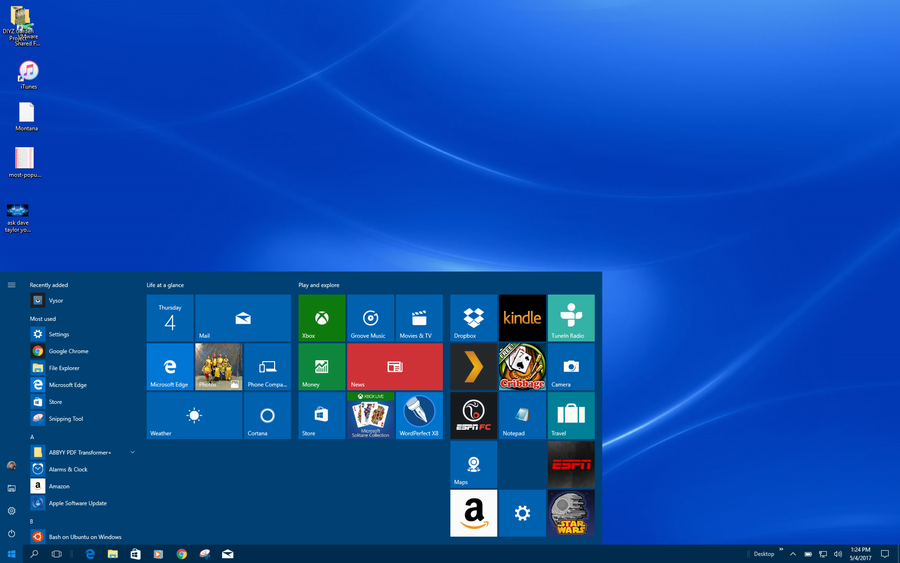
If you don’t have a start menu icon, you’re on the original Windows 10 and I encourage you to update to at least Windows 10.1. It does make things easier to work with. The pic above is a bit small because of our big monitor, but notice the second column on the Start Menu: it’s an alphabetical list of all apps known to Windows.
One of my programs that doesn’t have a Start Tile is Google Chrome. So once I locate it on the all apps portion of the menu (it’s a separately scrolling region) and right click, check out what options I see:
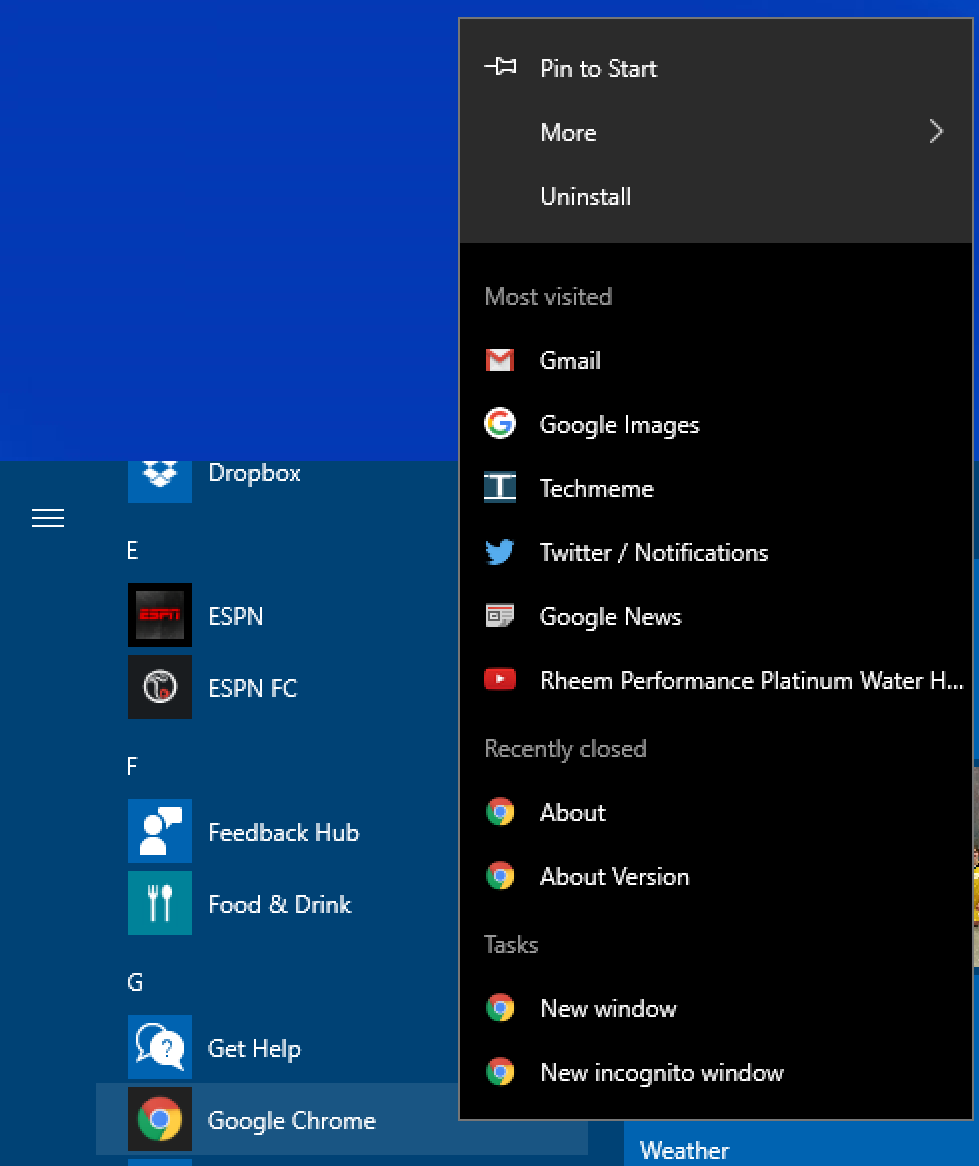
The topmost is what you want: “Pin to Start“. Do that and the app icon turns into a little square and… it’s a Start Tile!
Google Chrome has some neat tricks up its sleeve too, notice the “most visited” pages as an easy shortcut to help you launch the program on a specific page. Very useful stuff, most programs don’t have such long menus!
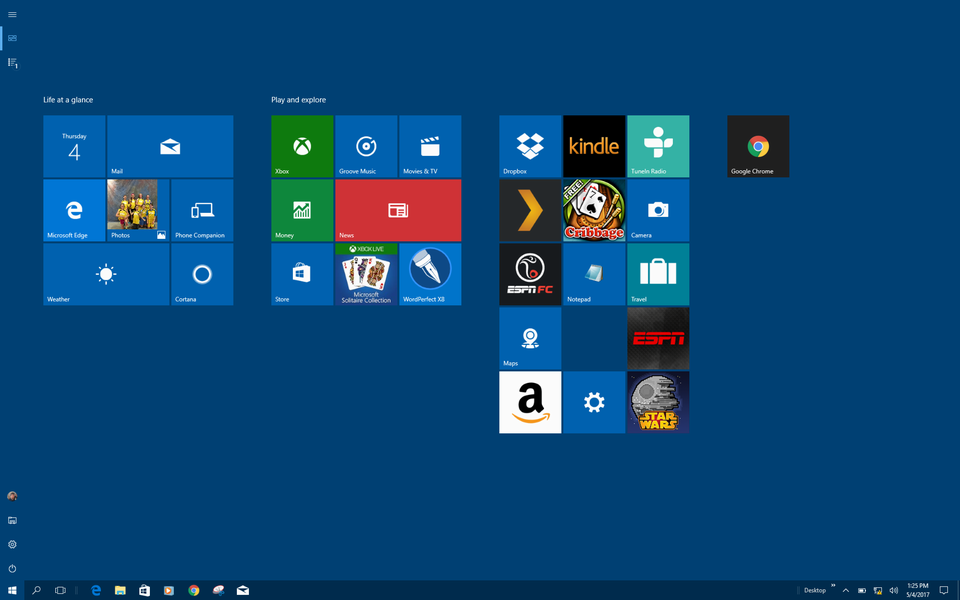
Oh, and here’s the Win10 Start Menu with the newly added Google Chrome tile:

You can click-drag to move it elsewhere if you want to rearrange your tiles. It’s a bit lonely sitting there all by itself!
Want to delete a Start Tile? You can do so without removing the program. No worries, the program will remain on your computer, ready to use, just not staring at you every time you look at the Start Tiles.
That’s done with… you guessed it… a right click:
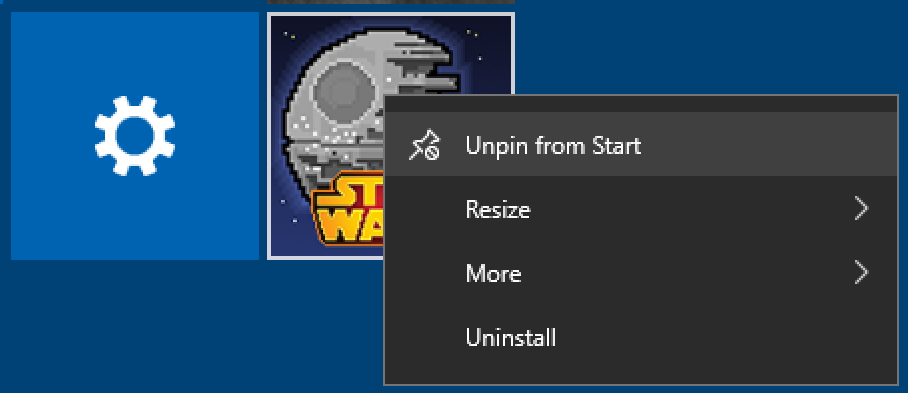
Simply choose “Unpin from Start“. Notice also that you can resize a tile if you want it bigger or smaller and, if it’s what’s known as an “active” tile (like how the weather tile shows you the current weather) you can enable or disable that capability. Handy!
Now, what about if you have a full-screen Start Menu? Not my favorite configuration but some people have grown to like it.
In the first generation of Windows 10 there’d be a small link on the lower left that says “all apps” but in the latest version of Win10 adds three buttons on the top left that are darn useful. A click and they reveal their functionality:
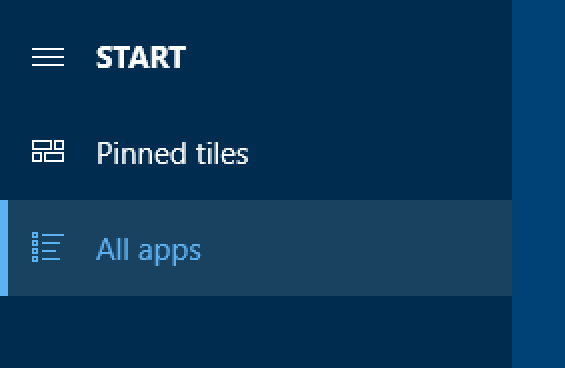
By default, you’re going to see the “Pinned tiles” option, but click on “All apps” and you’ll get a screen listing every app and program you have installed on your Windows 10 system, neatly organized by name:

Easy enough. Find the app you want to add to the Start Screen by creating a start tile and right click on it (I told you, it’s all about the right click!). Here’s what you’ll see:
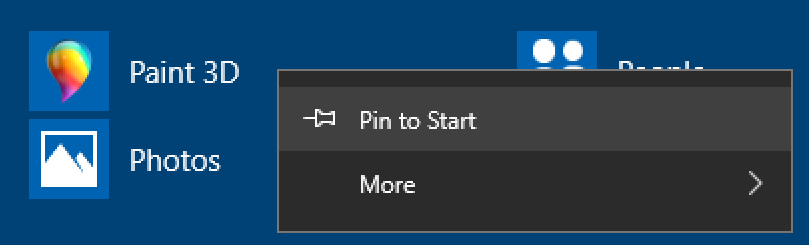
Just like earlier, simply choose “Pin to Start” and you’ve created a Start Tile and can now right-click to resize, click-drag to move around, etc. Want to delete a Start Tile from the Start Screen? Right click and you’ll get the “Unpin from Start” option shown earlier.
And that’s it. Once you get the hang of it, customizing your Start Menu or Start Screen is a breeze and is time well spent as your favorite apps can now be big tiles, easy to click, and programs and apps you never use can be removed entirely, ready to go when needed but not starting at you and consuming valuable screen real estate!