
I heard that LinkedIn is letting certain members post articles on their profiles through a blog tool called “Post”. Cool. I want in. How do I get started?
I had read about the Post tool on LinkedIn a few weeks ago, but it took a while until one day when I went to check on my LinkedIn account status and got a notification that I was hooked up and ready to go, able to access the Post tools. If you don’t get the notification, the way you can tell that LinkedIn blogging tool is available to you is by looking for the little pencil icon on the status update entry box.
But let’s back up a second. The system, formally called Publishing Power, started as “influencer posts” and has actually been available for a while on LinkedIn, but only for a few hundred top executives and celebrities. So why open it up? I think it’s best answered from a Mashable quote: LinkedIn staffer Ryan Roslansky explained that “the more content we have, the more content that’s going to be consumed.” Content. More content. Because the Internet needs more stuff. 🙂
The tool itself is fairly rudimentary, about the same level of sophistication as the built-in editing tools in WordPress.
To demonstrate, here’s what my LinkedIn status box now looks like:

You’re used to seeing the paperclip, but the pencil icon is new. If you have it, you have access to Publishing Power / Post.
Click on it instead of entering a status update, and a clean, uncluttered edit window appears:

With the magic of superfast typing, I’ll enter a title and a few paragraphs of text:

To add a graphic — always a good idea when you’re writing online! — move the insert cursor to the desired spot (in this case, I’ll place it just before the first word in the prose) and click on the camera icon in the very right of the toolbar.
A window pops up:

Pretty easy from here, click on “Choose File” to pick an image file on your computer, then click “Submit” to upload it.
Note that there are no image resize tools I could find in the Publishing Power system, so you’ll probably want to resize the image on your computer before you upload it.
Once included, it looks like this:
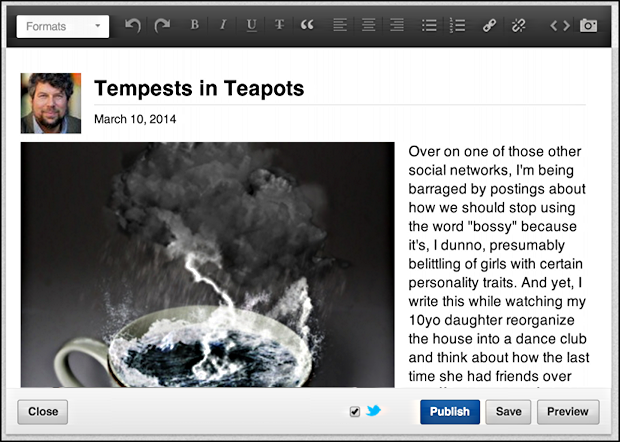
The image is still a bit big for the piece, but I’m going to ignore that problem and proceed.
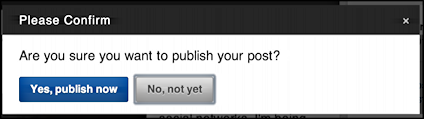
LinkedIn recommends you preview your article to ensure it’s ready to go, a good idea, so click on “Preview” to clean up any layout issues. Then click “Publish” to proceed.
You sure about that?
Since the tiny Twitter box was checked in the edit window, the next thing that happens is that a tweet box appears, pre-filled with a shortened URL and all:

Looks good? Click on “Tweet” or just close the window if you’ve decided you don’t want to share this missive with your loyal Twitter following. Either way, done.
Now on your profile and for those who follow you, here’s the snippet they’ll see:

Notice it did a nice job scaling the image down and producing an attractive summary, etc. Nice.
Now let’s see if it’s worth the time to publish exclusively on LinkedIn…
Nice article about LinkedIn post blogging thanks for sharing this information.