
I don’t know what’s wrong, but when I try to access my Kindle library in the Kindle app for my iMac, I see tiny little book covers and a couple of columns of information that are just one or two letters long. Why don’t I see book covers so I can tell which is which?
Amazon’s done a great job creating a Kindle ecosystem so you can bounce between your Android phone, your Mac system, and your Kindle reader, without ever losing your place in your current eBook. Slick. The problem is that as with most programs, the programmers make assumptions about what you understand and can figure out in each of the different programs. On the Kindle device, there aren’t many options, so it’s easy and looks good all the time, but on the Mac system – or a PC – there are some settings that can get a bit munged up and cause problems.
In terms of the Kindle for Mac app that you’re talking about, I believe I understand what’s happened to your program and it’s solved with a click-and-drag action. The trick is to know what to click and drag and where to click to get the process started. Let’s have a closer look!
KINDLE FOR MAC: COLUMNS TOO NARROW
This is what I expect you’re seeing on your iMac when you open up the Kindle app:
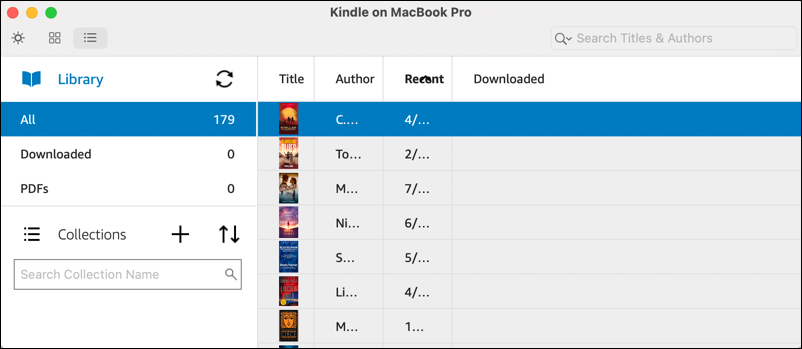
You’re exactly right when you say it’s hard to figure out which ebook is which, and doubly so if they have similar covers! The problem here is an easy one to fix, however! Each column, Title, Author, Recent, Downloaded, has a left and right edge, which can be moved within the window!
Move your cursor to the line between “Title” and “Author” and it’ll change to a tiny double-arrow icon. Now click and, while you’re holding down the mouse button, move the cursor to the right. The entire column will begin to expand, with more information showing up as you go:
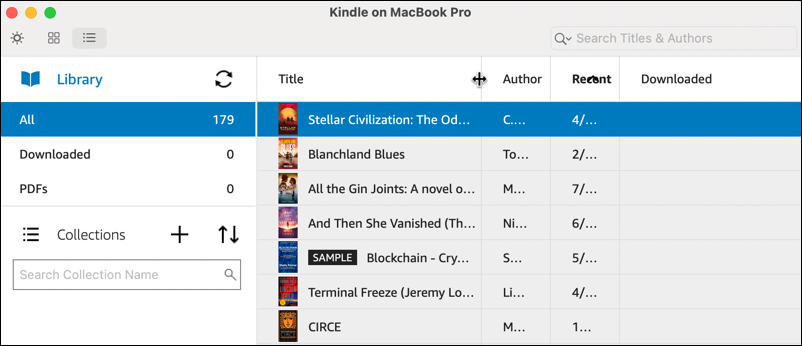
Now you can see that I have both tiny thumbnails of the book covers and actual book titles. Much more helpful!
You can do that same click-and-drag to widen each of the columns, which completely changes your view:
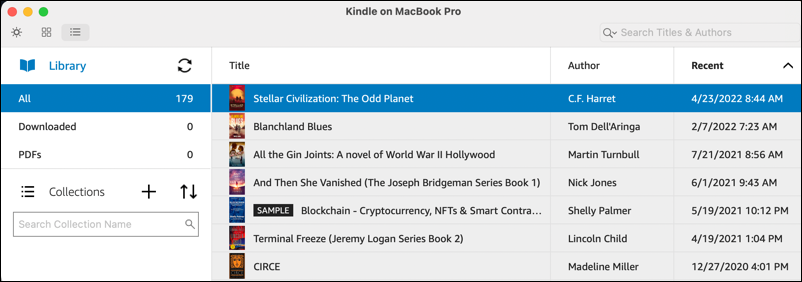
You can also click on any of the column titles to sort by that information. For example, click on “Recent” and you can reverse the sort order and see what the oldest ebooks are in your Kindle library.
SWITCH TO KINDLE COVER VIEW AND DARK MODE
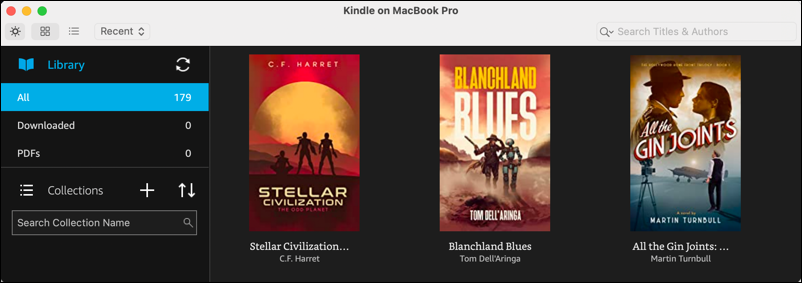
Look closely on the top left, though, because those three tiny icons – the sun, the grid of squares, and the dot-dash lines – are quite helpful. They let you switch between views. The current view is ‘list view’, but a click on the grid of squares reveals much bigger book covers, more like your Kindle device itself:
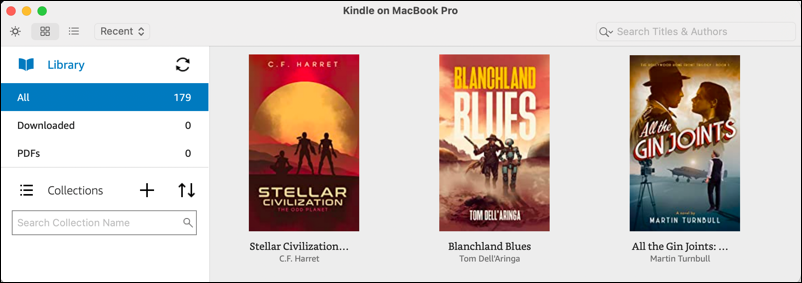
I much prefer this since I really like book cover art and know that authors put a lot of effort into working with artists and designers to create something that’s striking, evocative, and memorable…
Now let’s switch to Dark Mode. Click on the tiny sun icon on the top left and white becomes black!
This can be a lot more pleasing on your eyes, particularly if it’s later at night. Don’t like it? No worries, click on the sun icon again and it’ll instantly switch back to “light mode” instead.
Since you’re on Kindle for Mac, there’s one more trick worth knowing. Click on the “View” menu on the very top of your iMac screen and you’ll see a number of options:
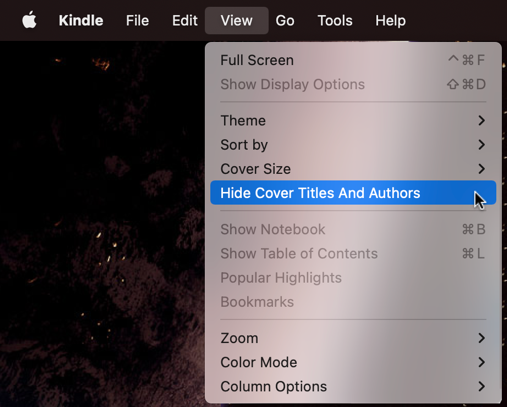
Choose “Hide Cover Titles and Authors” and you get a cover-only view:
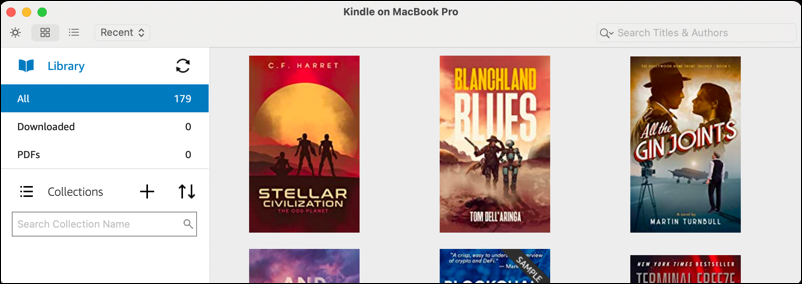
Lots of options, and you can still sort as you desire even in this cover-only view!
Pro Tip: I’ve had Kindle devices for many years and have written quite a few Amazon Kindle Help tutorials here on my site. Please take a few minutes to check it all out!