
My kids share my computer and there are some files and Word docs that I really don’t want them to read. What are my options for keeping them hidden or protected in Windows 11?
While lots of people share computers, PC and Mac, the best way to solve the problem you’re talking about is really to set up separate user accounts. I advocate that even if it’s you and your spouse, not because each of you likely has lots of things to hide from the other but more to ensure that neither of you ever accidentally step on the other’s files, Web site settings, browser defaults, etc. Every time you’re done using the computer, just remember to log out, and if you find it’s logged in to someone else’s account, log them out, log in to your own account, and proceed. Easy enough. Here’s a tutorial: How to set up additional user accounts on your PC.
If that feels like overkill, then the other solution to truly keep files private is to utilize removable storage. It’s really easy to obtain a USB flash drive with plenty of capacity for $10-$20 at the supermarket, Target, Best Buy, or a similar store. Ensure your files and documents are stored directly on the drive and every time you pull it out of the USB port on the PC, the files vanish. Of course, if one of your kids gets ahold of the drive, they can just as easily plug it in and read all your files and folders, but we’ll get to that in a moment.
HIDING FILES FROM THE “RECENT” LIST
The first place that problems problematic with your desire to hide some of your activity is the “Recommended” list on the Windows Start window. When I click on my Windows icon on the Taskbar, here’s what I see:

Notice that “My Secret Diary” and “wishlist” are both showing up as “Recommended”. Not very useful with a shared account, and it suggests that one basic step is to have really boring filenames for your content. No “My Secret Diary”, maybe instead “tax-data-2020” or “logfile” or similar.
You can remove things from the Recommended list with a right-click, but you have to remember to do so every time:
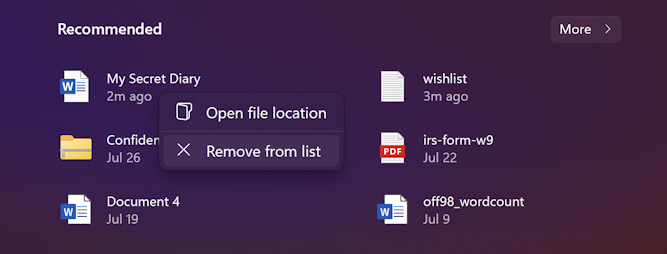
Not only that, but click on “More >” and you’ll find that there’s a second Recommended view too:

This also has the right-click-to-remove option, but it’s fairly tedious given that you need to remember to do it every time you edit a file or create a new one. You can also remove the Recommended list entirely in Settings > Personalization > Start > Show recently opened items in Start.
If you’re using Word or any other Office program you can set up a password to keep things safer.
HIDE & ENCRYPT YOUR WORD DOCUMENTS
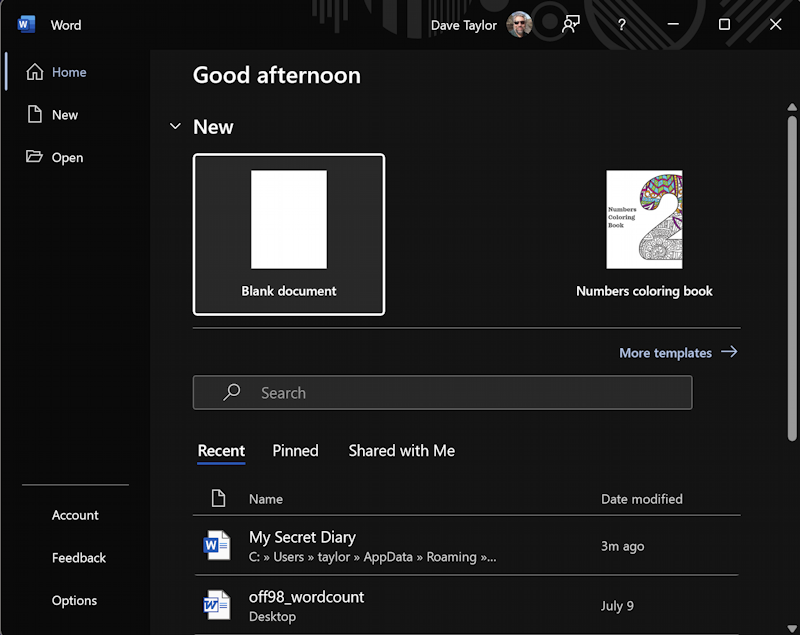
Early versions of Microsoft Word used to have a checkbox in the Save “Advanced Options” window, but the latest generation of the program has moved all of the encryption and document protection to its own area. First, though, like Windows itself, Word has a Recent file list that might well include your secret – even encrypted! – document:
Again, though, you can right-click on an entry and get a menu of options:
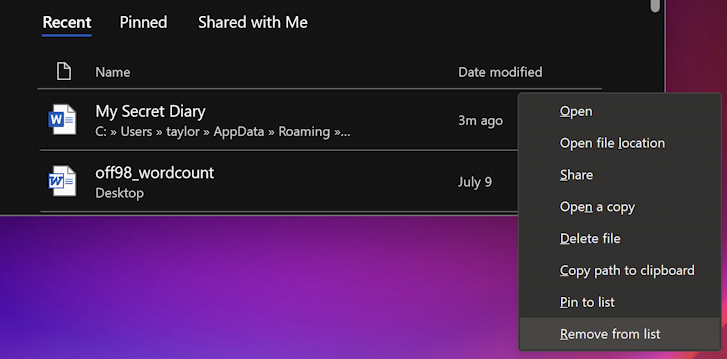
Choose “Remove from list” as appropriate.
Prefer to encrypt your file so that it’s unreadable without a password? Doable! With your file open in Word, choose File > Info:
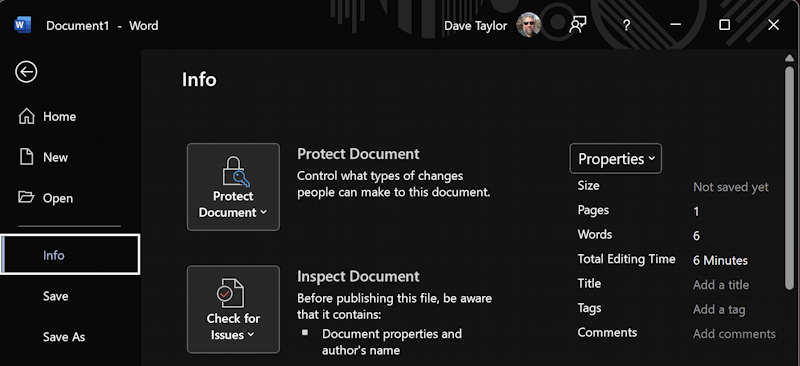
Specifying that your file is a protected document is separate from saving it to disk, OneDrive cloud, etc. So you’ll want to set up the password encryption, then save it to your computer. Choose “Protect Document“…

Now you can guess. Choose “Encrypt with Password” and it will prompt you for a password:

You can specify something quite complex or really simple. Probably not one of your children’s names, however! I like to use simple, easy to remember passwords like “Sekrit!” for this sort of task, but, of course, if it’s really confidential then a more complex password will be that much more difficult to guess.
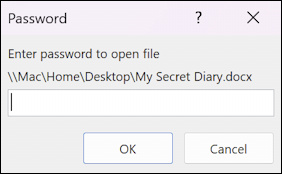
Click “OK”, then save the document and you’re done. Quit Word, start it up again, and you’ll find that it does indeed prompt for that password before it will open the file:
Those are your basic choices. As you can see, it’s pretty hard to completely wipe all traces of your file and editing from the Recent, Recommended, and Active lists in the various programs and Windows itself. Again, I encourage you to set up a separate account for your children and let Windows itself manage the privacy and security features directly. If not, well, now you know the trade-offs. Good luck.
Pro Tip: I’ve been writing about Windows since the beginning. While you’re here, please check out my extensive Windows help area for hundreds of other useful tutorials and how-to articles. Thanks!