I have Skype on a pretty powerful Mac system and after seeing people have fun on Zoom calls with their backdrops and fake backgrounds, I’m wondering: Can I do the same thing on Skype?
Though it doesn’t get much love, Skype is still a great video conferencing, chat and meeting tool used worldwide. I think Zoom is more popular because it was adopted by schools and gained lots of visibility quickly, but to be fair, Zoom’s designers also had a chance to learn from Skype’s design and add some fun features to differentiate from the business video meeting tool. Fun features like “virtual backgrounds”. Not sure what I’m talking about here? It’s when you can superimpose a photo, drawing, or even video behind you in a video chat. Just like a Hollywood green screen. I wrote about using virtual backgrounds with Zoom if you want to check that out.
What people don’t realize, however, is that Skype not only has virtual backgrounds but it also has a really helpful ‘blur background’ feature which you might appreciate even more! There are some hardware constraints with all of this, however, so if you have an ancient old PC that can barely launch Skype at all, you might lack the CPU oomph to have all this work properly. But I had it working just fine on my MacBook Pro so hopefully your system will support it too.
Let’s just jump in and have a look at how it works. First off, launch Skype and there’s no obvious way to change your background – or even preview y0ur background, for that matter:
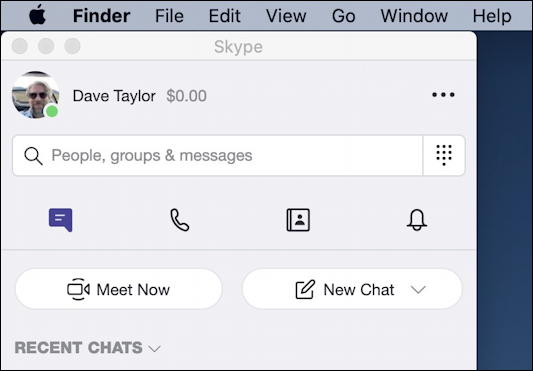
Except there actually is a way to test and preview both your audio and video. Simply click on the “•••” link on the top right of this window. A menu pops up with these choices:
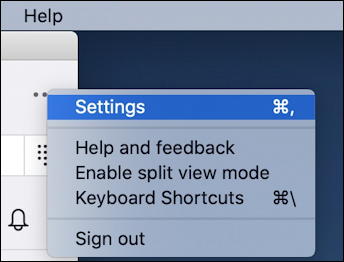
You can, of course, also just go to “Preferences…” off the Skype menu on the very top, but I prefer the three-dot menu because it’s short and simple.
Choose “Settings” (or use the keyboard shortcut Command-,) and you’ll find that there are a staggering number of different possibilities:

I’ve already jumped into “Audio & Video” which you’ll want to do once you’ve poked around on some of the other settings and options. Definitely check out your settings overall, then when you move into this area, you can see what other participants would see. In my case, the stairs and a coffee picture on my wall.
To blur all that out, simply click on “Blur” in the “Choose background effect” area.
Here’s what happens:
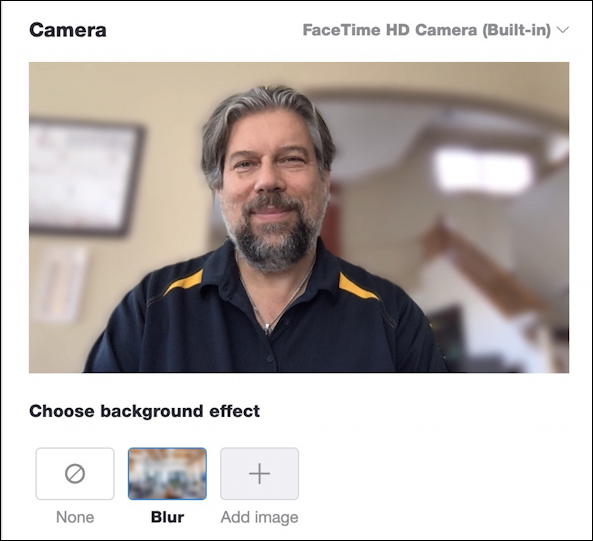
I really like this visual effect and, of all things, wish I could use something similar in Zoom. I know, the proverbial grass is always greener on the other side of the fence…
To load up an image of your own choosing, click the “+” above Add image and select any photograph or other graphic on your computer. Generally speaking bigger is better in terms of the results.
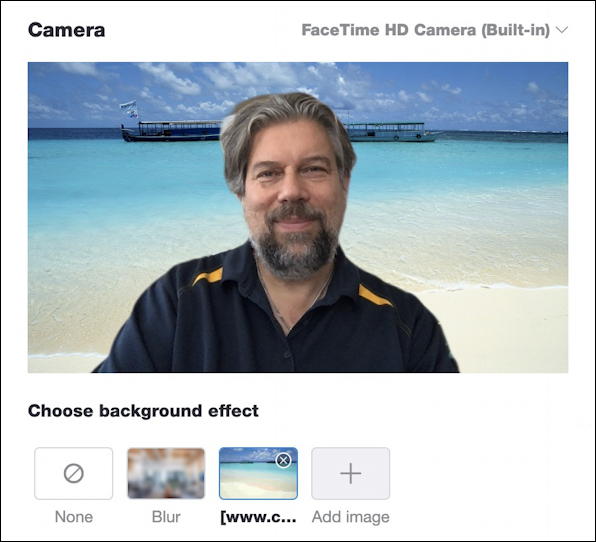
Alooooha from the beach!
Or, I can have something a bit more meditative:
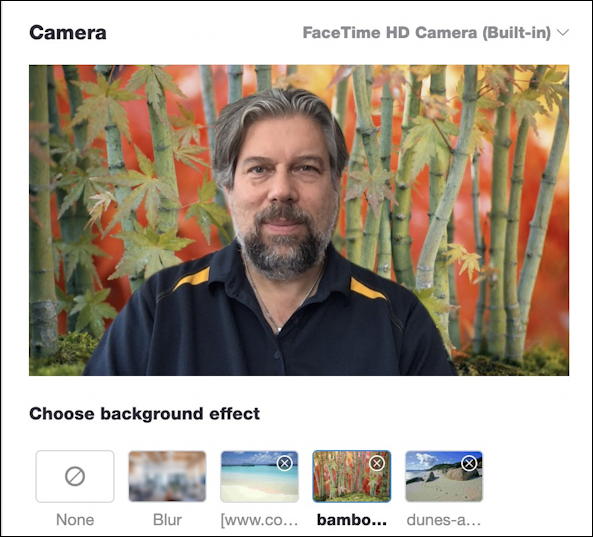
You can also build up a library of favorite images too, as shown above. What’s nice about that is if you have meetings on Skype with your colleagues, you could have a photo of your office building or even your office. I teach at the University of Denver so I have a campus photo as a possible background for meetings with fellow faculty and students. Not required, but just a bit of fun for your chat.
Finally, if you need images, Google Image Search is your friend. For example, I searched for “beach wallpaper” and then used the Google filter Tools > Size > Large to ensure that the results would work well as virtual Skype backgrounds:
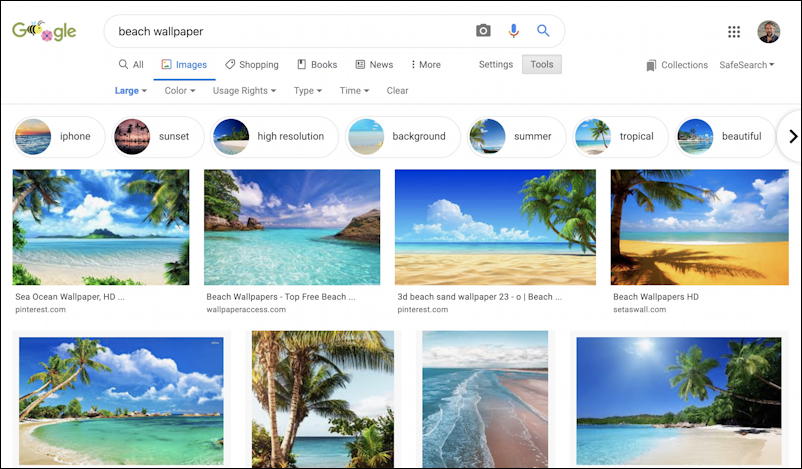
That’s how it’s done. Try blur, then try a few of your favorite photos and see how it works for you!
Pro Tip: I’ve been writing about Skype and other Microsoft tools for many years. Please check out some of my other Skype help articles for more assistance.
