
Do you like the protection of knowing that Microsoft Windows Defender is scanning your PC to isolate malware, but forget to run the scan on a regular basis? No problem, you can use the Task Scheduler to set up daily, weekly, or monthly scans with just a few clicks…
While many third party anti-virus programs include a scheduler that allows you to have a scan initiated every night at 2am or during your lunch break, Microsoft Defender doesn’t include this capability. It can remind you if you haven’t scanned your system for a while (sometimes) but having it automate the scan process so you don’t have to think about it unless there’s a problem? That’s not so easy.
At least, not within Microsoft Defender itself. Turns out that there’s another system in Windows called Task Scheduler and it allows you to set up one-time or repeating invocations of just about any program. Want to have the Adobe Suite all ready to go when you sit down at your desk, even if you quit the program the night before? You can do that. More importantly, though, you can schedule malware scans through this handy admin utility.
WINDOWS TASK SCHEDULER: AS ADMIN
The first and perhaps most important part is that you need administrative permissions on the PC to be able to run the scheduler. This is easily tested by searching for “task scheduler”:
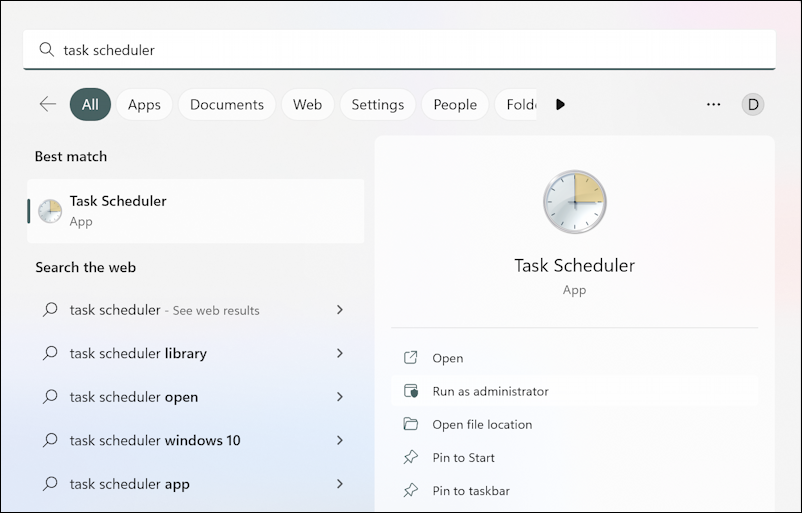
Choose “Run as administrator” and if it launches, you’re good to proceed. If not, you’ll need to talk with the admin of your computer (probably your IT department) to either gain permission or have them set it up for you.
Once launched, Task Scheduler is, well, kinda complicated.
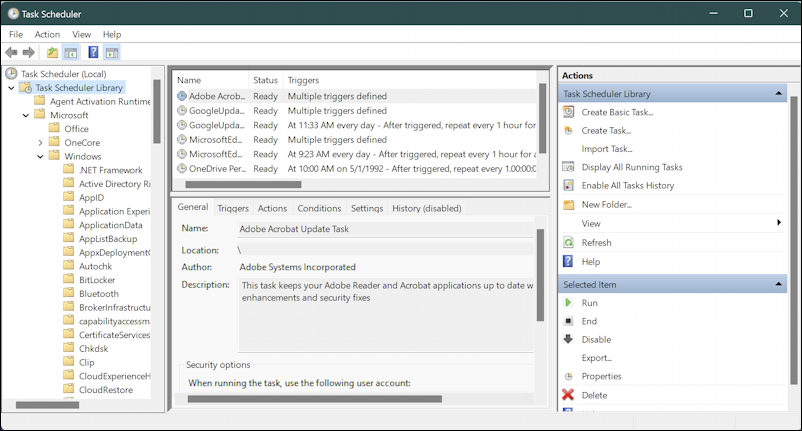
Your default view will be slightly different, but on the left open up “Task Scheduler Library”, then “Microsoft”, then “Windows” to see what I have displayed. For now, just focus on the leftmost column.
SCHEDULING DEFENDER WITH TASK SCHEDULER
On the left side, once you’ve opened “Microsoft” > “Windows”, scroll down the list to find “Windows Defender” and click on it. You should see something like this:
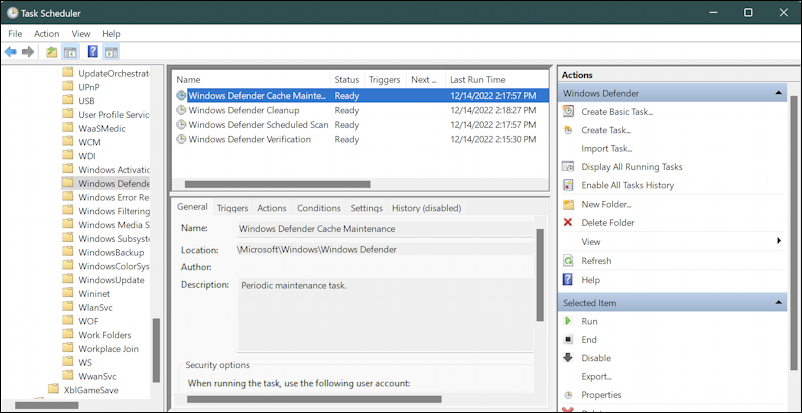
Notice that there are four primary categories for Windows Defender here in the scheduler: Cache maintenance, cleanup, scheduled scan, and verification. Right click on “Windows Defender Scheduled Scan“.
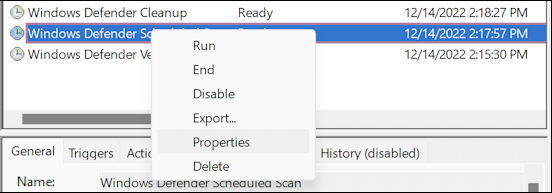
From this menu, choose “Properties” and yet another window pops up:
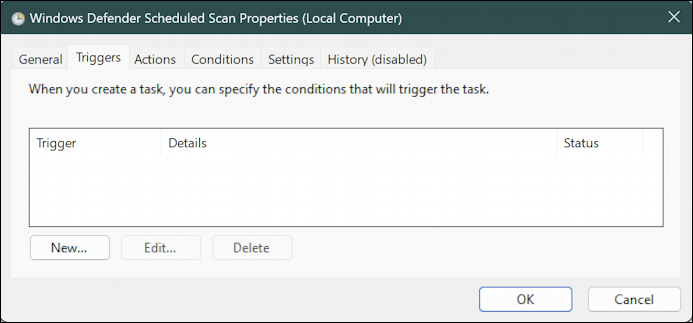
“Triggers” are what cause the program to run and we’ll be creating a new one for our own scheduled invocation of Defender. Note that if you already have some on this list you’ll want to check with your IT department before adding any additional triggers.
Click on “New…” on the lower left to create a new trigger.
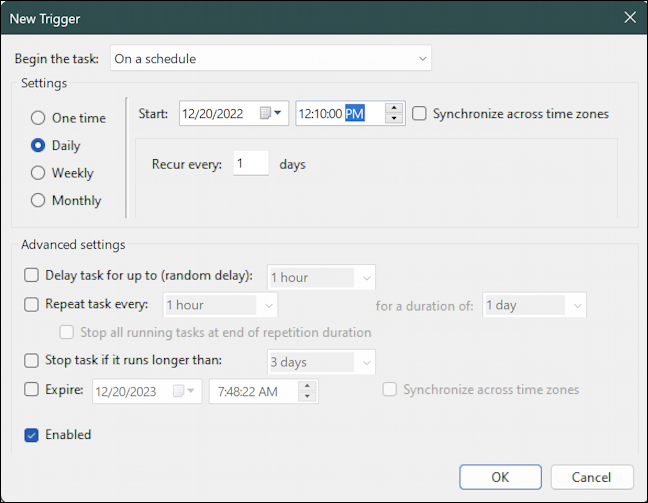
Lots to check out here, but notice on the top you’ll want to specify “On a schedule”, then choose One time, Daily, Weekly, or Monthly. I’m going to set up a scan to start at 12:10 pm, right as I head out for lunch, every day. There’s one more thing worth setting to ensure you don’t have the program get “stuck” and force a reboot: “Stop task if it runs longer than”. Since my scans typically take a minute or two, I’ll set it to an hour.
All told, here’s what I have configured:
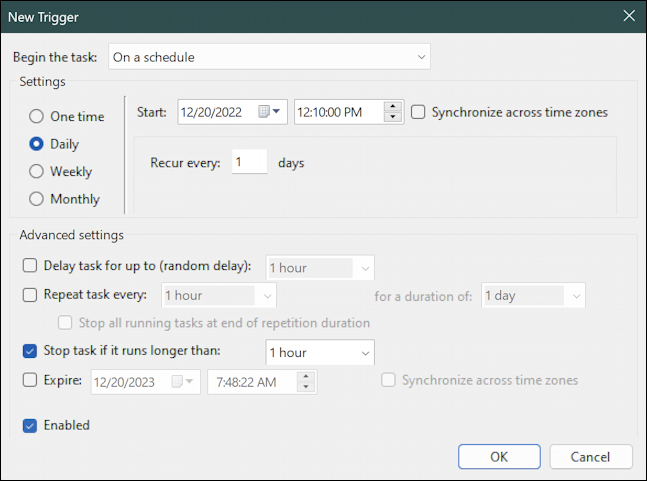
Double check that “Enable” is checked at the bottom, then click “OK”.
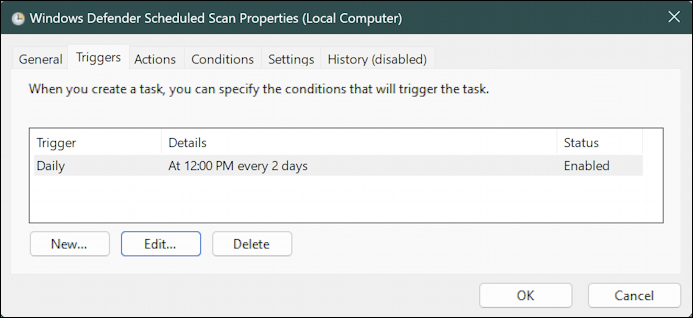
(Eagle-eyed readers will note that I changed my mind at the last minute and set it to scan every other day). Looks good. To have it formally scheduled, a click on “OK” does the trick.
Done. Now when the time rolls around, the scan should automatically start, without any intervention required.
BONUS: SET CONDITIONS FOR A SMARTER SCHEDULE
Before we finish up, click on the “Conditions” tab along the top of the Scan Properties window…
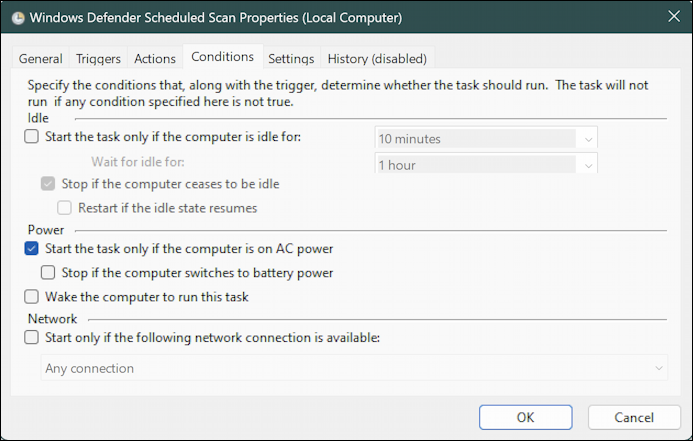
This is a good place to specify that it should only trigger if the computer is idle, or if it’s plugged in (rather than on battery power), or if it’s on a specific network, or similar. You can even specify that it should wake the computer to run the task if it’s otherwise gone to sleep (for example, noon on Sunday might not have you in the office working). Add a few conditions to make it less disruptive, and you’re all set.
Power Tip: I’ve been writing help articles about Windows for years and have an extensive Windows 11 help library here. Please check it out to find lots of additional tutorials and guides while you’re here. Thanks!
Excellent set of instructions to do exactly what I needed. Thanks!