
I bought a new Canon all-in-one printer, scanner, fax, copier unit and it’s really great, but I can’t for the life of me figure out how to use it as a network scanner from my iMac. What’s the secret?
Years ago it was printing that was the roughest edge of the computing universe and getting a printer up and online with the proper configuration could take days of messing around and trying different settings. Fortunately those days are past and most modern printers you just hook up to your Wi-Fi network and they just pop up on your Mac or PC systems. Way better!
Add a networking scanning capability, however, and it’s not quite that simple to work with. Even on the Mac system, turns out that the standard Mac OS X scanner system is in the last place you’d think of looking: within the world of System Preferences.
Let me show you what I mean, using my Epson Artisan 837 all-in-one as a demonstration unit.
The fastest way to get to the scanner software turns out to be using Spotlight and searching for your scanner by name. For example, when I type in “epson…”
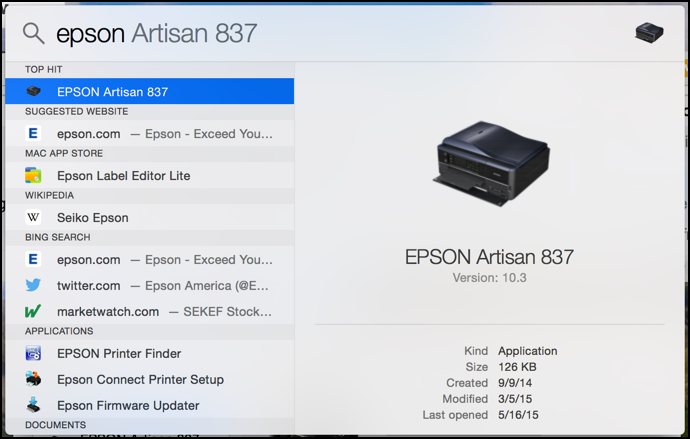
Tap on Return or click on the matching entry to launch the printer program:
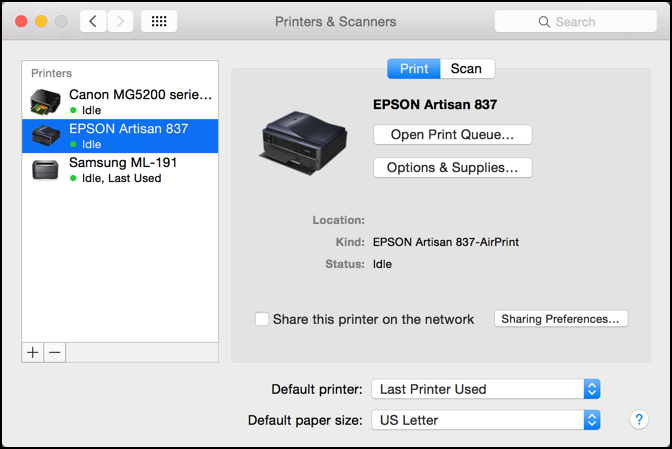
Notice on the top, just above the printer’s name, the buttons “Print” and “Scan”. On a printer that doesn’t have a scanning capability, those are missing, as you can see in the Canon printer driver window:
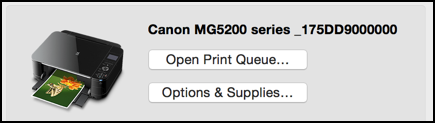
Fortunately, the Epson does have the scanner set up. If your Canon shows up as just a printer, delete and re-add the printer by clicking on the “+” button on the lower left below the list of known printers. That should help out!
Back to the printer / scanner window. Click on “Scan” to get into the scanning software. It’ll show a big, empty window and look like something’s broken:
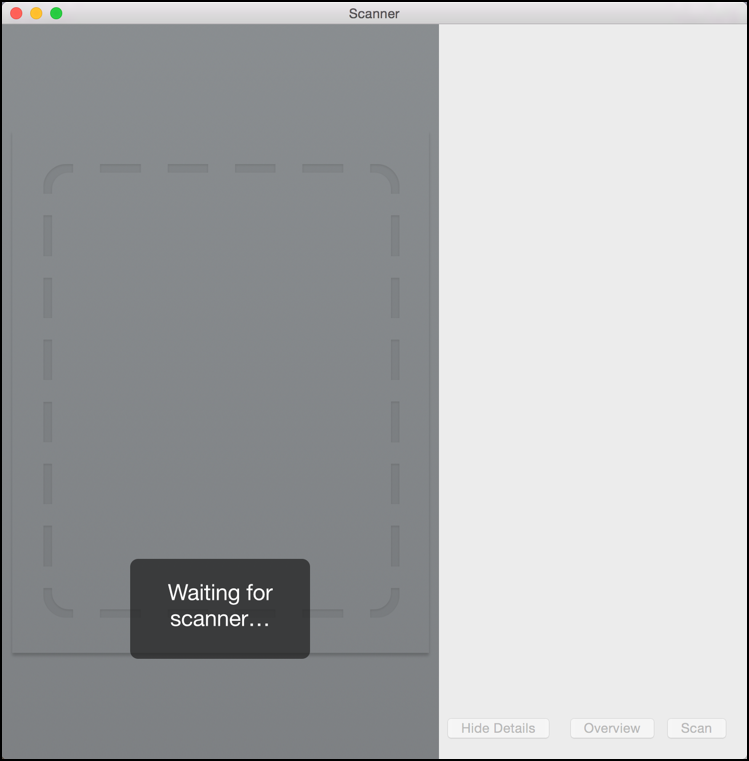
If you have something on the scanner plate or in the scanner feed, it should actually pull it in now and send a basic preview to the program via the network connection. This can take a while, btw, because 1) scanners tend to be rather slow, particularly in all-in-one devices and 2) it’s a lot of data.
Eventually, though, you’ll see something like this:
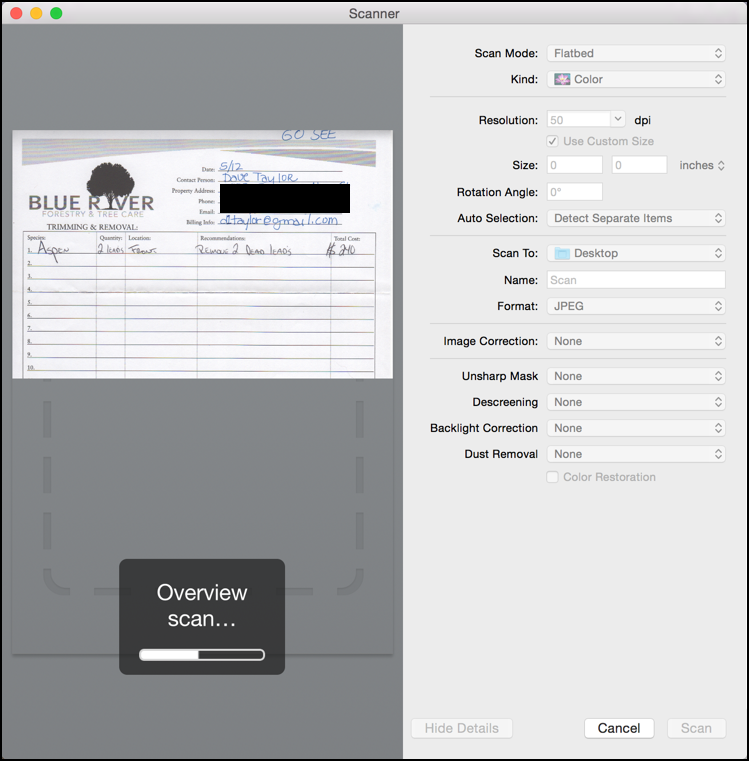
(I’ve obscured my home address from this document)
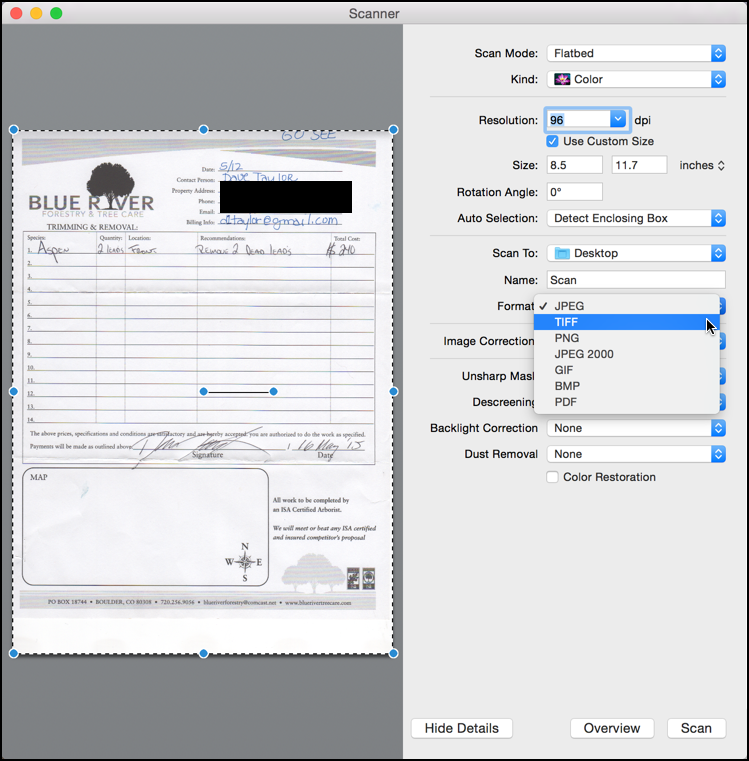
Notice that there are a lot of different options you can tweak and fiddle with, including notably the location of the saved scan, the filename, and the format. I recommend TIFF or PNG, but as you can see below, there are plenty of different choices available.
You might also look at scanning resolution. The default of 50dpi (dots per inch) is pretty low-res so I recommend 100dpi for on-screen use and 200-300dpi for print work.
Make the adjustments you want, make sure the selection box is correct
Ready to go? Everything set just so?
Click on “Scan” on the lower right and sit back…
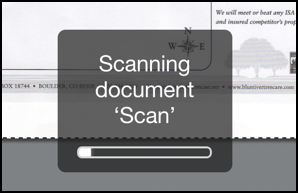
Once that’s done, the resultant document is automatically saved to the specified destination in the specified format. Actually easy once you learn where the scanning software is hidden on a Mac system.