
I notice that every so often someone on Instagram will post a multi-photo college. They look really sophisticated and I’d like to make them too. How can I create these collages to post on Instagram?
I know exactly what you’re talking about and it was my 12yo who showed me how to make those beautiful Instagram collage photographs that look so sophisticated and artistic, believe it or not. She routinely takes three photos of a single theme and assembles them into a single one-pic story, then posts them to Instagram for her small circle of followers. Very effective and definitely more fun than just posting them one photo at a time.
A quick search for “collage” in the Apple app store or Google Play / Android store and you’ll find that there are dozens upon dozens of options available, however, which makes things more difficult, not easier!
Fortunately, it turns out that Instagram has a companion app designed just for creating collages called “Layout“, as you can see here in the App Store:
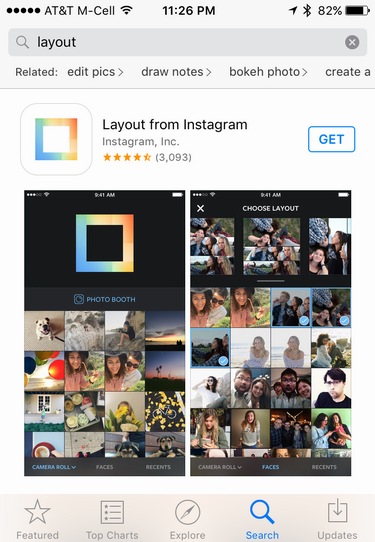
As with all apps, simply tap on the “GET” button and it’ll download and install. Simple enough.
Using Android? You can get Layout from Instagram for Android instead. Easy!
Once installed, start it up!
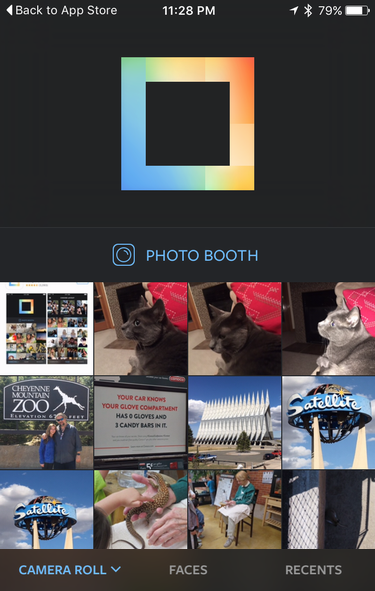
This is the main screen of the app, so to proceed you want to pick out three photos from your gallery — or take some pictures or selfies by tapping on “Photo Booth”.
I’ll start by tapping to select three photos of the beautiful Air Force Academy Chapel in Colorado Springs, Colorado:
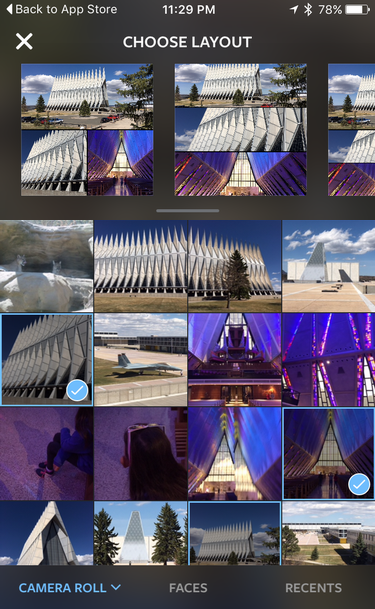
You can see that the pics are chosen from the collection on the lower portion of the screen and the top offers a horizontally-scrolling set of layout options just under “Choose Layout”. It’s a bit tricky to see with the dark grey background, but once you’ve picked the photos you want, swipe right-to-left to see all the layout options.
Find one you like? Tap on it. I’ll choose the top left option since I like having the images with different sizes.
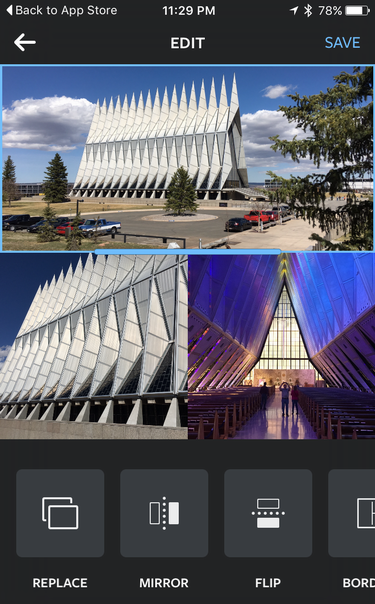
There are two main things you can do here: Tap and drag the border between the photos to change their relative size, and modify each of the individual images based on the options along the bottom (replace, mirror, flip, border, etc).
I’m going to drag the divider up a bit to get rid of the parking lot on the top photo, then actually pan slightly up on the photo itself (by putting my finger on that photo and dragging down just a bit) so that the top of the spires remains visible.
The result is very nice:

You can see that I’ve also moved the lower dividing border a bit to the right to change the balance a bit. All looks good!
A tap on “Save” in the top right to proceed…
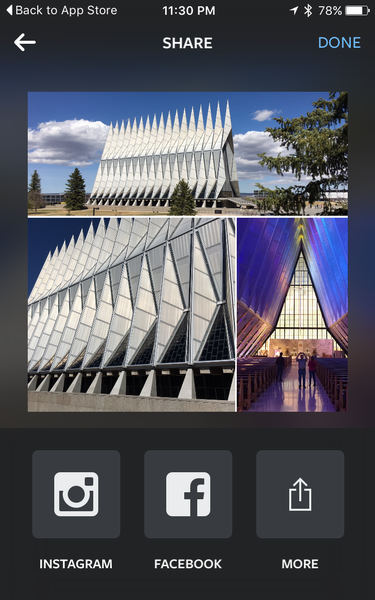
Looks great! Now I can share it directly to Instagram, Facebook or just save it to my photo album. The goal here is to share the collage on Instagram, however, so a tap on the “Instagram” button opens up the app with the photo ready to post:

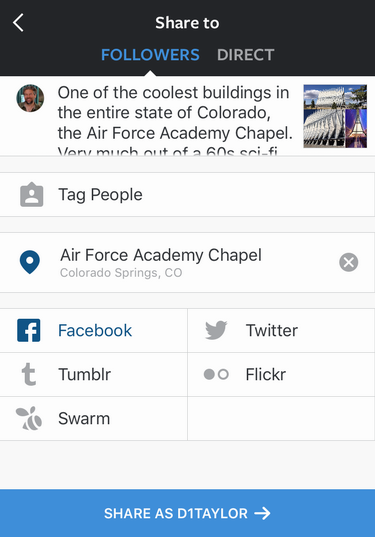
You can apply additional filters at this point or tweak the collage before you post it to Instagram, or just tap “Next” on the top right. Now you’re in Instagram so there are a variety of settings and, of course, a caption to enter:
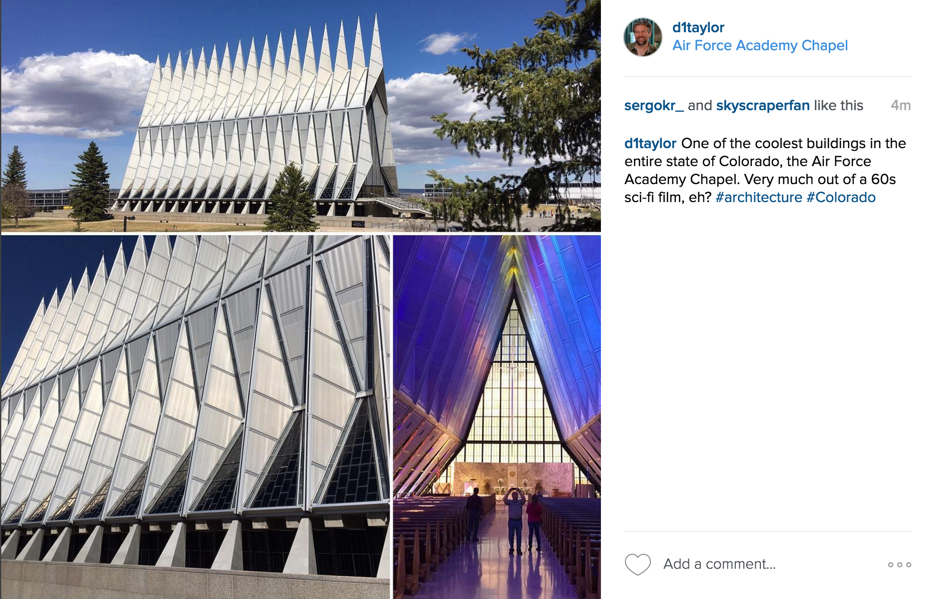
A tap on the “Share” button and our new collage is posted for the Instagram community to enjoy:
Not too difficult at all, actually!
And while you’re at it, why not follow me on Instagram? I’m d1taylor.