
When my brother plugs his Samsung Android phone into his PC, it shows up on the Desktop as an external device and he can copy music, view photos, and everything! When I plug my Android phone into my own Windows computer, however, nothing at all happens. Help!
You’re asking an important mobile device security question, even if you don’t know it. Think about it, though: What you don’t want to happen when you plug your phone into a device is for that device to then have access to everything on the phone. Contacts, phone history, even text messages. That all must remain private. But people also want to be able to plug in and access their mobile devices from trusted computers! The default is to simply lock everything down so that your phone or other mobile device can charge by being plugged into a computer, but the computer cannot access anything on the device.
Remember, we sometimes plug our phones into unknown devices too, like a charging station at the airport or train station. Is it really just power, or is there a tiny PC inside that’s going to try and clone all of your phone data? Best to assume the worst (and that’s one reason why you might consider buying a cheap “charging only” cable that doesn’t allow data transfer for your travels too).
All of that said, you can indeed set up your phone to be a happy partner with your Windows PC and then mark your computer as “trusted” so on subsequent connections it just shows up. Just like your brother! It’s a bit tricky the first time, though, so let’s go through the steps…
ENABLE ANDROID DEVELOPER MODE
The tricky part is that your Pixel Android phone has to probably be switched into Developer mode. To start out, simply plug your phone into your computer, then on the phone search for “USB Pref” in the Settings app.
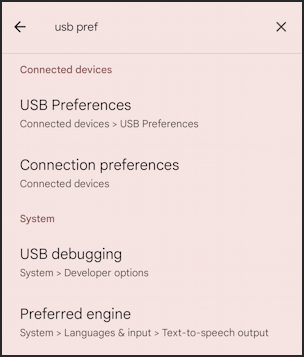
If you see “USB debugging”, you’re in luck; your phone’s already in Developer Mode. You can skip the next two steps and go straight to “USB Preferences”. If not, go back to the main Settings screen and swipe down to “About Phone”, then go to the very bottom of that screen to find the Build number. Tap on it. A few times. It will show:
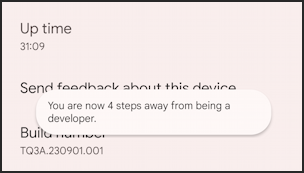
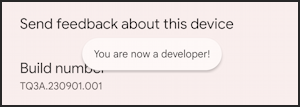
Keep tapping. It takes 8 taps to enable developer mode and it will probably ask for your PIN or otherwise verify that you’re allowed to make this change to your phone:
Once it’s enabled, do that “USB Pref” search again and you should see the results above. Tap on “USB Preferences” and you’ll see this:

Be thoughtful about what you change here: I strongly recommend that you never choose “USB controlled by Connected device“. For a charging only connection, the default “No data transfer” is perfect, but for your own Windows PC, choose “File transfer/ Android Auto“. Once you do that, since the phone’s already plugged in, you should immediately see the following on your PC…
EXPLORING YOUR ANDROID FILE SYSTEM
Once you switch to File transfer / Android Auto” the following notification should pop-up on your Windows Desktop:

Tap on it and you’ll get a bunch of possible actions you can take:
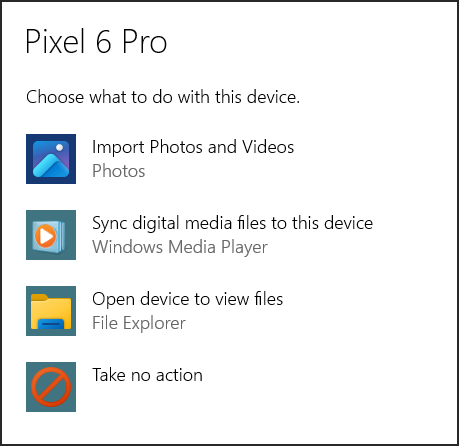
If you want, you can choose one of the first two options and let the slick Windows Photos app automatically manage all your photos and video content and/or Windows Media Player work with other media files (music, podcasts, audiobooks). Me? I like to just get into the file system itself, so I always choose “Open device to view files“.
It drops me into the File Explorer:
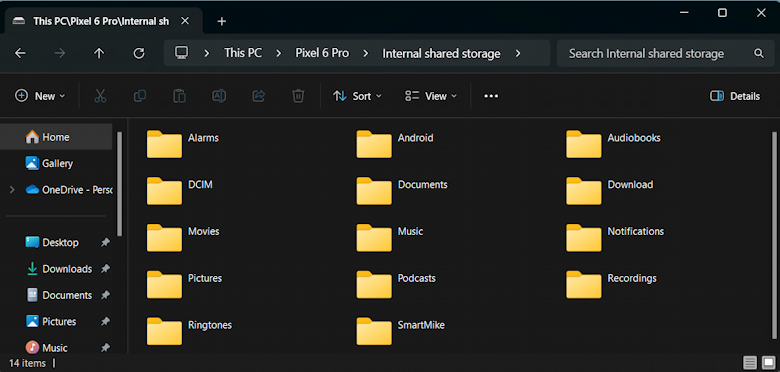
Most of these are self-explanatory, but where are photographs? Turns out that they are in the obscurely named folder “DCIM” (“Digital Camera Images”). Open that, open its subfolder, and you’ll be able to see every photo and video stored on your phone!
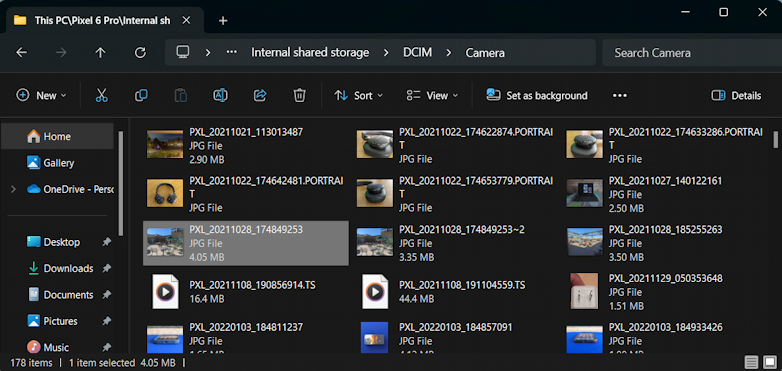
They are cryptically named but you can see the thumbnails. The names embed the date and time from when the photo was taken or video was captured but hopefully just browsing with big icons helps you pick and choose your favorite.
A double click and it should open in Photos, ready to edit / print / share:
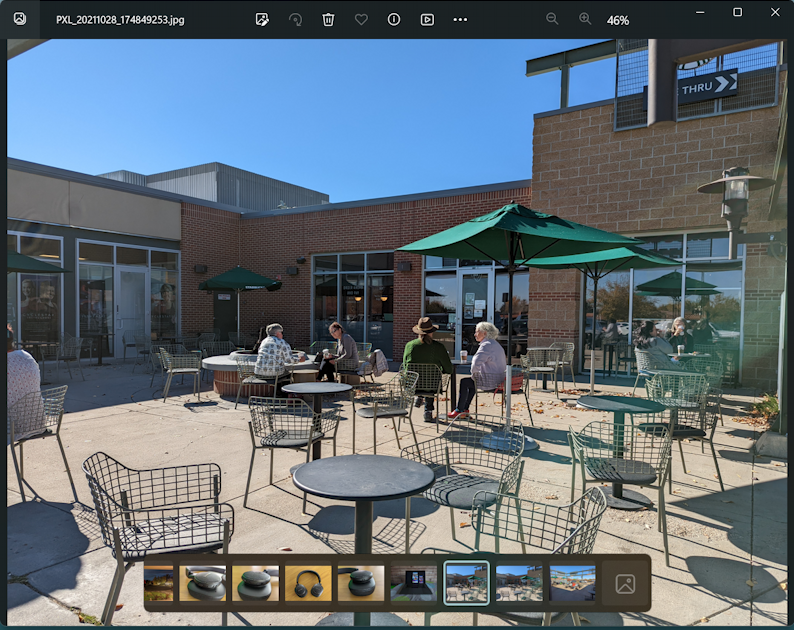
Notice that the navigational bar along the bottom shows thumbnails for all of the photos on your device in date/time order too. Just remember if you want to save the photo on your PC you’ll have to import it; just viewing it isn’t sufficient.
That should get you going with a better connection between your Android phone and your Windows PC. Good luck!
Pro Tip: I’ve been writing about Windows since the beginning. While you’re here, please check out my extensive Windows help area for hundreds of other useful tutorials and how-to articles. Thanks!
I am far from someone who should be giving advice BUT…I just take a pix with my Samsung and email it to myself. Done.
That’s the modern sneakernet solution and yes, it works for individual pics, no question!