
I’ve been running the Brave Web browser and really like it, but I hit a snag: My autofill information has the wrong address and I don’t know how to fix it. Can you advise?
While every browser developer says they focus on privacy, Brave has staked its claim on being truly focused on your data privacy with its built-in ad blocker and easy notification of tracking cookies from sites, etc. It’s definitely good to have options and choices! Like all browsers, there are many features also included to make your daily Web experience easier and more streamlined. Top on the list is autofill, predicated on the idea that you should only have to fill in a specific information field once, on one page.
The problem is, if your autofill information is wrong, it can be quite frustrating to have to either skip autofill entirely, or to be stuck fixing your street name, zip code, or phone number on every darn Web site that prompts for that information! Fortunately, you can edit what’s saved and even delete it if you want to just start over…
FINDING BRAVE BROWSER’S ADDITIONAL SETTINGS
The challenge is that you have to get to the Additional Settings in Brave. Doable, but it’s a bit of a quest. Start by clicking on the “hamburger” (three horizontal lines) icon on the top right of the Browser, which brings up a long menu of options including the following:
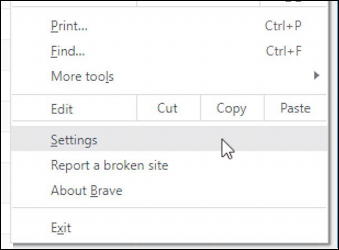
As shown, choose “Settings” from this menu. You’ll then have a new tab open up, which has plenty of things to explore, from the tabs along the top to the many options along the left side…
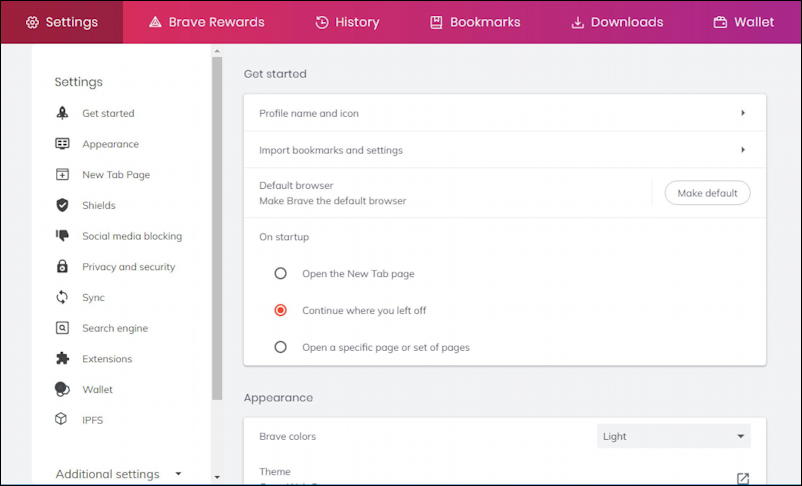
None of them are what you want, however! This is where people get confused, I expect. Instead, you want to find and click on “Additional settings” on the lower left. You might have to scroll to reveal it. When you do, more settings appear in that same menu on the left side:
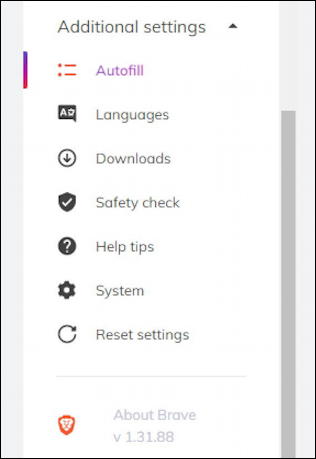
As highlighted with the funky color bar, choose “Autofill“.
HOW TO EDIT YOUR AUTOFILL SETTINGS IN BRAVE
Now you’re in the right place. On the right side, once you click on “Autofill”, the following appears:
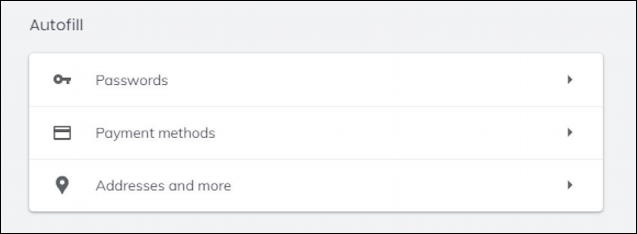
Let’s start with Payment methods, because it’s a chance for you to ask yourself do you really want your browser storing your credit card payment information? Click on “Payment methods” to find this information:
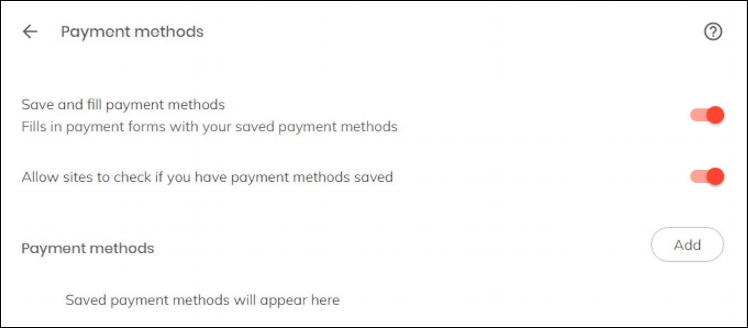
To be candid, the one that most gives me pause is whether the browser should allow Web sites to check whether you have any payment methods saved or not. For a browser focused on privacy, it’s a surprise that defaults to ON, somehow. You can enable or disable these features as desired.
Ready to fix that bad address? Go back and click on “Addresses and more” instead.
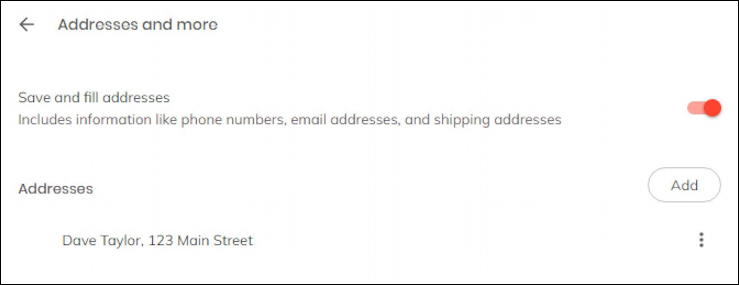
Hey! I don’t actually live at 123 Main Street. To either Edit or Delete this entry, click on the “•••” with the vertical orientation adjacent to the entry in question. I’ll choose “Edit” which produces a pop-up window with specific fields I can update:
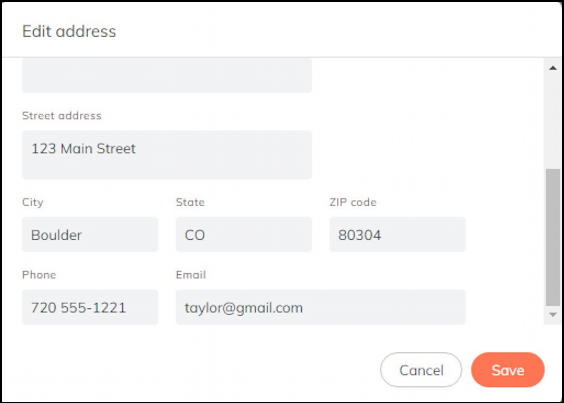
It’s easy to update the information. Just remember to click “Save” when you’re done. Fixed. But while we’re here…
HOW TO UPDATE CUSTOM SPELLING DICTIONARY IN BRAVE
While we’re in this area of Settings, go back to the Autofill settings and look for “Languages”. It’ll show your current language or languages if you have more than one set up:
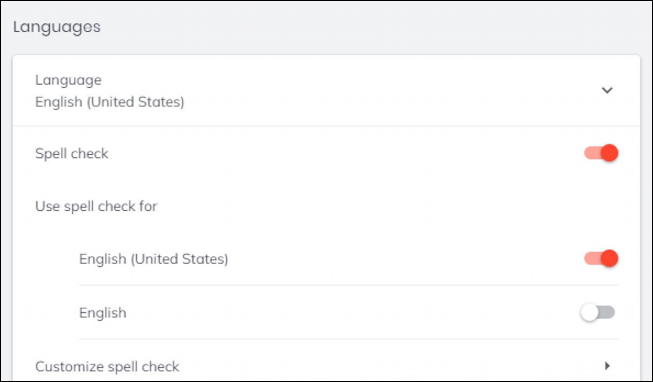
What you seek is again at the very bottom: “Customize spell check“. Click on that and you can see your current additions to the default spelling dictionary:
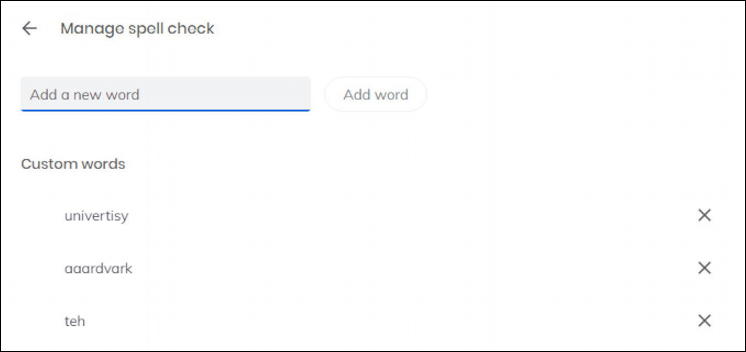
Ah, these are bad: If I type in one of the above, I don’t want it ignored, I want it flagged as a spelling mistake! Easily remedied by clicking on the adjoining “x”. File that in your “good to know” folder!
Pro Tip: I’ve been writing about Windows since the beginning. While you’re here, please check out my extensive Windows help area for hundreds of other useful tutorials and how-to articles, along with my computer basics help area too. Thanks!
So where do I edit other info boxes not listed in the settings? For example: I upload to Rumble and the tags box has a list of things I have entered over the year. I want to edit and delete those.