I get a lot of contracts and forms via email and to sign them I print them from my PC, sign, scan and email the resultant PDF image. Clumsy. Is there a way I can sign PDF forms and documents without printing them?
If you think about it, your signature is just another sequence of bits so it seems like it should be really easy to scan or sign on your computer and then use that digital version of your signature to “sign” documents and letters. And it turns out that it is, whether you’re on a Windows computer or a Mac. On the Mac side, MacOS X includes Preview and it’s pretty darn easy to add your signature to Preview. On the Windows side, the easiest solution is to download Adobe Reader and use that for your PDF files. Fortunately it’s a free download and Adobe did invent the PDF format itself, so it’s a pretty decent piece of software 🙂
Start here: Download Adobe Reader for your Windows computer.
Now let’s look at the steps required to add your signature. The first step doesn’t even involve the computer, actually. You’ll want to start by getting a sheet of white paper and a dark pen, then write your signature nice and big. Here’s my John Doe, to show you what I mean:

Pretty simple, really. You’ll want to take a photo of this signature sample – perhaps with your smartphone – then crop it so that it’s just the signature and nothing else. If you can pump up the contrast and desaturate it you’ll have better results too: You’ll want a high contrast photo when we get to that point in the process. Save it on your PC as ‘sample-signature.jpeg’ or similar.
Now launch Adobe Reader with a PDF document that requires a signature. An example demo is to use an IRS W-9 form, a fillable PDF form that’s free to download from the Internal Revenue Service web site. It looks like this in Reader:

Everything in light blue is a fillable form entry. Easy. The lower part where it says “Certification”, however, requires a signature and that’s where we’ll focus our attention, so I’ll scroll down to that portion.
To start, click or tap on the “Fill & Sign” option on the right side. The edges change and a new toolbar appears along the top, as highlighted in the below capture:

See that “Sign” link top and center? It’s subtle, but that’s what you want to proceed. Click or tap on it and a small menu appears:
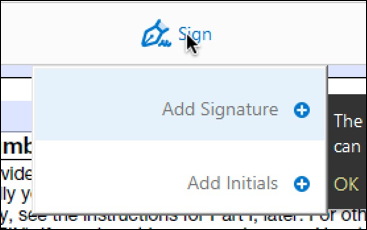
Choose the “Add Signature” option and it’ll offer you the chance to type in your name as a signature:
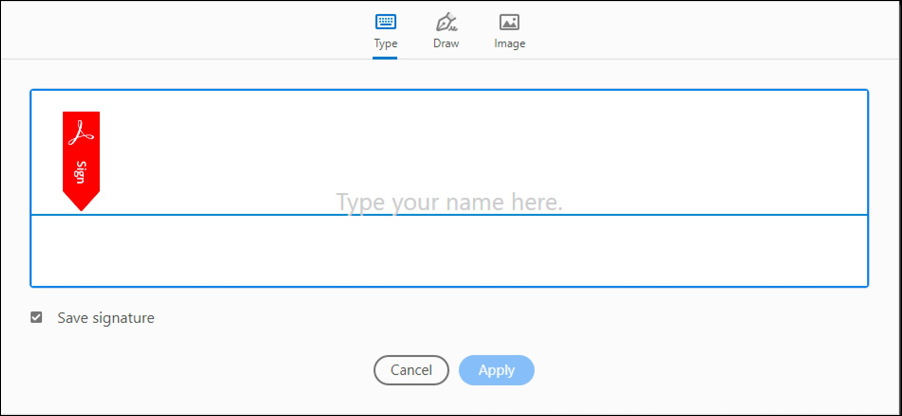
You can do that and just type in your name, but that’s not going to look like you printed and signed it, for sure. You can try a draw-on-image signature if you have a steady mouse hand or want to try your luck with a touchpad or touch screen, but… Since you already created an image with your signature sample, click on “Image” on the top of this window instead.
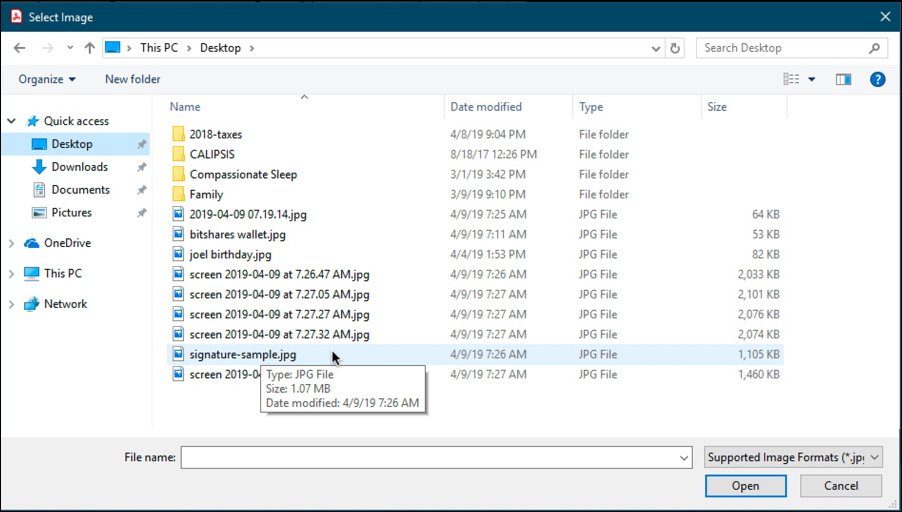
You’ll instantly be taken to a File Open window where you can select that previously saved photo:
Here’s what I ended up with as I went through this process:
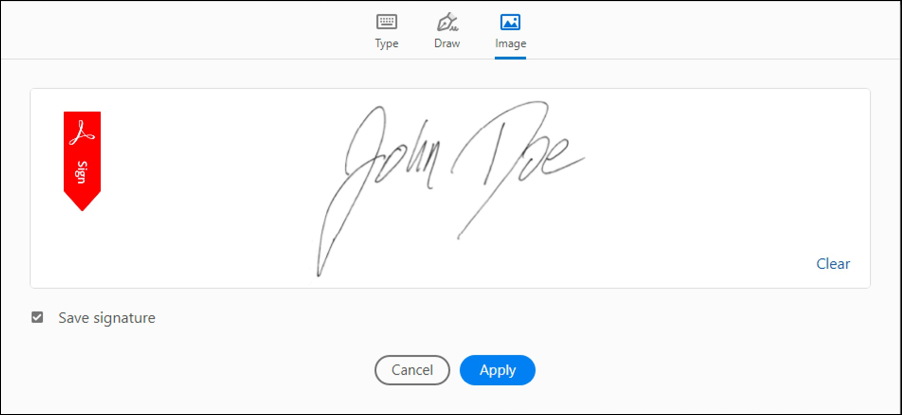
Don’t worry about it not being “on the line” because it’s going to end up a semi-transparent graphic you’ll be able to move around to position it on the baseline in the form. This one is a bit faint so it might be worth creating a heavier signature, but we can proceed with this for the demo!
Choose it by clicking or tapping on “Apply” and *POOF* you’ll have a digitized signature ready to add and move around on your document:
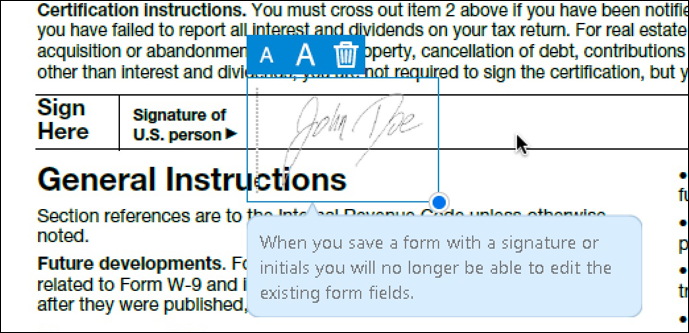
You can see what I mean about it being a bit faint, yes? Nonetheless, mission accomplished: You can click and drag to move it into the correct spot, then use the “A” and “A” buttons to make it larger or smaller to be an appropriate size for your document. Or, for that matter, you can click and drag the handle on the lower right of the bounding box to resize it even faster!
That’s it. Save the document, open it up again and your signature is now part of the PDF. Surprisingly easy!
Pro Tip: I’ve been writing about Windows since wayyyy before Win10. Please check out some of my Windows help here on the site while you’re in the digital neighborhood! 🙂
