
I’ve seen various screenshots of a new Windows 10 search tool that has a floating input bar on your screen. It’s part of PowerToys, and I want it! How can I install and use PowerToys Run Launcher?
While both MacOS X and Linux have had an app launcher shortcut for a long time, Windows has insisted that you use the search feature that’s stuck on the TaskBar at the bottom of your screen. As a result, PC people tend to have lots and lots of shortcuts on their desktop which leads to a rather cluttered user experience. This is just been the nature of Windows compared to the other operating systems, but no more! The PowerToys set of utilities for Windows 10 now includes PowerToys Run which is essentially an open source copy of the Mac Spotlight utility. And it’s glorious!
Once you set your keyboard shortcut, it’s super easy to pop up that toolbar and type in whatever you want, whether it’s a program name, a math equation, a word to define and more. In fact, as an open source utility, the expectation is that as PowerToys Run gets more popular, there will be a richer and richer set of options you can access directly from that little floating box. Let me entice you with this example:

I just start typing in ‘solitai’ and it finds matching programs and offers up the two choices, either of which is tappable or clickable to launch. How’s that for easy?
INSTALLING POWERTOYS RUN
To get there, however, you have to do the installation, and that starts with the PowerToys code repository on a site called GitHub. Go here to find it: github.com/microsoft/PowerToys/releases. GitHub is designed for developers, so it’s a bit confusing to figure out how to proceed. Here’s what you’ll see:

What you want to click on is the “.msi” installer package, which is listed near the bottom (as highlighted). Right now it’s at beta version o.18.1 but expect it to change versions fairly quickly as developers keep improving it.
Note: This is a set of beta utilities from a group of third party developers that are affiliated with Microsoft, but this is not official Microsoft Windows code, so if you’re not comfortable with that, wait a few months for it to (hopefully) be integrated into the main Windows system.
Ready to proceed? Click or tap on PowerToysSetup-version-x64.msi…
Once it’s downloaded you’ll probably need to open up the MSI file:

Once you do it will open up the Setup Wizard for this particular new program, and also warn you that it’s still a “Preview” edition, as you can see:

Proceed by clicking on “Next” and proceeding with the install.
After a few clicks, you’ll get to this point in Windows:

It’s smart to be leery any time you see this window pop up because it’s a program requesting permission to monkey with your OS itself, but in this case, that’s how PowerToys works, so to install you’ll need to click “Yes” to grant permission.
Then another installer appears!

This one zips along pretty quickly, installing what it needs from the .NET library along with its own files.
Once it’s done there are no windows, no new desktop shortcuts. In fact, you’ll wonder if anything’s changed at all. The difference is subtle! So you can use the old search to find it…

But the eagle-eyed among you might notice a new icon on the lower right of the Taskbar too:
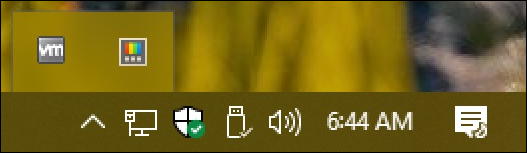
See it? That tiny little rainbow TV console? Mine doesn’t even show up on the main Taskbar but in the secondary view! Easily fixed, but it’s easy to imagine people installing Windows PowerToys and then scratching their heads to find out where it’s hidden.
Either way, fire up the PowerToys App to get to PowerToys Settings and you’ll see what’s now installed:
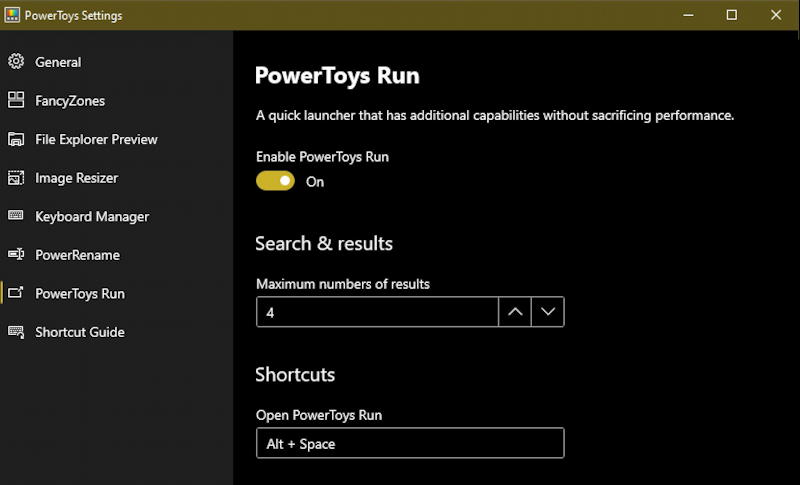
Look down the left side to see what’s included in PowerToys at this point: FancyZones, File Explorer Preview, Image Resizer, Keyboard Manager, PowerRename, PowerToys Run (the launcher we want to utilize) and a handy on-screen Shortcut Guide. You can explore all the others to see how they work – and they’re darn cool and useful both! – but for now, click on “PowerToys Run” to see the settings for the launcher. Most importantly, to see the Open shortcut.
As shown above, my default is the ALT key plus SPACE (interestingly the Mac shortcut for bringing up Spotlight is Command + Space).
Press ALT+SPACE to fire up this new utility!

It’s literally just a floating text box. But start typing and the magic is revealed:

What a great way to access programs on your PC! This can prove to be a game changer if it’s expanded properly to allow you to type in file names as well as commands, but you saw earlier that typing in just the first few letters of ‘solitaire’ also gave you a super easy way to fire up your favorite game.
What about a simple equation?

Seriously, how cool is that? I can’t wait to keep experimenting and exploring all the PowerToys utilities, but PowerToys Run Launcher is a big improvement to the Windows 10 user experience in my book and worthwhile all by itself.
If you do install it and use it on your PC, leave a comment with your experience and some of your favorite discoveries about its capabilities as it’s developed!
Pro Tip: I’ve been writing about Windows since the very beginning. Please check out my quite extensive Windows help area for lots and lots of useful tutorials and guides while you’re here. Thanks!
Hey Dave – Great article, like your writing style very much. However, I hope you don’t mind if I make one suggestion: Some of the images are too small to read properly, perhaps some kind of click and enlarge option might be helpful?
Cheers… Jim
Thanks for that feedback, Jim. I wrestle with image size on my pages and try to make them as large as possible without being too annoying. My goal is to have the text in the image match the size of the text of the article. If it’s a full-screen image, however, there’s no way for it not to be reduced for overall legibility. Having them clickable to pop up a window with larger versions of the images is a great idea, though. I’ll see if I can figure out how to implement that!