I used to have a PC but moved over to Mac earlier this year. It’s going well so far, but I find the Microsoft Office suite a bit baffling on Mac. In particular, how do I get to Find and Replace in Microsoft Word? It’s not on any of the ribbons…
Microsoft has been developing Word and the rest of the Office suite for quite a while, actually. Did you know that it was first called Multi-Word Tool and was initially released in 1983? That’s almost 40 years ago at this point, during which time it’s grown quite a bit and gained about a half-million features and capabilities. As it’s increased in sophistication, however, it’s also gained in complexity, so it’s no wonder you’re having a hard time finding what would seem to be a pretty core feature for the program.
I also have to say that switching operating systems is a big deal too, so props to you for figuring it all out with your migration from Windows to MacOS. While “windowing” is similar across the two, there are definite differences in shortcuts, keystrokes, and even how the mouse or trackpad works. All manageable if you have a bit of patience to figure it all out.
Now, on to Word. It turns out that since you’re using the Mac version of Microsoft Word, there are two completely different versions of Find and Replace available. It’s confusing, but I believe the logic is that the typical Windows-type interface is accessible, but if you’re already a Mac fanatic, you can access the alternative – more powerful! – search and replace feature. Let’s check it out!
STANDARD FIND AND REPLACE IN WORD
Launch Microsoft Word on your Mac system and it’s a big, bright window with the “ribbon” toolbar along the top that changes depending on what kind of task you seek to accomplish:
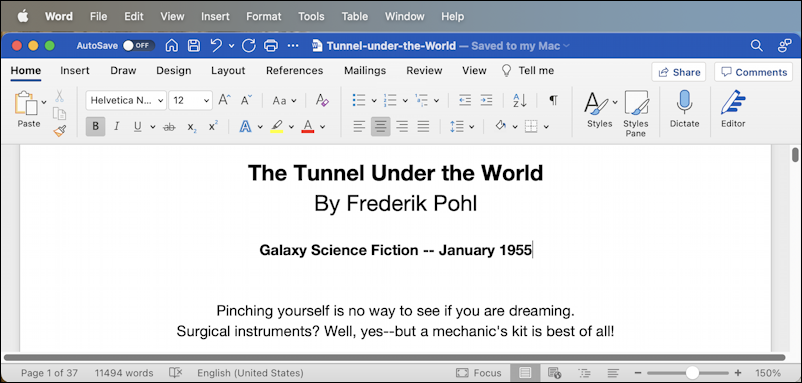
In this instance, I’m doing some formatting on the classic Frederik Pohl sci-fi short story The Tunnel Under the World, as originally published in Galaxy Science Fiction back in 1955. It’s free to download and read through Project Gutenberg, if you’re intrigued.
A glance along the top offers the following main ribbons: Home, Insert, Draw, Design, Layout, References, Mailings, Review, View, Tell me. So where the heck is Find and Replace? You can try perusing each and every ribbon, but it never shows up in any obvious place, leaving many users to scratch their heads in confusion.
But this is a Windows interface ported to the Mac so Microsoft does something that no native Mac developer would do: It utilizes the title bar for buttons and capabilities, including, you guessed it, a find function. Look closely on the very top right and you’ll see the magnifying lens along the top blue titlebar. It’s functional! Click on it…

Not only is this a functional search, but if you click on the magnifying lens icon a second time, it pops up a tiny menu:

There’s our Find and Replace! Choose “Replace…” and the entire screen changes rather dramatically:
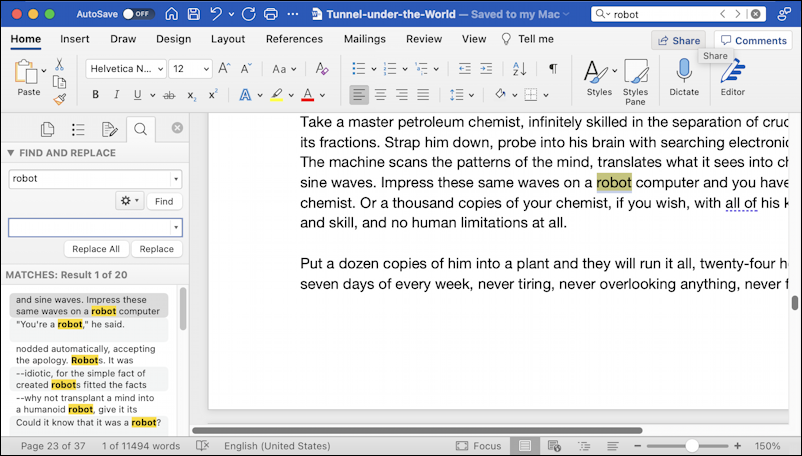
The document is automatically scrolled down to the first occurrence of the pattern – in this case “robot” – and the left side reveals the FIND AND REPLACE pane, which has lots of useful info and options.
Click on the gear icon adjacent to the small ‘Find’ button and you’ll find that, as is common with much of Microsoft Office, the Find and Replace feature has a lot of power and capabilities:
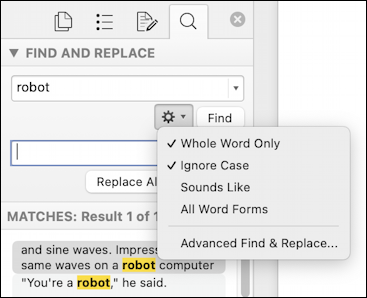
The “Sounds Like” is particularly interesting if you have misspellings in a document; you can search phonetically and replace a variety of misspellings with a single correctly spelled word or phrase. In that case, I’d step through using the “Replace” button, which is really “Replace and Find Next” from a functionality perspective.
That’s the standard Microsoft Word way to find and replace text, something you can use if you go back to a PC and are using Word for Windows too. But you’re on a Mac, so there’s a better way with an even more powerful Advanced feature.
ADVANCED MAC FIND AND REPLACE IN WORD
What Mac users often forget when they’re in the seemingly self-contained world of Microsoft’s Office Suite of programs is that they also utilize the full MacOS menu system tool, all accessible from the top menubar. Indeed, look at what you can find on the “Edit” menu:
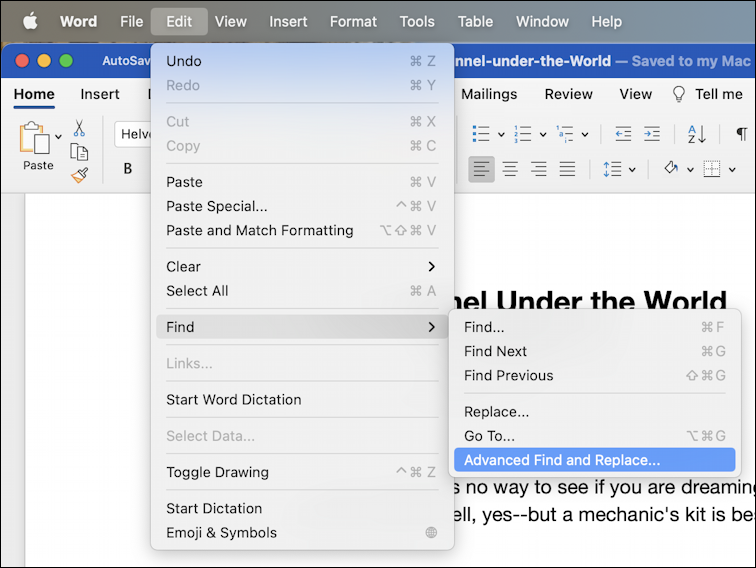
A much more elegant way to work with Find and the Replace feature both, including an obvious way to choose “Advanced Find and Replace…“. Even better, when you choose that, you find it’s a typical Mac-style window:
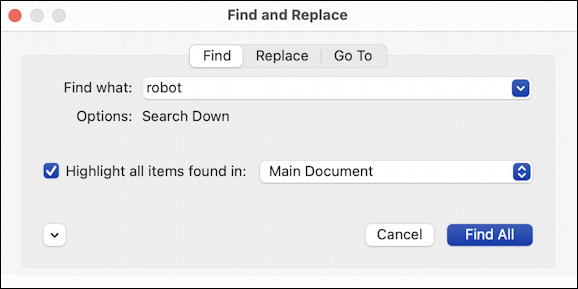
Maybe I’m just too deeply rooted in the Mac design mentality, but this seems a lot easier to understand than the built-in Microsoft Word find and replace feature. Click on the “Replace” tab along the top and it’s even better:
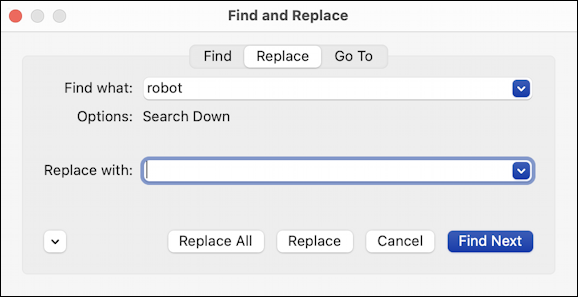
What’s not obvious here, however, is that if you click on that tiny downward “v” button on the lower left of this window that all sorts of advanced features and options are accessible:
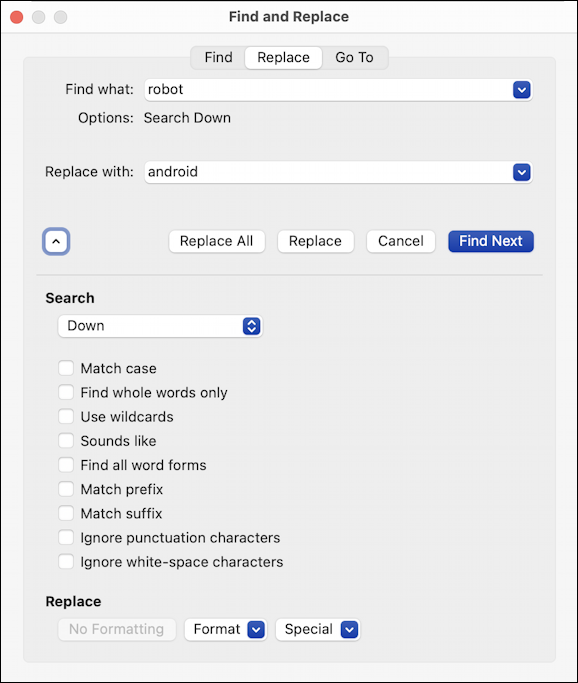
Notice you can even replace a word or phrase with the same word or phrase but add or remove formatting with this interface to the Find and Replace tool. Why these features aren’t accessible from the Microsoft Word ribbon interface is a bit of a puzzle, but at least you now know the two ways you can solve the find and replace challenges you face. Good luck!
Pro Tip: I’ve been using and writing about Microsoft Office Suite for many years. Please check out my Office 365 help pages for lots of helpful tutorials and user guides! Thanks.

Given the “un-Maclike” location of Find, and the silliness of needing ANOTHER menu choice just to access Replace, this keystroke is very handy:
hit shift-cmd-H to open the find & replace pane.