
I borrowed a friend’s Pixel phone to take a photo of them and saw a really cool feature: A level indicator on the Camera preview. Since I tend to take photos that are a few degrees off level, this would be quite helpful. How can I enable it on my own Android phone?
Lots of people take photos where the image isn’t perfectly level; you can see that when you look at the horizon line in the background. The most amusing is when it’s on water and the horizon isn’t level. I always expect the water to flow towards the lower side! Soon enough this will all be fixed by yet another AI-powered feature in the Android Camera app (there are already quite a few) but while we wait for the app to auto-adjust photos taken with a strange angle or skew, we humans are stuck having to do it ourselves.
Fortunately, as you have seen, there’s actually a way to have a level indicator show up in the preview screen of the Android Camera app, if you enable it. The same feature also offers a grid to help you work with what’s known in photography as the rule of thirds. It basically means that instead of always putting your main subject in the center, sometimes try to have them 1/3 from the left or right. It can lead to far more attractive compositions, and is a pro photographer trick!
ANDROID CAMERA WITH LEVEL INDICATOR
I’m sitting at a local Starbucks as I write this and when I go to take a quick photo of the baristas and the coffee bar, rather to my surprise the camera is not perfectly perpendicular to the ground:
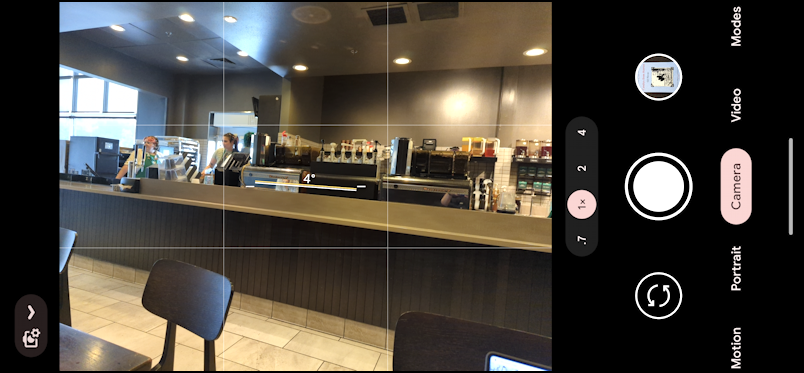
It’s a bit subtle but can you see the line in the middle of the composition with the 4º just above it? That shows that I’m 4 degrees off of level. It’s live, so if I slightly tilt the Pixel to the left, it’ll level out and the indicator will vanish. In this case, however, it’s not really a problem since there’s no overt horizon line. Notice also the four grid lines to help with composition. In fact, the barista who is visible is almost exactly at a “rule of thirds” location and you can see how it offers up a subsequent composition that emphasizes the prep area and counter.
HOW TO ENABLE FRAMING HINTS IN CAMERA
The feature that gives you this level indicator and grid is known as Framing Hints and I think it’s a great addition and one worth having enabled all the time. To access it, start by tapping on the tiny camera + gear icon the lower left (or top left if you’re in portrait mode). It only shows in vertical orientation, so you’ll probably have to flip your camera 90º.
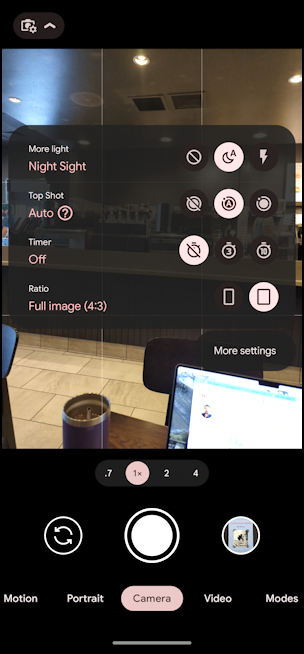
The four settings you can tweak at this point are Night Sight, Top Shot, Timer, and Ratio. All of these are terrific and worth exploring to learn how to take better photos with your Android phone. For now, however, tap on “More settings” just below the pop-up menu. This takes you to a plain white settings screen:
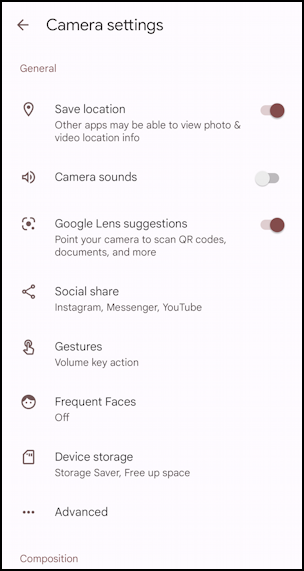
From a privacy perspective, the most important setting here to consider is Save location. While modern social media sites automatically remove this information from shared images, any photo you text someone or email someone might have very specific geolocation data included. Take a pic of your dog from your kitchen and everyone who gets a copy of that image could potentially identify your house address on a map with just a click!
Swipe up to see even more of these Camera settings…
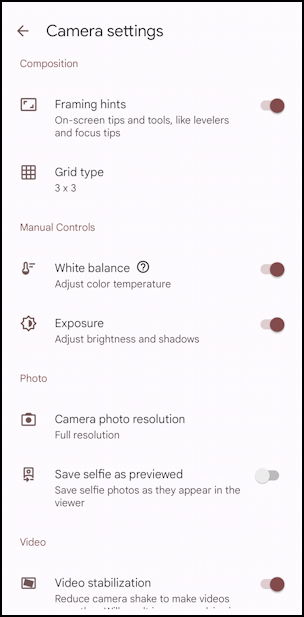
There’s that “Framing hints” feature. Enable it! You can also change the grid type if you would like more grid lines to help with composition, or less to avoid distractions when taking photographs. Most other settings are probably fine with their default values.
Before you go, however, scroll back up and tap on the “Advanced” link to see yet more settings:
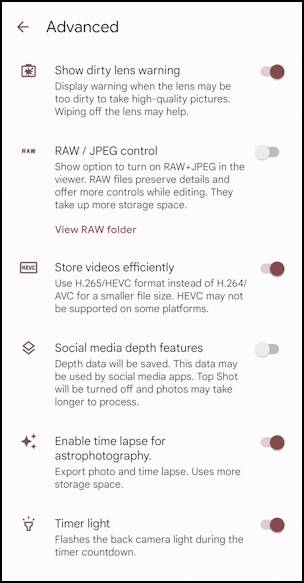
Agian, you probably don’t need to worry about these, but it’s good to know they exist in case you do want to disable some or enable RAW image format for more professional post-production editing and manipulation.
That’s it. Now, go back to your photos knowing you have a handy built-in level on screen!
Power Tip: I’ve been writing about Android for many years and have an extensive Android help library here. Please check it out while you’re visiting. Thanks!