
Hi Dave. Just updated to MacOS 11 “Big Sur” and liking it, but the colors are a bit jarring for my vision. I have what’s known as tritanopia, which means that instead of seeing all colors, I have color vision deficiency (please don’t call it ‘color blind’) and can’t easily differentiate between blue and yellow. Is there a way in Big Sur for me to compensate for that?
The way our eyes differentiate and interpret colors varies from person to person and we’re only recently realizing that there are a variety of color differences that we perceive differently. The most common of these color vision deficiencies are protanopia (unable to see red and green), deuteranopia (lack of sensitivity to greens) and tritanopia (blue/yellow confusion). Fortunately modern computer systems have all sorts of amazing accessibility features to automatically compensate for any of these with just a click of a button.
The Mac has always been on the forefront of these accessibility solutions and the latest release of MacOS 11 Big Sur is no different. In fact, there are features in the accessibility area that are worth enabling even if you have no issues with your vision or other abilities! Having found that the menu bar in Big Sur is too translucent for my tastes, for example, I have enabled “reduce transparency” to make it easier to read (though I still haven’t figured out how to get the clock’s time display to be the right color yet).
Let’s jump in and make some changes to see how it works for you. All of this is located in the Accessibility area of System Preferences…

Once you click on that you’ll find that there are a world of settings and adjustments you can make to your MacOS experience to have the system better fit your preferences and abilities!

As the overview explains, “your Mac can be customized to support your vision, hearing, physical motor, and learning & literacy requirements.” Lots of support for varying abilities, which is great.
To adjust for a color vision deficiency, click on “Display” on the left side, then along the top of that pane choose “Color Filters” from the options. Here’s what you’ll see:
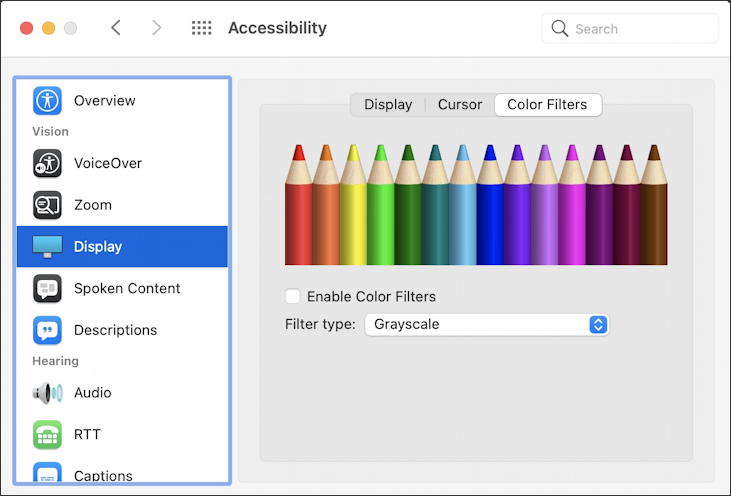
It’s interesting that they choose to display a spectrum of colored pencils, but it is an easy way to see if the color filtering is correctly compensating for your deficiency: Can you differentiate all the colors shown?
To enable accessibility color filtering, check the box “Enable Color Filters“. It’ll immediately change the display to being greyscale, which might work well for some users, but for most it’s a bit of a shock!
No worries, though, click on “Grayscale” and you’ll find it’s a pop-up menu with the more common color vision deficiencies listed:
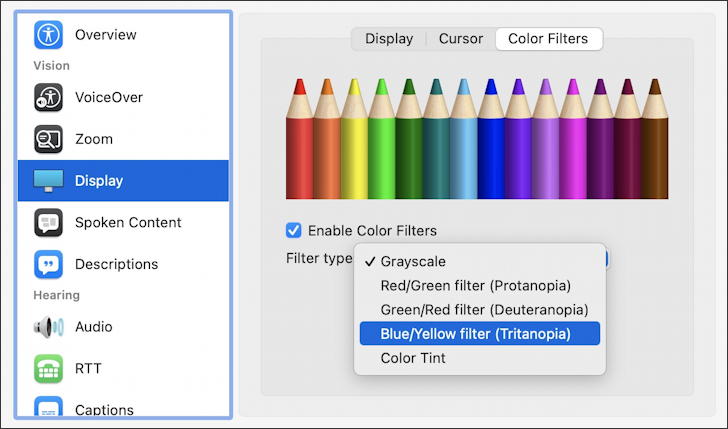
Choose “Blue/Yellow filter (Tritanopia)” from the list and see how it all looks. I can’t simulate it here because it isn’t changing the colors on Web pages, photos or the desktop, it’s filtering those colors in your OS to compensate.
Note that once you’ve chosen the matching filter, either Protanopia, Deuteranopia, Tritanopia or the more generic Color Tint, you will have a slider that lets you tweak and adjust intensity too:
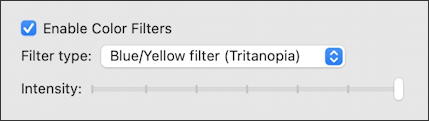
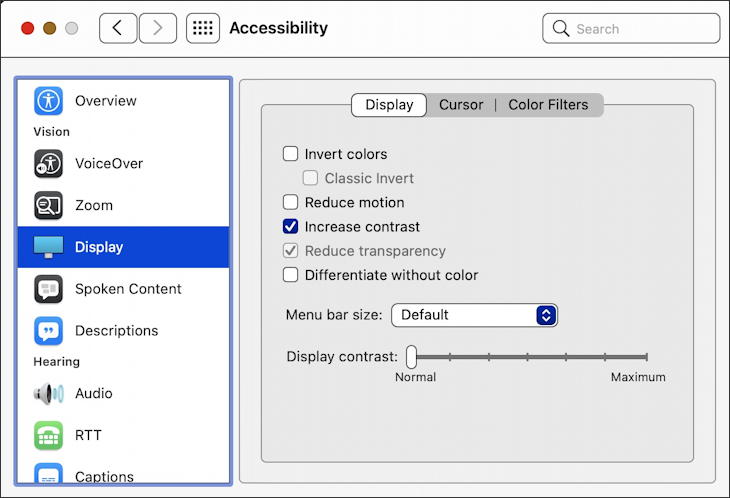
Try different settings to get the best match for your own vision. Now while we’re here, click on the “Display” option on the top tabs of this window (the tabs show “Display / Cursor / Color Filters” along the top).
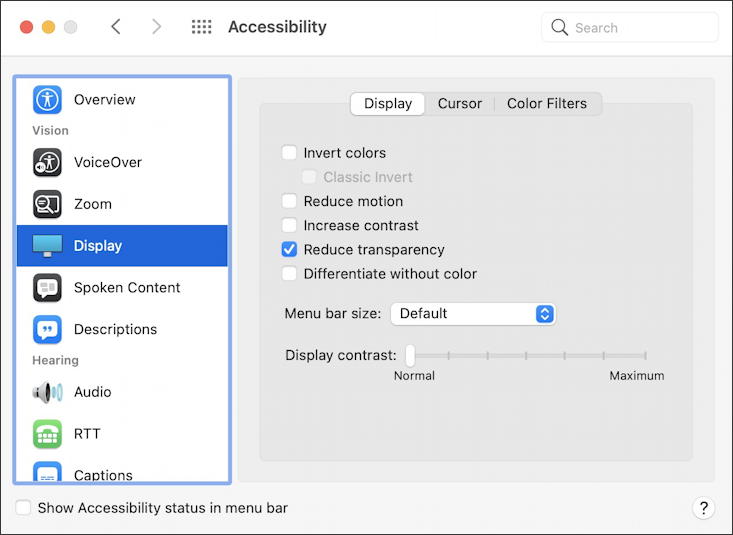
There are more tweaks and changes you can make here. Notice that I have enabled “Reduce transparency” as I said earlier. It helps ease back on the aggressive translucence of the menu bar in Big Sur, which is a bit more than is useful from a usability perspective (at least for my own eyesight). Also note on the lower left corner the checkbox “Show Accessibility status in menu bar“. That can be useful to choose if you share your Mac with other users who don’t have tritanopia: It’ll let everyone switch back and forth with ease.
One more interesting visual setting while we’re here: Check “Increase contrast‘ and watch how the edges of all the different grey boxes in windows suddenly pop:
For many users, that might be a great improvement over the oh-so-subtle shades of grey that characterize the Big Sur user experience. It’s also just an interesting variation on the theme that I like quite a bit. Sort of retro!
Anyway, that should let you fine tune the presentation and color of graphics and other images on your own Mac system running MacOS 11 Big Sur. There’s lots more you can do with Accessibility to adjust your interface and user experience too. Check out the Apple Accessibility Overview for more ideas and capabilities.
Pro Tip: I’ve been writing about the Mac system since MacOS 9. A looooong time ago. Please do check out my quite extensive Mac help library for lots of additional tutorial content while you’re visiting. Thanks!
First time I have had to make use of some of the accessibility features. I also like the reduced transparency and the increased contrast option. I use readers for my older eyes and just think Apple MacOS developers but be all young people with perfect eyesight?
While I do like some of the design aspects of Big Sur I don’t like the White under a whiteish/grey text and toolbars. Everything sort of fades and you have to stare more intently at times. I don’t think it helps your eyes, and I have considered maybe just using dark mode. I think its even worse on a non Retina display such as my Viewsonic hooked to my 2018 Mac mini. Apple apparently thinks 1080p is the new 720p because with Catalina and now Big Sur and its lighter UI it’s unusable without Contrast improvements.