I email myself photos to get them from my Android phone to my Chromebook. Clumsy! Is there a way to plug the phone into the Chromebook and just copy them all at once?
Perhaps surprisingly, the answer is mostly yes, but the most challenging part has nothing to do with the Android to Chromebook connection and everything to do with ChromeOS not wanting you to have local copies of files. Since both ChromeOS and Android are developed by the same company – Google – it’s no surprise that they interoperate really well. It’s virtually (but not quite) plug-and-play, actually. Except for that copying bit.
First off, as with all tutorials of this nature, I recommend you ensure that both your Chromebook and your Android phone are running the very latest operating systems. It’s easy to update ’em: How to Update Your Chromebook and How to Update Your Android Phone will get you there quickly. Then you’ll need a wire that can plug into both devices. I’m using a Pixel phone and a Lenovo ThinkPad Chromebook, so both support USB-C. To start, plug your phone into your Chromebook.
CONFIGURE ANDROID TO ALLOW USB SHARING
Once you plug the device in, you’ll see… nothing. It doesn’t show up on your Chromebook nor are there any sharing apps that automatically launch. The only clue it’s working is that you should see your phone indicate that it’s charging through the connection.
We’ll have to start with the phone, so unlock it and swipe down from the top. In your Notifications, you’ll see this:

Tap once on this notification (the “V” indicates there’s more you can reveal, if you’re not familiar with the world of subtle Android user interface symbols). It now reveals a second line of information:
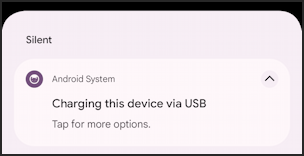
As it says, “Tap for more options” and you’ll jump into the Settings area with a screen of options specifically focused on that USB connection. Swipe down to reveal all the options:
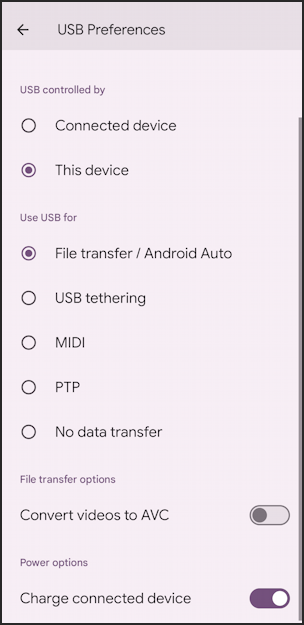
It’s worth noting that you should only ever change this when you are connected to a trustworthy device. If the wall charger you’re using at the airport invites you to change it, do not! If you just want to charge your device, there’s no reason in the world to allow file access.
With your own Chromebook things are pretty safe, so choose “File transfer / Android Auto“. For fun you can also enable “Charge connected device” if you want to chuckle over your little phone charging the battery on your Chromebook. The latter is definitely not particularly important for this task, however! 😃
NOW, ON YOUR CHROMEBOOK SCREEN
Suddenly your Chromebook will “see” the connected Android device and this message will appear:
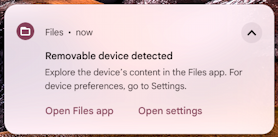
Your best bet is to tap or click on “Open Files app“. The Files app works great for this task and your phone will show up in just a moment or two:
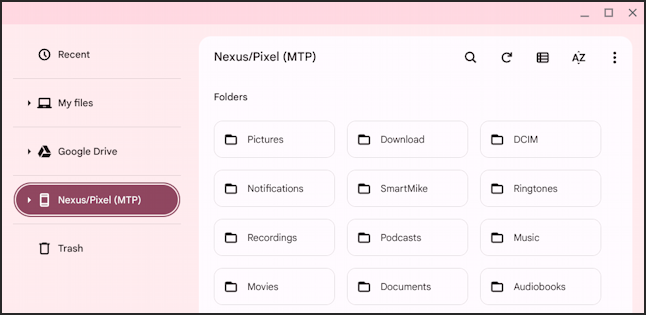
It really gives you access to everything on your Android device, which can be a bit daunting. You can ignore any folders you don’t understand (browsing to see what’s inside is safe. Removing files or adding new ones is risky and should be avoided unless you’re an Android expert). You might think the photos you’ve taken on your Android phone are in “Pictures” but click on it and you’ll soon realize that’s incorrect:
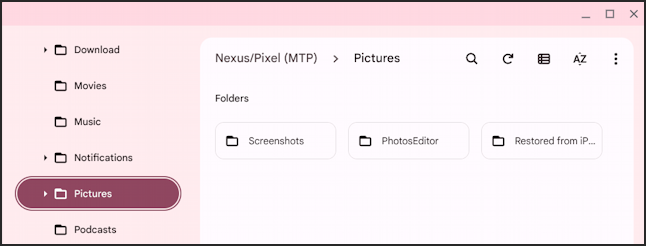
It shows the scratch folder for PhotosEditor and all of the screenshots you’ve taken on your device, but no actual photos. Confusing!
The secret is that your pictures are saved in the folder called “DCIM” (Digital Camera Image Media). Back up to the top of the Android file system and click on “DCIM” instead:
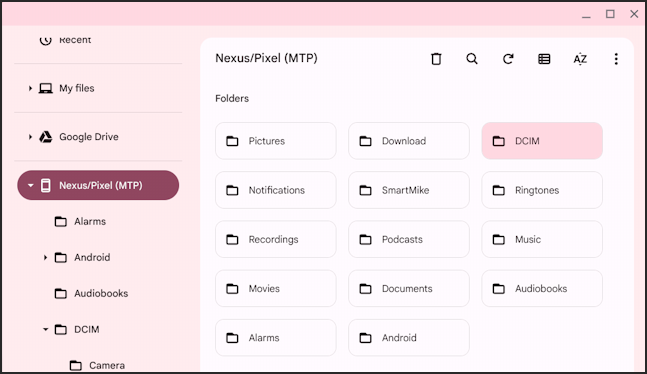
There’s one more level of subfolder here, so click again on “Camera” and, finally, you’ll see all your photos from your Android device:
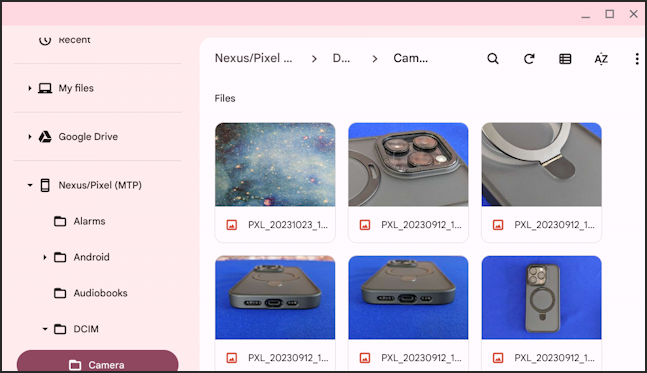
Here’s where ChromeOS is a bit annoying, though…
COPY PHOTOS FROM ANDROID TO CHROMEBOOK
Right-click on an image and you’ll see oodles of options, but none are “Save”:

My recommendation to save them onto your Chromebook is to open them up in Gallery or Photos, then Save As from that point. Or, since your device is connected, go into a program like Gmail and access them as needed in email you want to send to friends. Note you can also open up Google Photos and upload them all since your phone is just another device to ChromeOS. Dragging them onto your Desktop? It’s just not an option with ChromeOS.
That’s it. You’ll probably have to change your USB connection settings every time you plug your phone or tablet into your computer, but that’s a good thing and helps keep your device secure. Good luck!
Pro Tip: I’ve been writing about Android and ChromeOS since they were introduced and have accumulated a LOT of helpful tutorials. Please check out my Android Help Area and ChromeOS Help Area while you’re visiting. Thanks!
