The M-architecture that powers modern Mac systems, the M1, M2, M3, and M4, are based on an “ARM” design. This means that the default versions of most Linux distributions are not compatible with your Mac. You cannot run them in VMware Fusion or Parallels. So how do you proceed? Here’s the scoop…
It was a boon to all users when Apple migrated all of its hardware from an Intel-based architecture to the M-series lineup in late 2020. Except for one problem; software that required an Intel processor no longer worked. Four years later, Mac users still occasionally bump into the consequences of this significant change. Most apps are now developed for the architecture – four years is a long time! – but if you’re working with software that works on a lower level, it’s still an issue.
Years ago I wrote a tutorial on how to install Ubuntu Linux on a Mac through VMware Fusion, but that article’s now obsolete because virtual machines are a technology that the architectural change has impacted. M chips are based on what’s known as an ARM architecture, Advanced RISC Machine, RISC is also an acronym – Reduced Instruction Set Computer – so it’s pretty geeky!
The good news is that the Ubuntu Linux Desktop distribution is prebuilt for ARM architectures, making the basic download and install quite a bit easier. If you prefer a different Linux distribution, and there are dozens from which to choose, just look for the ARM version rather than the Intel or ‘amd64’ version.
DOWNLOAD THE CORRECT ARM ISO
The first step is to find the right disk image for your installation. Look for an “ISO” download and don’t be surprised if it’s a few gigabytes or larger. In the case of Ubuntu Linux, the Desktop version of the system (as opposed to the Server version) only has a daily build update available for ARM architectures. You can find it at https://cdimage.ubuntu.com/daily-live/current/ (or do a search for “ubuntu linux arm desktop iso”).
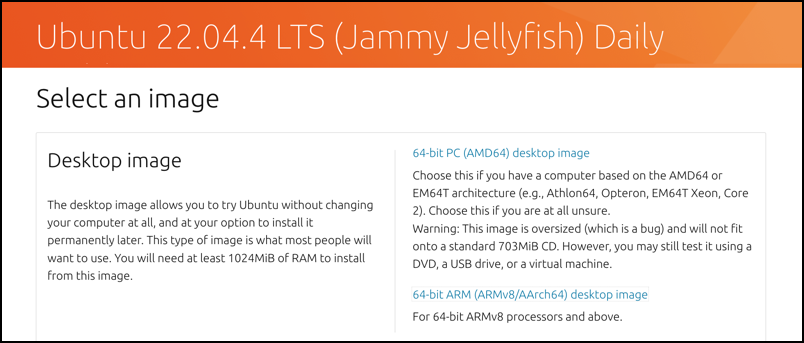
As I write this, Ubuntu is at version 22.04. Notice that there are two versions of the ARM download from which to choose. Which one should you use? Turns out that the Apple ARM architecture is based on the ARMv8.5-A instruction set architecture, so you’ll want the second build for best performance:

This is about a 2.3GB ISO download, so it might take a minute or two for it to complete. While that’s happening, launch VMware Fusion…
NEW INSTALL FROM ISO IN VMWARE FUSION
Once you have VMware Fusion running, choose File > New:
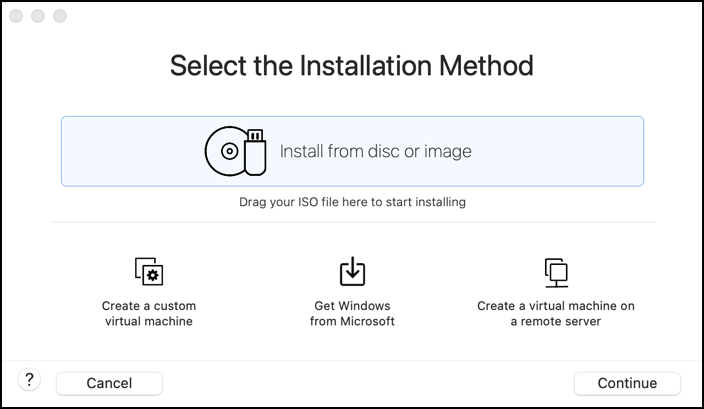
Once the ISO has been downloaded, drag it onto the light blue target area on the window. It’ll promptly display this:
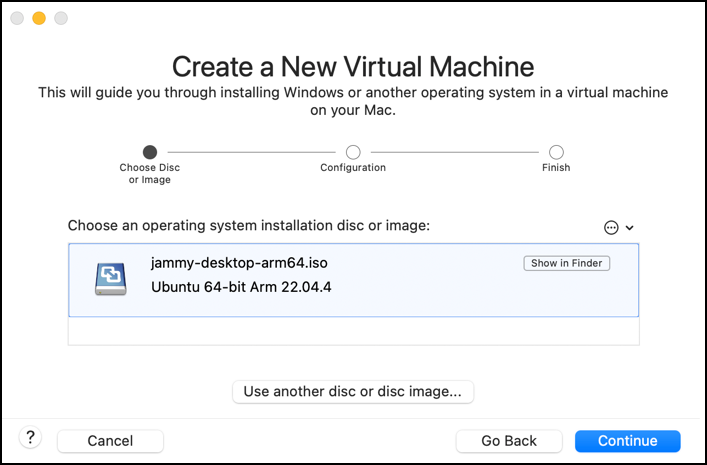
Your version of Ubuntu might be slightly different, but from this point, all you need to do is click on “Continue” to proceed. There are many points in the installation process where you can customize the install as desired, but you can also just accept the defaults. Eventually, you’ll see this:
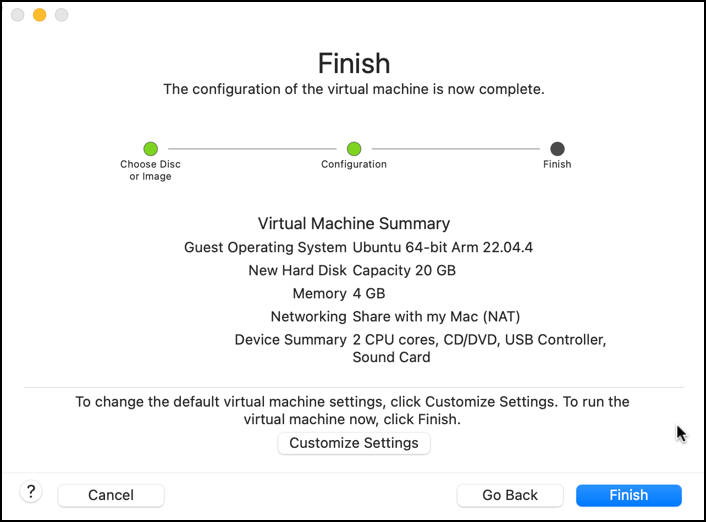
Looks good and while 4GB might seem like way too little RAM, this configuration will actually work fine for a Linux system. Click on “Finish”
UBUNTU LINUX INSTALL AND DESKTOP
A window will open that is the “display” of the virtual machine which will show lots of command line and text information as it tries to proceed. If it stalls, just press Return and it’ll continue. You’ll start in GRUB, the Grand Unified Bootloader:
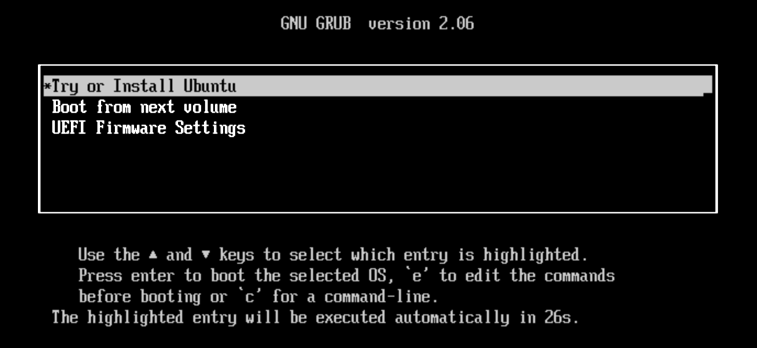
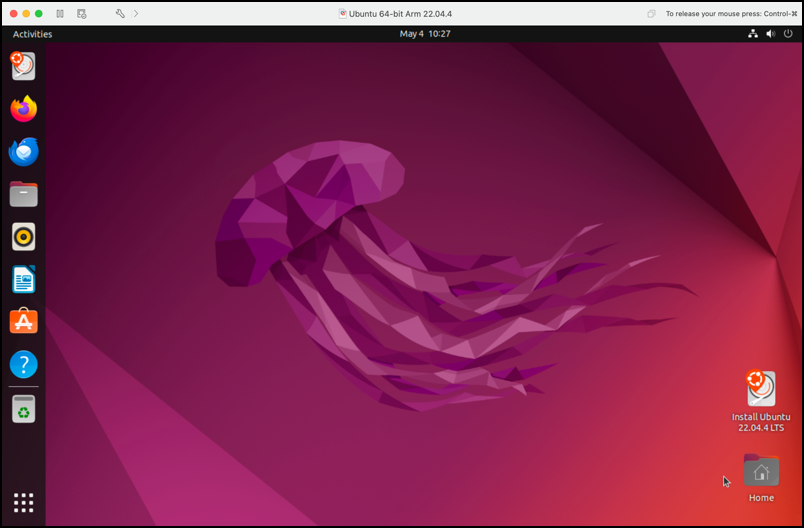
Choose “Try or Install Ubuntu” and after a surprisingly short process, you’ll find yourself within Ubuntu Linux Desktop, logged in and everything:
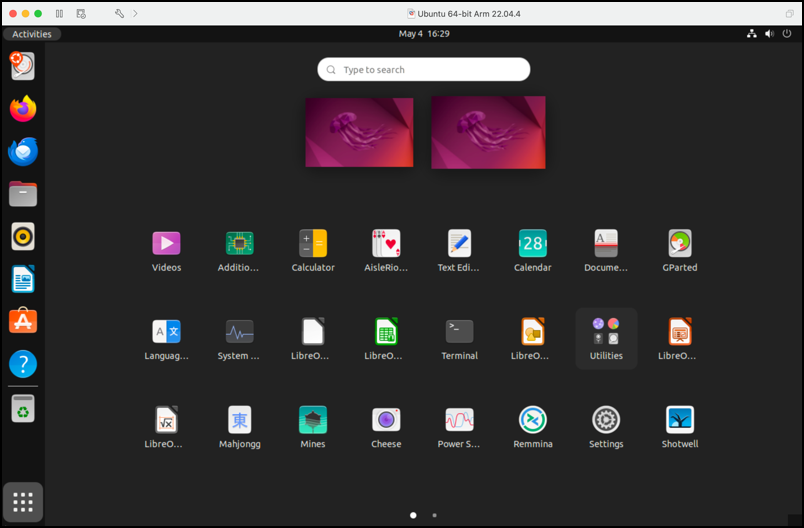
Not only is it ready to go, but if you click on the tiny 3×3 grid on the lower left, you’ll find that this daily build distribution also includes a number of pre-installed applications too:
That’s it. You’re ready to go. Have fun!
Pro Tip: I’ve been writing tutorials for both the Mac since it was first released and Linux since it had a single-digit version number. Please check out my extensive Mac help area and my Linux help area for lots and lots more useful content.

Thanks for this – as a relatively new user to the M2 Macs, it confused me for awhile before I read your article – many thanks for that pointer. Might be worth updating your article as I think Ubuntu/Canonical have changed their url – or removed the images – for Jammy.
There is a valid ARM image for Oracular Oriole at https://cdimage.ubuntu.com/daily-live/current/. I have just installed on M2 15in Macbook Air and it appears to work as expected although as I dont have the memory resources on the Air, its a little problematic.
Just got to figure out VMware tools now.
Updated my link. Thanks for the tip, glad the article’s helpful!