
The text and overall display on my Mac is often too small to read comfortably. I saw you wrote about how to use Magnifier on a Windows computer to have a zoom region. Is there something similar for a MacBook or iMac?
As the resolution of screens keeps going up and computer users age, the two are leading to a situation where what’s known as assistive technologies are proving critically important for a wide swatch of users. Apple’s always been on the forefront with this, offering up integrated features that help people who are visually impaired, have hearing issues, color perception problems and even motor control challenges. All known in the industry as “assistive technologies”. These aren’t technologies that are an optional install or part of a different version of MacOS, however, they’re all sitting and ready to utilize on any Mac – or iOS device like your iPhone – whenever you’d like.
One of the most useful is the zoom capability. By default it’s not quite the same as the Microsoft Windows Magnifier, but the concept’s the same: It emulates a rectangular magnifying lens that you would otherwise be holding over the screen to make a specific portion bigger and therefore easier to read or analyze. Indeed, if you’ve ever peered at a photograph, you might just find MacOS “Zoom” a wonderful feature…
Once enabled, it’s a simple keyboard shortcut – Option + Command + 8 – to have the magnifying lens (oops, sorry, the “zoom lens”) pop up. Press the key sequence again and it’ll vanish. To enable it, choose System Preferences… from the apple menu on the top left of your screen. Then, in System Preferences, find and click on “Accessibility“:

See it all the way to the right? A click and you’ll see that there’s quite a lot more your Mac can do to help you enjoy your computing and online experience:
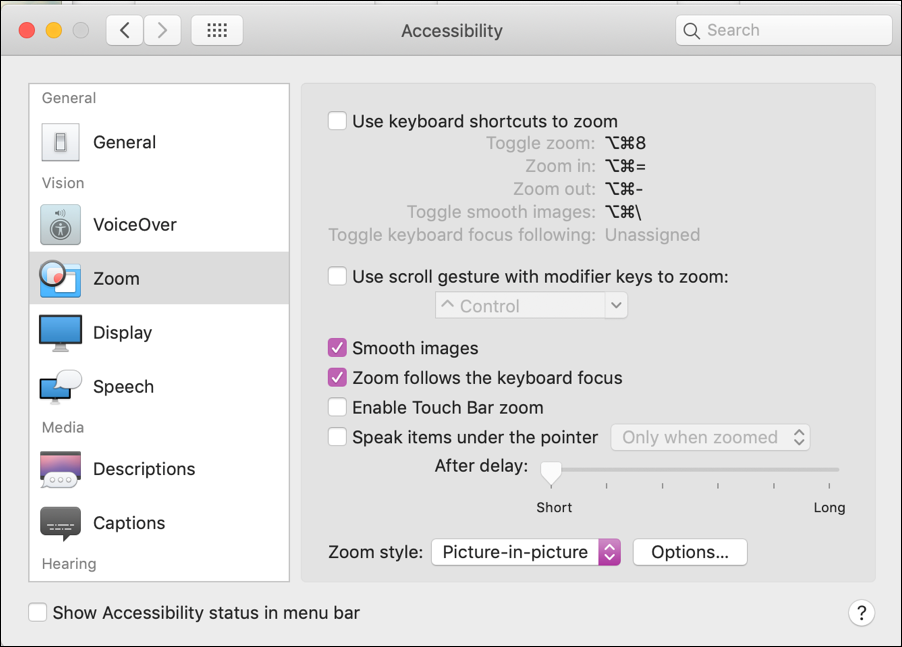
The primary categories are listed on the left side. Notice that they’re organized by assistive technology type: Vision, Media, Hearing, and (not shown) Interaction. You can experiment with the other features if you’d like, but I clicked on “Zoom” to enable that capability. The right side has all the many, many ways you can tweak or modify Zoom to make it work for you. To start, check out the Zoom style menu at the bottom. My preference is “Picture-in-picture”, as shown, but check the other options out if you’d prefer the entire screen become bigger.
Click on “Options…” to find tune the zoom rectangle if you’d like to tweak its size:
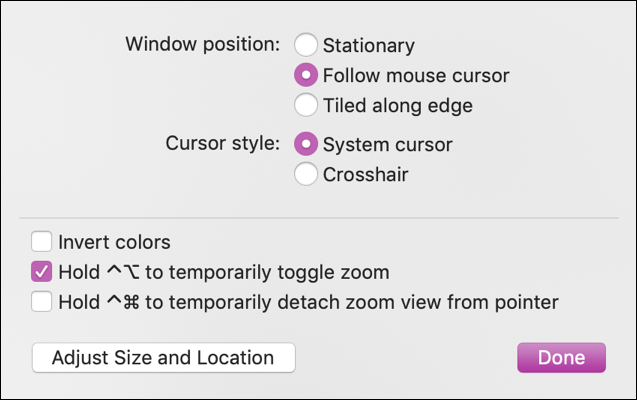
To start, perhaps leave it with the default settings (shown above). The most interesting of these is ‘invert color’, which can be great if you have any sort of color deficiencies with your eyesight: at any time you can have a portion of the screen “flip” colors as needed.
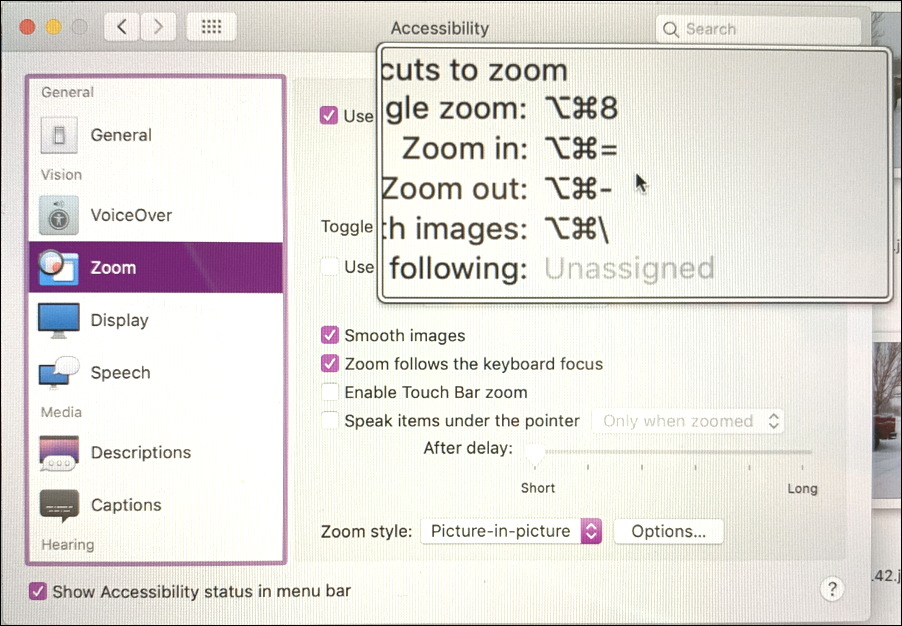
Looks good? Click “Done”, then back on the main Accessibility window, click to enable “Use keyboard shortcuts to zoom”.

Now the fun part. Close the window and go back to what you were doing – perhaps reading this very page in your Web browser.
Press and hold down Option + Command + 8 for just a moment, and the zoom rectangle will show up on screen. Now move your cursor around and watch what happens! It’ll look like this:
Note: I had to take a photograph of the screen because the screen capture software doesn’t know that the accessibility utilities are enabled and therefore doesn’t “see” them. A bit weird.
Quite useful even if you have splendid vision, actually. Done for now? Press Options + Command + 8 and the zoom rectangle will vanish.
Pro Tip: I have lots and lots of Mac help and tips here: I’ve been writing about the Mac since I started on Apple gear with the Apple II. Yes, it’s been a long journey!