
I join a lot of Zoom meetings from my iPhone and iPad, some with family, some from work. How can I rename myself in a meeting in Zoom for Mobile to match the meeting purpose?
Like many smartphone apps, the Zoom for Mobile program is far more powerful than it may initially appear. Features are hidden under almost invisible buttons or only appear when you know where to tap on the screen to reveal options. With a small screen, it makes sense to have an interface of this nature because otherwise it’s just cluttered, often with features you’ll never use. However, a basic usage tutorial is definitely a boon at least once, so you at least know what capabilities are within the Zoom app (or any other app on your phone or tablet).
Zoom also differentiates between whether you initiate or start up a meeting or whether you join someone else’s meeting. This is important to know because some meetings, particularly for school or work, might have settings that prevent you from renaming yourself. It’s not common, but if you’re going through the steps in this article and find that your “Rename” option is missing or greyed out, it might well be due to the meeting creator’s preferences. In that instance, you’re stuck. But in most cases, you’ll be able to rename yourself as desired. Let’s have a look!
HOW TO START A ZOOM MEETING ON AN IPHONE
Download and install the Zoom app – easily done through the iPhone App Store – and log in to your Zoom account.
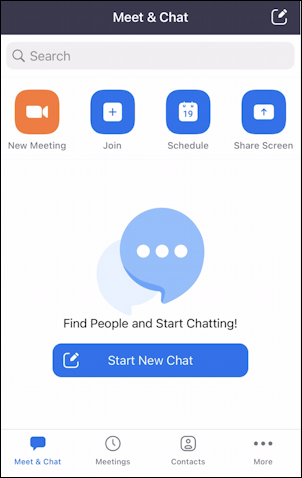
Zoom is really trying to get into the instant messaging game, as you can see, but if you want to just create a new Zoom meeting, it’s the orange “New Meeting” button you’ll want to tap, not the big “Start New Chat” in the middle of the screen.
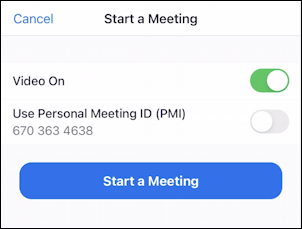
Every Zoom account has a unique Personal Meeting ID and you can start your meeting with that ID (it’s important to know when you share an invite so others can join you) or, by default, have a random room ID assigned to your new meeting. Ready? Tap on “Start a Meeting“.
Note: Wondering how many possible meeting room PMIs there are? It’s 10**10 or 10 billion. That’s a lot of meetings!
Depending on how you have your Zoom profile configured, here’s what happens when you start up a meeting:
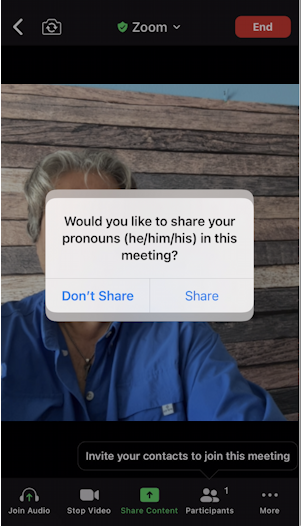
Zoom lets you share pronouns, which is great in academic and business settings, though probably not as much for family and friend connections. Want to know how to set your own Zoom preferred pronounces? I have a tutorial on just that topic: How to Set Your Zoom Pronouns.
I’m going to tap “Don’t Share” to move past this point. If you haven’t set any pronouns in your Zoom settings, you’ll automatically skip this step.
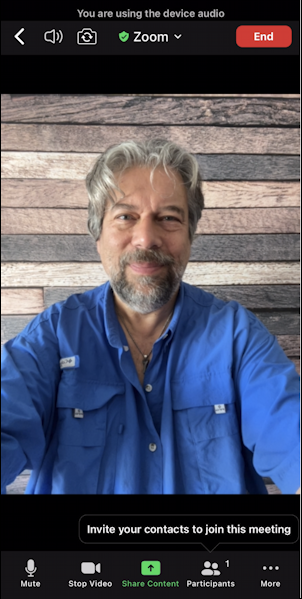
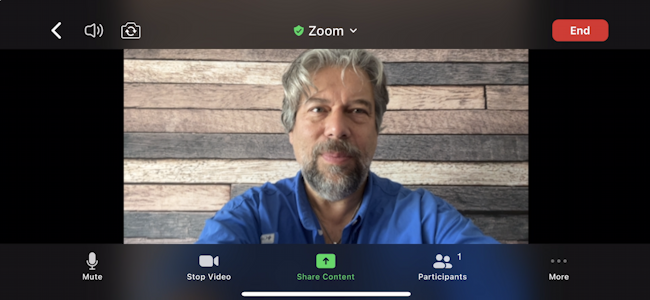
Meeting ready to proceed! Now rotate your phone 90 degrees for the benefit of non-mobile meeting participants:
Now, here’s a really cool trick you can use in Zoom for Mobile that you can’t use on a computer too: Swipe from left-to-right and you’ll be able to switch to ‘driving mode’ which lets you listen and talk, without any distracting video either being sent from your phone or images of others to distract you:
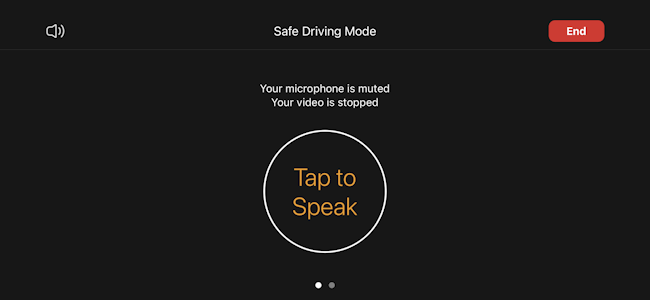
Note that when you first swipe into Safe Driving Mode, your mic is also muted! One of the most common mistakes in Zoom meetings is to talk without realizing you’re muted, so you’ll want to “Tap to Speak” when you’re ready.
Swipe back to the main view with you on camera. There are five buttons along the bottom: Mute, Stop Video, Share Content, Participants, and More. Tap on “More” and a menu appears:
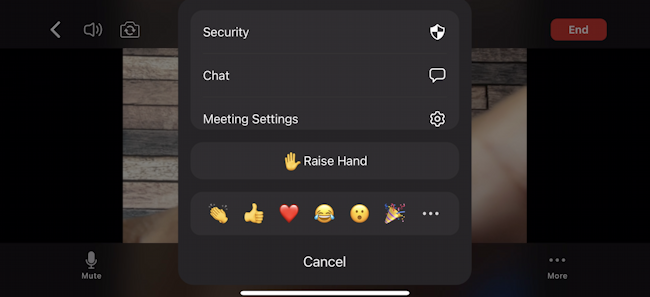
Useful features, but… not where you can rename yourself. Let’s get to that spot!
HOW TO RENAME YOURSELF ON A ZOOM FOR MOBILE MEETING
To rename yourself for the meeting, you need to actually go to the “Participants” screen, which is particularly austere since it’s just a one person Zoom meeting at this point:
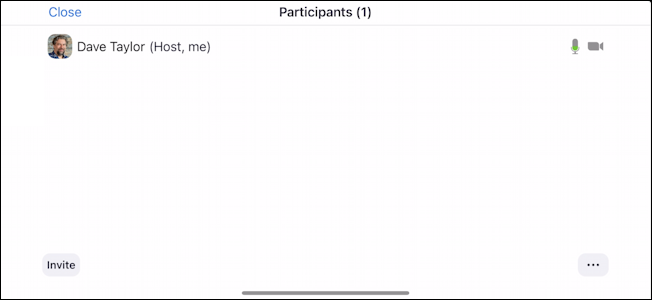
There’s no obvious way to rename yourself but if you tap on your own name, yet another menu appears:
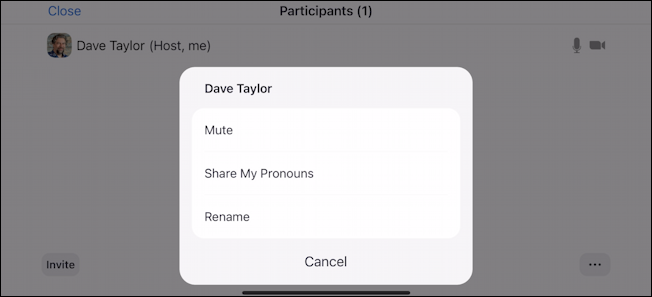
While the options are intended for the meeting organizer to control others (note if you were to tap on someone else on this list, you could, as meeting creator, mute them!) it turns out you can also control your own participant info, notably including.. ta daaa… “Rename“. Tap on that.
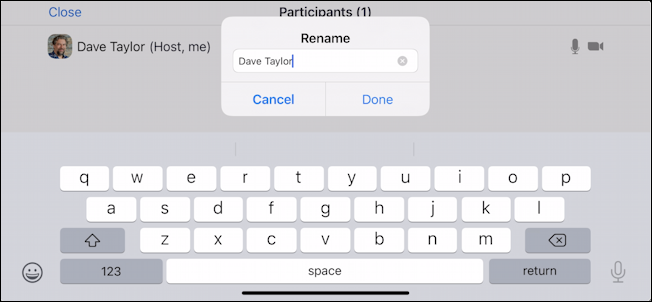
You can rename yourself whatever you want at this point, even use rude language (great for hanging out with friends, probably not so good for work or school). I’m just going to add “Ask” to the front of my name for this demo. A tap on “Done” when it looks good, and “Close” on the top left to get out of the Participants window, and…

It’s tiny, but on the lower left you can see it now shows “Ask Dave Taylor“. Mission accomplished! If I join the meeting from a computer, my Zoom for iPhone / iPad picture shows up like this, with the newly renamed title:

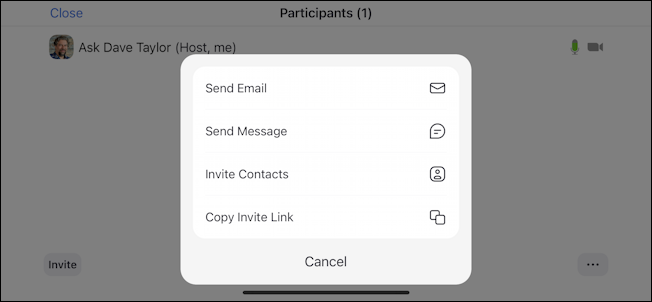
Huzzah! Now, one more handy tip. While you’re in the “Participants” screen, you can also tap on “Invite” on the lower left, which brings up a surprisingly broad array of choices for how you want to invite others to join you:
That’s it. Now you know how to rename yourself in Zoom meetings. With this approach, I will note that the next time you start up or join a meeting your name will have reset, so this might be something you get very comfortable doing (or you can go to the main Zoom profile settings and tweak things there if it’s a permanent change).
Pro Tip: I’ve been writing about Zoom and video conferencing systems for years. Please do check out my growing Zoom help area for lots more useful tutorials while you’re visiting. Thanks!