
I’ve been posting photos one at a time in Instagram forever but just recently noticed that there’s some way to post multiple in a single entry. It’s then a gallery where people can swipe from picture to picture. Cool! How do you accomplish this particular magic?
It actually turns out that quite a few social media services and networks support multi-photo posting as a way to keep all of your images in a single place and, of course, to offer a better user experience. Instagram is one of the original photo sharing services (can we call it “The OG” yet?) and, no surprise, it supports you posting multiple photos too. Not only that, but if you cross-post to Facebook from Instagram, it cross-posts all of the photos as an album too! Nice.
Indeed, the toughest part of this feature is deciding which photos to use because, as every ‘grammer knows, it’s much easier to take photos than to take those really great, attention grabbing images that pull in all the likes!
With that in mind, let’s jump onto my iPhone and I’ll show you how to post multiple images, instead of just one…
HOW TO POST MULTIPLE PHOTOS ON INSTAGRAM
First off, I always like to take the photos with the camera app so they’re ready to post but I also have a copy of them for my own album and later reposting. Here’s my Instagram with a zen photo of clouds from my pal Angela front and center:
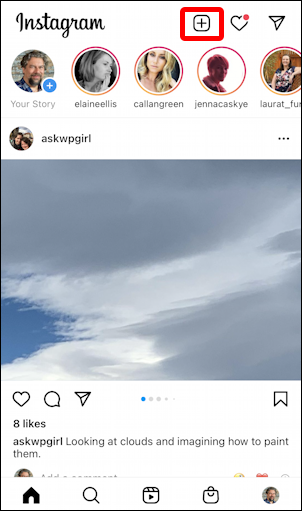
As you doubtless know, Instagram changed its user interface so you post new photos from the “+” icon on the top – as highlighted – not one of the buttons on the bottom. A weird decision to change that, but hey, whatevs. Just gotta use these tools, not fix ’em.
Tap on the “+” button and you’ll have the first photo in your camera roll automatically selected:
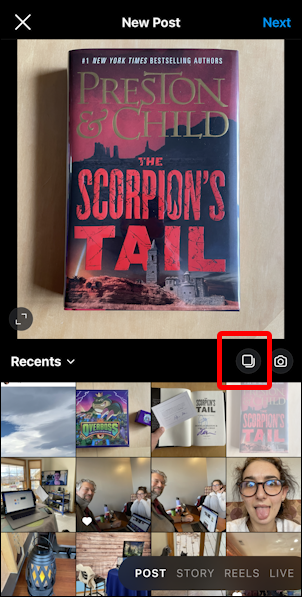
As highlighted, the secret and barely noticeable button that enables multi-photo albums is the tiny square adjacent to the camera icon. What’s odd is that if you tap on it, not much actually changes other than the images in the photo album get tiny circles:
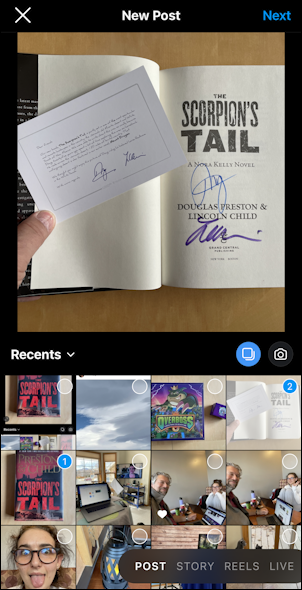
Notice that I’ve selected two images and that they’re marked ‘1’ and ‘2’. The #1 image (the first you select) is going to be front and center on your post, with the other images mostly out of view until the viewer swipes to see them too. Worth keeping in mind. You can also choose up to 10 photos, which is pretty generous.
I’ll stick with the two I have, the cover of this new book I received and the author’s signature page with included authenticity card. To proceed I can either switch from a Post to a Story, Reels or even go Live (on the lower right) or just keep progressing with a Post by tapping on “Next” on the top right. I’ll tap on “Next”.
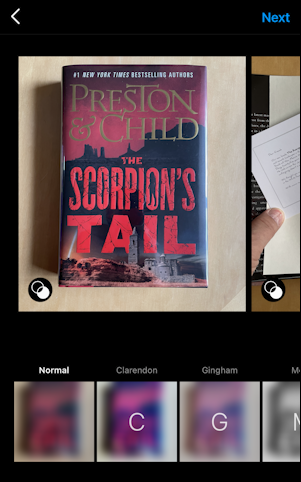
Now I can apply a favorite filter or otherwise edit each of the images selected if I’m so inspired. Or I can keep moving forward with these pre-edited photos (thanks Camera app!) by again tapping “Next” on the top right.
It’s time to craft the perfect caption for this photo album (and notice below the tiny white square superimposed on the image to denote that it represents more than one):
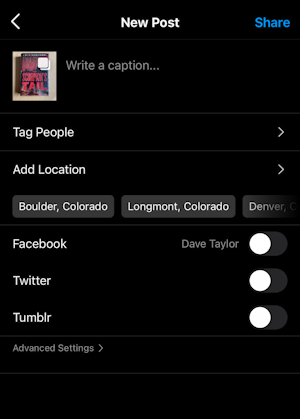
I usually try to include a hashtag or two in my caption, tag my location and cross-post on Facebook and/or Twitter. Once that’s entered, here’s how it looks:
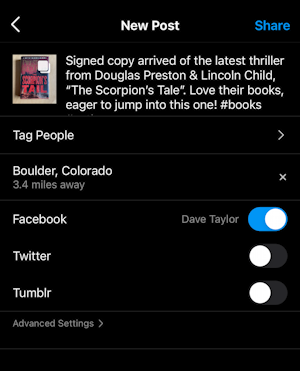
Note: Yes, there’s a typo: The book title is actually “The Scorpion’s Tail“. Fortunately you can edit and fix typos after you’ve posted something on Instagram if you catch it in time, as I did!
Looks good! To post it, all I need to do is tap on “Share” on the top right and… voila!
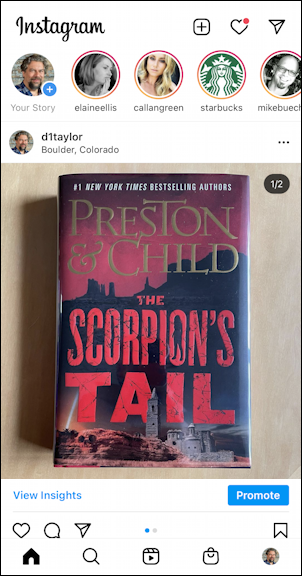
Notice in this view that the “1/2” denotes that this is the first of two images included in this album. There’s also a tiny blue and grey dot that also show there are two images, of which this is the first. Overall, mission accomplished.
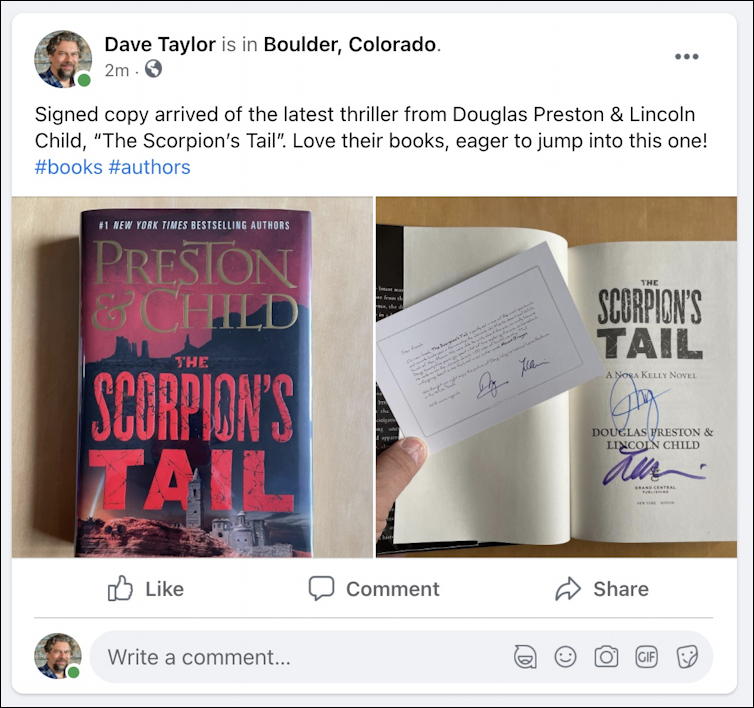
Oh, and over on Facebook? Looks great:
And that’s how it’s done. Surprisingly easy once you learn about that tiny, unlabelled “album” button adjacent to the camera when you’re just starting to produce your post.
Pro Tip: While you’re visiting, please do check out my other Instagram help articles and why not follow me – d1taylor – on Instagram too? Thanks!