Tired of every site you visit being tracked and recorded by your Internet Service Provider? Unsure whether that public Wi-Fi network is free of hackers? You need a Virtual Private Network (VPN). Here’s how to get started with NordVPN…
When you’re working on your computer, whether it’s for entertainment, research, or business, you undoubtedly have the sense that if no one can see your screen, your privacy is assured. Turns out that isn’t the case, however, and from malicious users on a public wireless network to ISPs that track your every Web site visit (and search term) throughout the day, there are a lot of people who might be keeping track of your actions. For many people that’s an acceptable cost of having access to the Web and the amazing resources it contains, but do you want to share your bank info with third parties unknowingly? Or have the medical conditions you’re researching become permanently associated with your account and online identity?
For quite a lot of people, privacy has become an increasingly important aspect of being online, and it’s a smart thing to consider even if you otherwise are complacent about these tracking issues. There are a number of things you can do to regain your privacy, but one of the best is really to install and use a Virtual Private Network, which essentially encrypts all traffic between your computer and the VPN’s server. There are also a lot of VPN services, but as a general rule, free VPNs are risky because you’re the commodity (many still collect aggregate “anonymized” traffic data to sell). My recommendation: Pay for a VPN. One of my favorites, and the one I use on every public Wi-Fi network, is NordVPN.
The company is endlessly offering discount pricing of various levels, and as I write this the basic service is a very affordable $2.99 per month, paid two years in advance. For less than the cost of “alternative milk” in your coffee each week, you can protect your privacy at the coffee shop and everywhere else (including at most workplaces).
GET STARTED INSTALLING NORDVPN ON YOUR PC
To get started once you’ve paid for an account, go to the NordVPN.com site and log in…
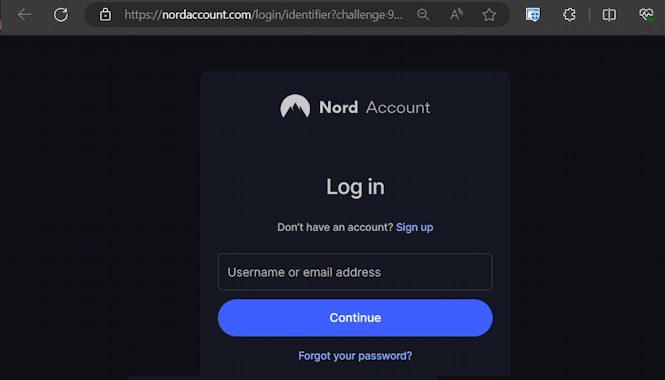
Pretty standard stuff. I recommend you also set up two-factor authentication with an Authentication app on your smartphone, but you can find info on that directly on the NordVPN site so let’s not get sidetracked!
NordVPN can run on Windows, Mac, Linux, Android, iPhone, you name it. Log in from your other devices and your download screen will offer you to download the appropriate version of the VPN software:
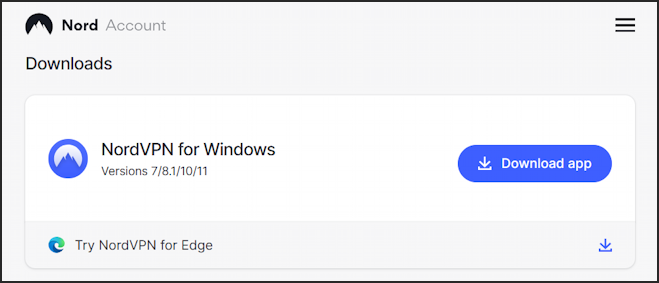
Be aware that since you’re downloading the app, you’ll see this warning screen during installation:
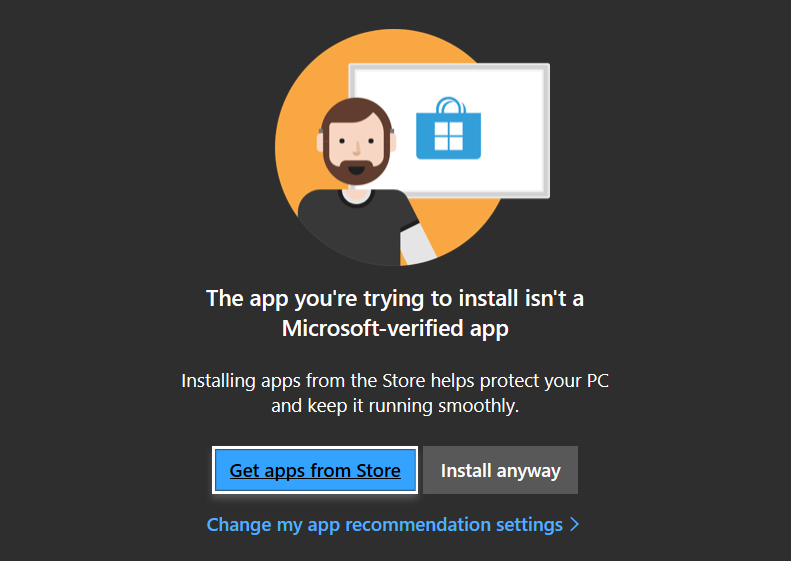
You can safely proceed as long as you started out on NordVPN.com. You might also be able to find NordVPN within the Microsoft Store app, though I find it a bit more hit-or-miss than just going directly to the site. To proceed, click on “Install anyway”.
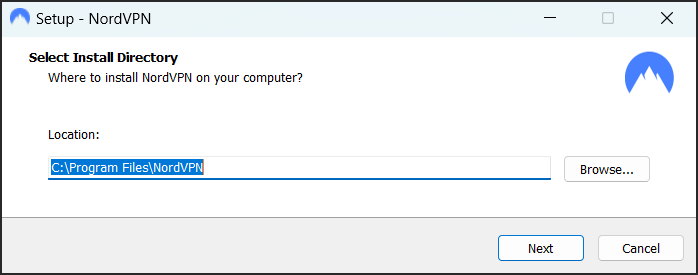
There are only a couple of choices you’ll have to make during the install process. The first is where to have the program live, and I recommend you accept the suggestion:
Then a bit further along, it’ll prompt you to install the browser extension for your Web browser:
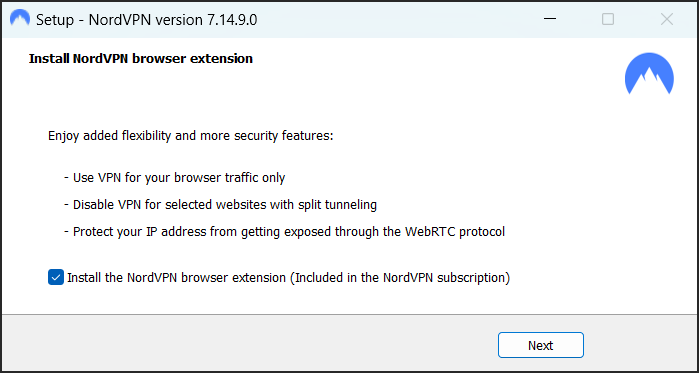
I recommend adding the browser extension because NordVPN includes some ad blocker and malware avoidance features too, but you can either check “Install the NordVPN browser extension” here or just wait until the next and final step of the installation.
RECOMMENDED RUNTIME SETTINGS
Once the software’s all installed, the installer program itself quits and NordVPN starts up with this screen:
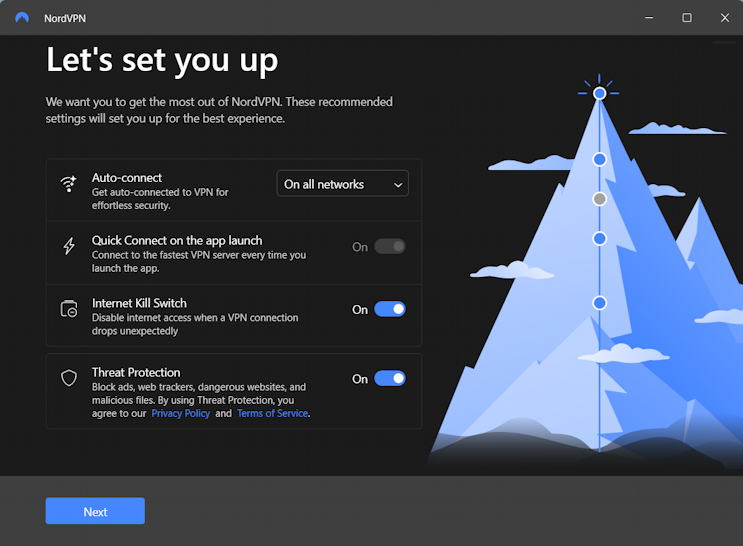
Here you want to consider each and every option. If you want NordVPN running 24×7, including when you’re at home on your own network, then leave the default of “On all networks”. I prefer manually enabling and disabling it depending on how I’m connecting to the Internet, so I change the Auto-connect option appropriately.
Changing that, however, then automatically enables “Quick Connect on the app launch” which I don’t want either. I like to pick specific VPN servers because sometimes I want to see UK content, South American content, etc. VPNs give you a fun way to have the Internet think you’re located in another country entirely!
Finally, the last two are very useful too, though I should add that Threat Protection can also trigger YouTube’s new ad blocker barrier, meaning you might not be able to watch YouTube videos while it’s enabled. If that’s a problem, simply disable it in settings.
Ready to proceed? Click on “Next” and, finally, NordVPN will launch, ready to be used!
HOW TO USE NORDVPN ON A PC
While it serves as an additional layer for all your network connections when it’s running, NordVPN nonetheless appears like it’s just another app, so it’s really easy to work with. In fact, the default screen is basically just a map:
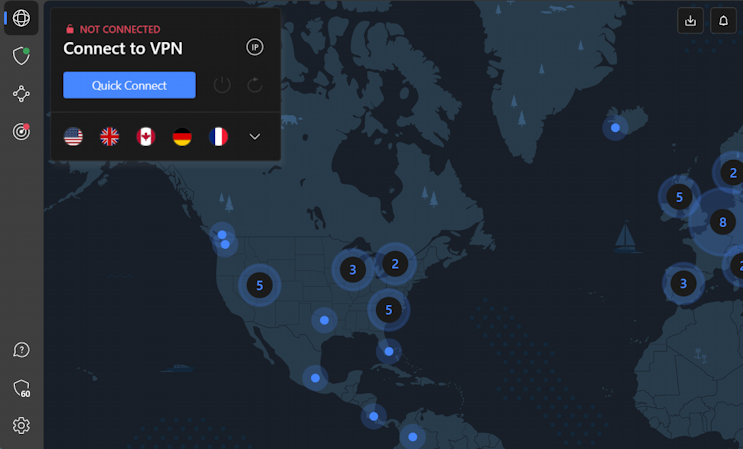
You can click on a specific spot if you want to look like you’re in, say, Mexico or England, but most times it’s easiest just to click on the blue “Quick Connect” button. Notice that I have a few countries I use with frequency when I’m VPN’ing, including the UK, Canada, Germany, and France, so all of those are offered up as handy shortcuts too.
A click on “Quick Connect” and after a few moments you’ll see this notification:

And you’re safe to proceed with your Internet usage, knowing that the public wi-fi and every other network is now safe to use. Ready to turn it off? Go back to the NordVPN app itself and choose “Disconnect”, which replaces “Quick Connect” once you’re online.
Finally, a handy tip: If you pin the NordVPN app to your Taskbar, a right-click on it reveals that you can do most everything you need without ever launching the actual app:
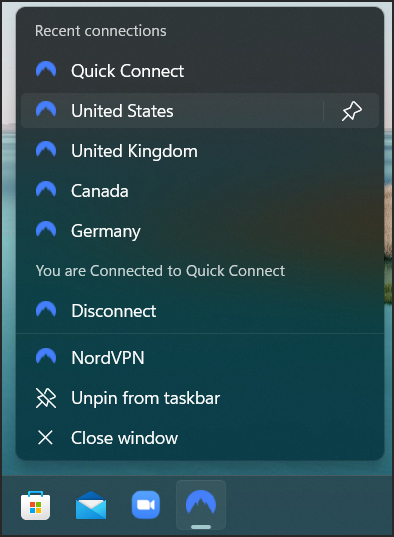
I have to admit, that’s my preference in terms of interacting with the program. Generally, I find that NordVPN is super easy and it’s also an easy way to check to ensure that you are connected and protected from all the nefarious actors and programs online. Good luck!
Pro Tip: I’ve been writing about Windows since the beginning. Please check out my extensive Windows help area for lots of useful tutorials and how-to guides while you’re visiting! Thanks.
