I’ve been asked to help my daughter’s teacher create some basic math worksheets and am embarrassingly stymied by the task. How do I enter fractions and other math equations into a Microsoft Word document??
It’s really easy to grab a piece of chalk and write an equation on a chalkboard in front of a class. A pencil and a piece of paper offer even more flexibility and ease of entry. But switch to a computer and the layout task is enormously complicated because superscripts, subscripts, fractions, all of those have to be laid out and positioned correctly to convey the desired equation. While the best word processors, like Microsoft Word, can do it, the task is not simple, nor is the data entry required. Fortunately, Microsoft has spent a lot of time trying to streamline the process so it’s not impossible, but you’ll want to give yourself time to practice and experiment, particularly with more complicated equations.
What can be confusing is that there are a very small subset of fractions that are automatically converted into a special fraction layout. Type in 1/2 and it’ll be laid out differently to 3/4 (as I’ll show momentarily). Like much in Microsoft Word (and related software suites like Apple’s Pages, Google Docs, and even LibreOffice) the solution involves moving into a specific area of the program and learning how to use it. An area that odds are most people don’t even know exists, let alone have experience utilizing. Let’s check it out…
BASIC FRACTIONS IN MICROSOFT WORD
If you’re writing up a recipe and want to specify a half-teaspoon of paprika, or want to challenge students with the most basic of fraction addition, it’s easy. Just type “1” “/” “2” “+” “1” “/” “2”. Here’s how that’ll format:
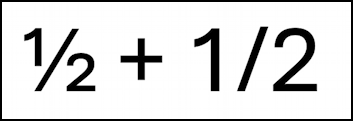
As soon as you append a space or anything other than a digit to the last “2” that fraction will also be fixed to have what’s known as a “skewed” fraction layout. But what if the fractions are a smidge more complicated?
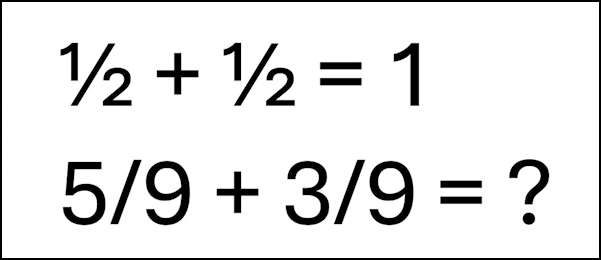
You can see that the 1/2 + 1/2 laid out very attractively, but 5/9 and 39 are more than Word can figure out, so it didn’t bother to format them. Odds are good that the worksheet you’re developing is at least that complicated, so it’s time to move to the Equation input area.
EQUATIONS AND MICROSOFT WORD
From the top menu, choose Insert and you’ll get a new toolbar or ribbon that includes a scrawny π symbol and the word “Equation” on the right side:
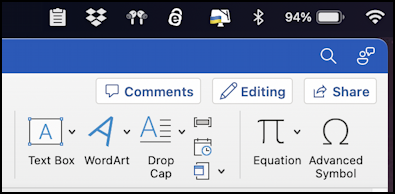
You can see by the relative ordering of things to insert those equations aren’t top of people’s minds in this particular program. No worries, it still works! Click on “Equation” and a menu of preset equations will appear:
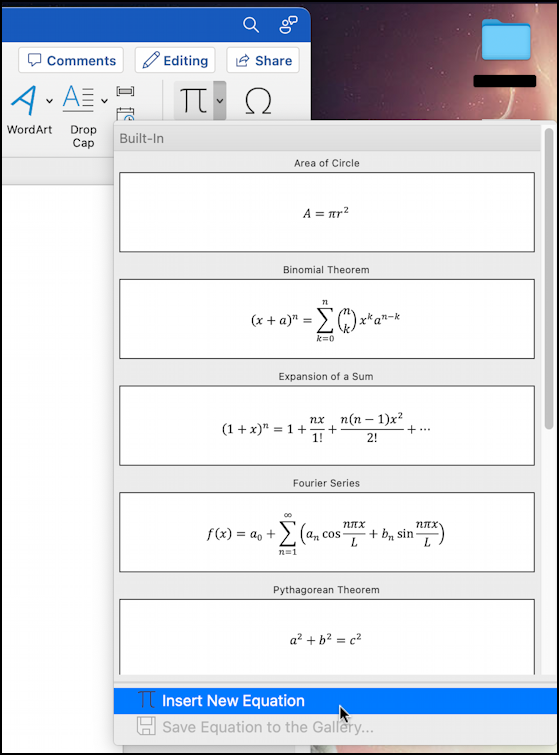
Probably the Fourier Series is a bit much for your daughter’s basic math worksheet (as is the Pythagorean Theorem) so instead choose “Insert New Equation“.
HOW TO ENTER AN EQUATION INTO MICROSOFT WORD
A box appears on the page exactly where your insertion point (e.g., cursor) was. This can be a bit disconcerting, so I recommend moving your cursor to an empty portion of your page first. This is what appears as I retype that basic fraction equation:
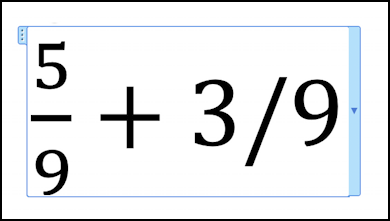
In this instance as soon as I typed “+” after the “9” it reformatted the fraction to be numerator-over-denominator. Since Word can’t know if I mean 3/9 or 3/99 it’s waiting to reformat the second fraction until I make my intentions clear with the next character. Once I do, it formats beautifully…
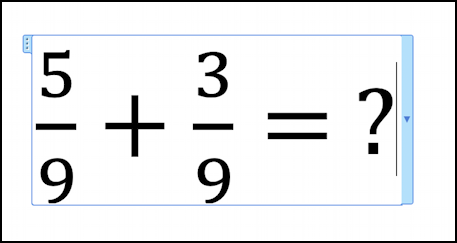
If you suspect that clicking anywhere outside of the equation entry box will remove the blue frame, you’re right.
RIGHT CLICKING WITHIN AN EQUATION
What’s not obvious is that the right-click (control-click for Mac users) context menu has all sorts of options depending on where you click. For example, I’m going to enter a more complex equation and then click:
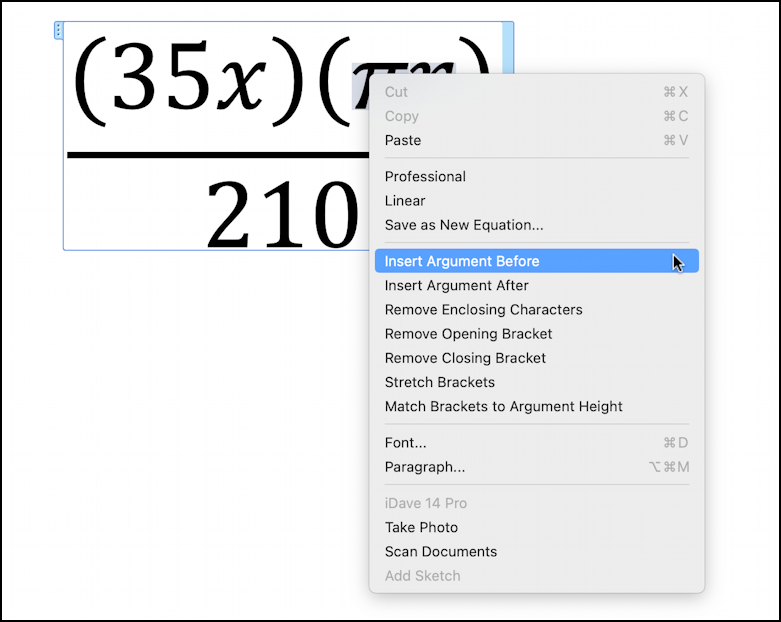
You can see that there are lots of options here for the πr portion of the underlying equation. If I click on the denominator, however, the context menu offers completely different choices:
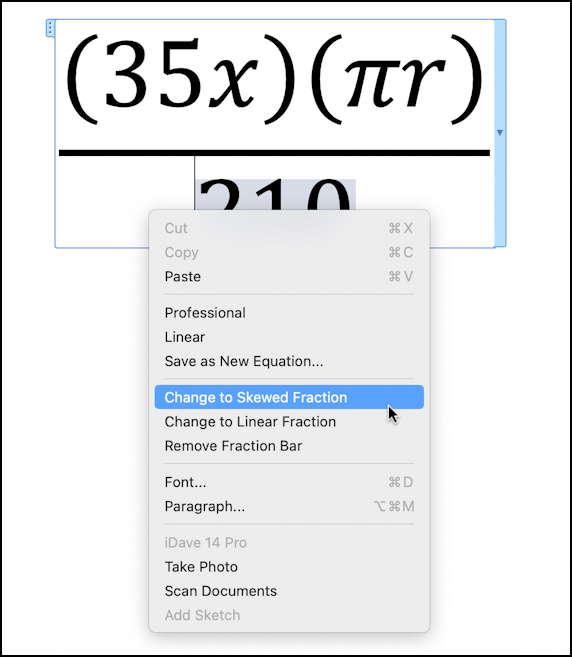
Cool! Now, what’s a “skewed” fraction? If I choose that, notice how the layout changes:

Definitely a bit shorter in terms of vertical size, but which one do you think is easier to understand? Fortunately, you can pick your favorite as part of the formatting process.
ADDING A SUPERSCRIPT TOO
You should be good to go with your basic fractions and math worksheet formatting requirements, but let’s look at one more task: Adding a superscript to your formula. This is a bit more complicated and really shows off some of the amazing formatting abilities of Microsoft Word. Select the number or portion of the equation you want to have as the base – in my case “210” – then choose Insert > Equation to get to the rather daunting Equation formatting toolbar:

On the right portion are specific categories of equation elements, including Fraction, and the one we want: Script. It’s denoted by the sequence of “e to the x power”. A click and the above menu shows up, listing common types of the Script formatting. We’re doing something pretty basic, so the first choice is going to work just fine. Once chosen, a small box appears:

Easy enough; click on the box, then enter the superscript value desired. In my case, here’s the result:

Pretty impressive formatting capabilities for a word processor, don’t you think? If you’re inspired, you can learn more about equation input from Microsoft. Go to Write an Equation in the Office help area to learn almost everything you’ll ever need on the subject!
Pro Tip: I’ve been using and writing about Microsoft’s Office Suite for many years. Please check out my Microsoft Office 365 help pages for tons of additional tutorials and how-to guides! Thanks.
