
An iPhone I saw had a big battery status widget on their home screen, which seemed really useful. I don’t want it on my home screen but somewhere I can easily find would be great. Can you show me how to add this “batteries” widget to my iPhone?
Given that there are so darn many Bluetooth devices in the world now, it’s surprising how difficult it is to check battery status of them, whether connected or not. Pair headphones with your iPad or iPhone and it’s almost impossible to see the battery status and if you have multiple Apple devices like an Apple Watch and AirPods, you’re going to be bouncing from screen to screen to ascertain everything’s charge level.
This is unnecessary if you know about the Battery widget for iOS, however, as you recognized when you saw it appear on a different phone. You’ll need to have the latest version of iOS – at least iOS 16.0 – but then you have access to widgets that can both be added to any home screen or to the Widget Panel. What’s the “Widget Panel”? It’s the screen you see when you swipe right from your home screen. Let’s have a closer look.
UPDATING WHAT’S ON THE WIDGET PANEL
Start by going to your basic home screen on your iPhone, then swiping left-to-right. A new panel shows up without any app icons but instead widgets for various programs and utilities. Mine looks like this:
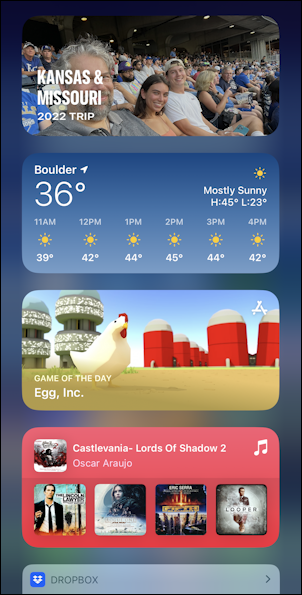
You can see that it’s bright and colorful, with each widget identified by its icon on the top right (except the top photo gallery one, that is). Tap and hold on a widget and after a few moments a menu appears:
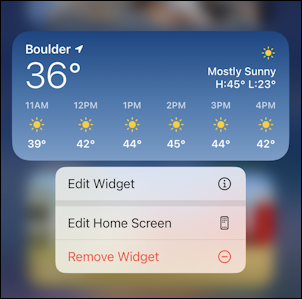
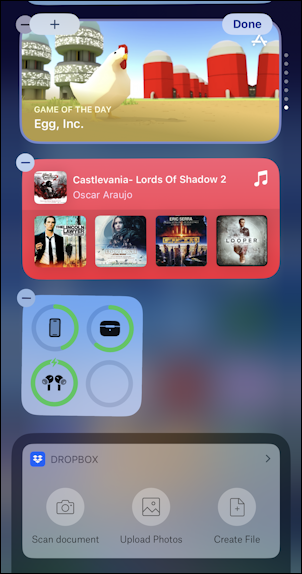
You can change settings on a widget, remove the widget or actually edit the home screen (really the Widget Panel, in this instance, but later you’ll see that these widgets can also be added to any screen in iOS). For now, I’m going to choose “Edit Home Screen”, which lets me easily drag widgets around to change the order of things:

Notice along the top that two new buttons have appeared, along with the “-” on each widget.
HOW TO ADD THE BATTERIES WIDGET
Tap on the “+” and you’ll see that there’s an ever-growing list of widgets available from both Apple applications and third party apps that you already have installed on your phone:
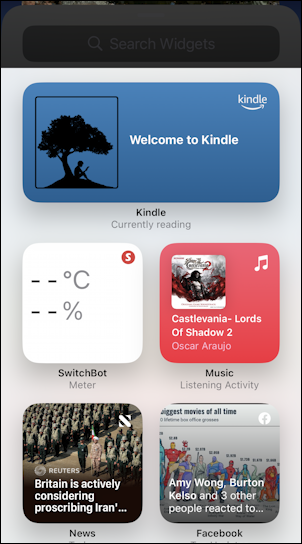
Notice that each has its application listed immediately below the widget. Swipe upwards, however, and you’ll find that there’s an entire listing of dozens of apps that have widgets, including “Batteries”. Not “Battery” singular, but plural since it can track as many devices as you have connected via Bluetooth. Find “Batteries” and tap on it:

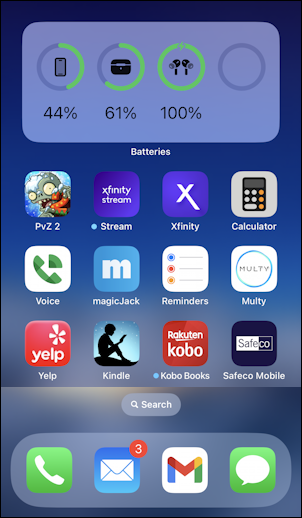
There are three versions of this particular widget, as denoted by the three dots along the bottom. This is the smallest version (and the one I like), but swipe over and you’ll see there’s a version that lists every connected device and its battery status too:
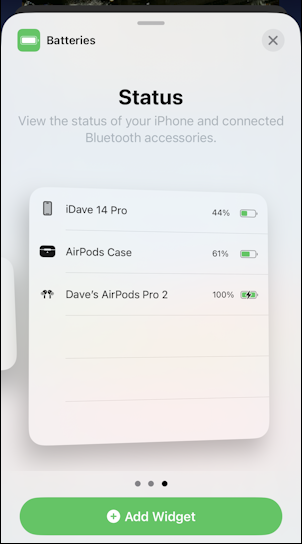
This will resize based on the number of entries, but it’s a live display so that’s actually the battery status of my iPhone, my AirPods Pro case and my AirPods Pro earbuds themselves. Cool!
For this layout, I want the smallest of the three widget possibilities, however, so I’m going to swipe back and tap on “Add Widget” on the half-width variation. It moves me back to the Widget Panel, with the widget shown:
I’ve removed the Weather widget since I want to switch from the full-width to the half-width and you can’t change widget size (rather surprisingly). No worries, it’s easy to re-add by tapping on the “+” icon on the top left. The final result is pretty attractive and very informative:

Perfect!
ADDING A WIDGET TO A HOME SCREEN
You can also add widgets to any icons screen, and you’ll have the same choices and sizes. As a result, one of my secondary app screens (not my home screen) shows a wider version of the battery widget too:
Heck, you can even add widgets to your lock screen on iOS 16, as I explain my Guide to Customizing Your iPhone Lock Screen too. All in all, lots of ways to make things useful and attractive both!
All of this should help you get your own iPhone set up just as you seek so that you never again are unsure about the battery status of any device plugged into or paired with your iOS device.
Pro Tip: I’ve been writing tutorials for the Apple iPhone since it was first released. Please check out my extensive iPhone help area for lots and lots of useful content.