
I install a lot of beta software as part of my job and my boss just told me about using backup/restore points to keep my device more stable. Can you tell me how to create these backup points on my Windows PC?
One of the unsung system features of Microsoft Windows is that it can take a snapshot of your operating system install at any point and restore to that point with just a few clicks of the mouse. Not only that, but it can also take a similar snapshot prior to any system update so you can revert to the pre-update version easily too. But you have to enable it all. Why isn’t it the default? Because these restore points take up disk space — up to 5% of the size of your system drive — and over the years more and more customers must have complained about losing a few gigabytes here, a few gig there. Me? I’d rather have at least one restore point (it replaces older restore points with newer ones on an active system) and a bit less disk space, knowing I can back up easily.
The first step is to enable restore points at all, and by default it’s not enabled. It’s also a feature buried in the old school Windows 3.x system configuration so be prepared to leave the pretty graphics and open UI of modern settings far, far behind.
ENABLE SYSTEM BACKUP RESTORE POINTS IN WINDOWS 10
To start out, search for ‘restore point‘ in the Windows 10 search box:
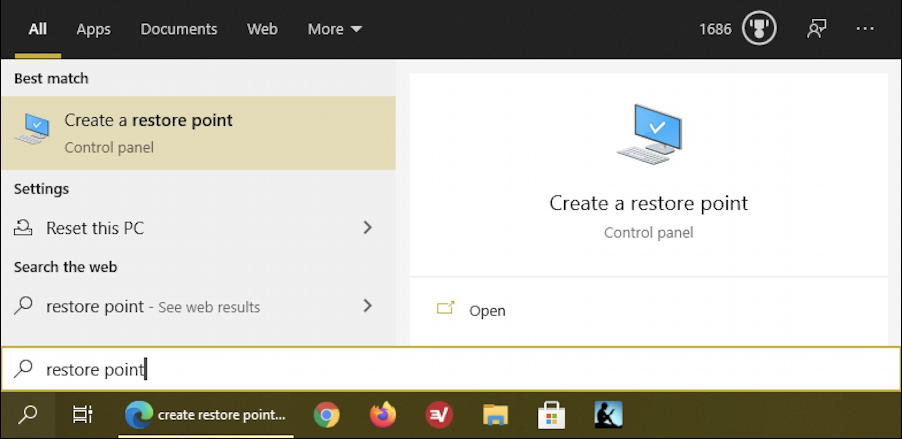
There’s only one choice, so it’s easy. Click on “Create a restore point“.
Now you go into what we should perhaps call “Classic Windows”:

You might need to click on the “System Protection” tab to get to this view. But it’s not configured, so the “Create…” button adjacent to “Create a restore point” near the bottom is greyed out. Not good.
To fix it, click on the “Configure…” button just above it, and you’ll get this window:
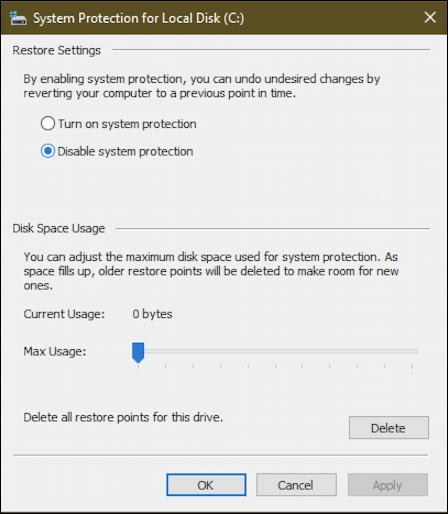
As a first step, choose “Turn on system protection” on the top portion. Then you can specify a maximum amount of disk space that the system restore points can utilize of the system disk, or you can just let it manage the space itself. I opted for the latter, so left the Max Usage slider at 0 bytes.
Once you’ve made those changes you can click Apply then OK and you’ll be back in the earlier window, but this time “Create…” is enabled and able to be clicked!
HOW TO CREATE A RESTORE POINT IN WINDOWS 10
Here’s the window with “Create…” enabled. Note also the “System Restore…” button near the top:
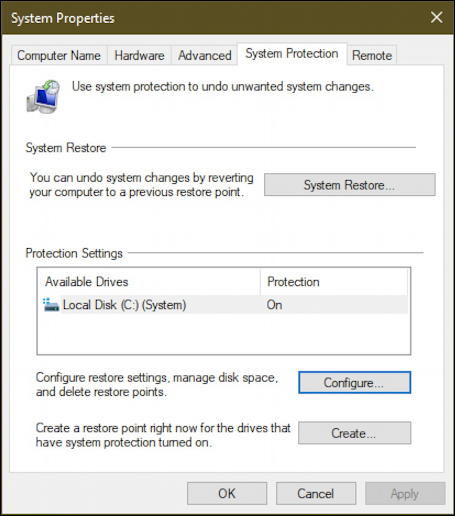
No surprise, click on “Create…” to create your first restore point!
You’ll want to give your new restore opint a meaningful name. At the least, specify the date, but if you’re poised to, say, install a new registry manager, you could say “pre-install of XX Registry Manager”:
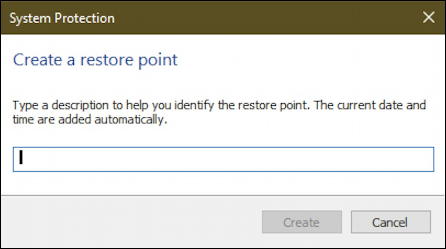
Got a good name? Great. Click on “Create” and Windows will create a restore point for you…
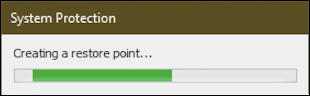
In my experience it didn’t take too long, maybe a minute or so, and I saw this:
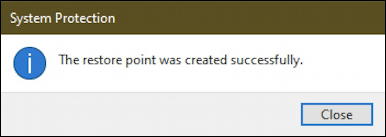
Done. If you want to restore your system to a restore point, go to the same window and choose “System Restore“. Easy enough, really.
Good luck!
Pro Tip: I’ve been writing about Microsoft Windows for quite a few years. Please do check out my extensive Windows help library for hundreds of other tutorials and guides while you’re visiting. Thanks!