
With the latest release of both iOS and MacOS you can now use your iPhone’s camera – and microphone – as input options for any Mac program that utilizes the webcam. Facetime, Zoom, Team, Skype, they’ll all work great. Here’s how to get set up and started…
There’s always been a fence between your iPhone and your Mac system, though over time it’s gotten shorter and shorter. From iCloud sync to sharing passwords to Handoff, if you’re doing something on one device, you can often pick the task right up on your other device with nary a glitch. The Zoom team, meanwhile, figured out how to use your iPhone as a camera on the Zoom for Mac application quite a while ago, but you needed to have it plugged in via a cable. No wireless option. That must have inspired the Apple developers, however, because with the release of iOS 16 and MacOS 13 Ventura, there’s now something called Continuity Camera that lets you wirelessly utilize your iPhone’s far superior camera and microphone as input options for Mac programs that utilize either, including FaceTime and Zoom itself.
Shortcuts: First Launch Enable | Zoom and Continuity Camera | Enable/Disable Feature | Visual Effects
There are a few oddities about the current setup worth knowing, most significantly of which is that it’s utilizing the rear-facing camera on the iPhone, so you can’t see your phone screen while you’re also using Continuity Camera (but that’s okay, the screen is essentially non-functional during the session). If you ever disconnect the phone from your Mac during a Continuity Camera session, it’s also a bit tricky to figure out how to enable it again for future sessions. No worries, I’ll cover both in this guide. Let’s get started!
FIRST WEBCAM APP LAUNCH ON MACOS 13
The first time you launch a Mac program that could utilize your iPhone (and I’m assuming you have them both set up on the same iCloud account, both have Bluetooth enabled, and both are on the same wifi network), you’ll see a splash screen like the following, which I was shown when I launched FaceTime after updating to Ventura:
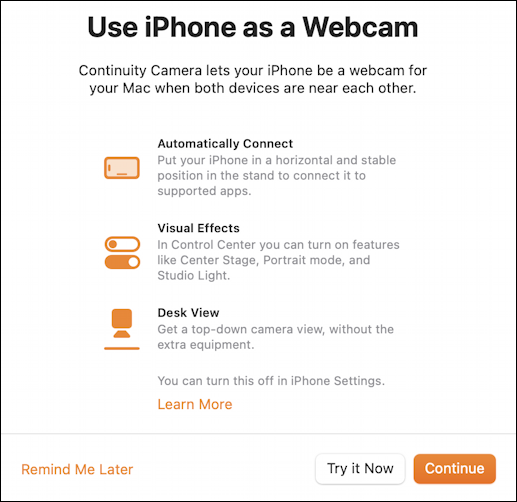
I suggest you choose “Try it Now” so that it’s ready to go whenever you want to utilize it. Notice what this says too; once you’re hooked up, the Mac will automatically connect with the iPhone so if it was your last chosen Webcam, it’ll automatically be so again, whether you’ve got it all set up or not. Visual effects are accessible from the Control Center (I’ll cover that in a bit!) and there’s even this interesting new Desk View option that shows the lower portion of the iPhone webcam video as a separate frame, image corrected to be undistorted.
Continuing into FaceTime, I chose “Continue” instead, which meant that it showed me an image from my own MacBook Pro webcam. Nice and crisp, nothing to complain about:

If I choose “Video” from the menubar above the FaceTime window, however, notice that there are a lot of options, including the new “iPhone 14 Pro”, which is my iPhone:
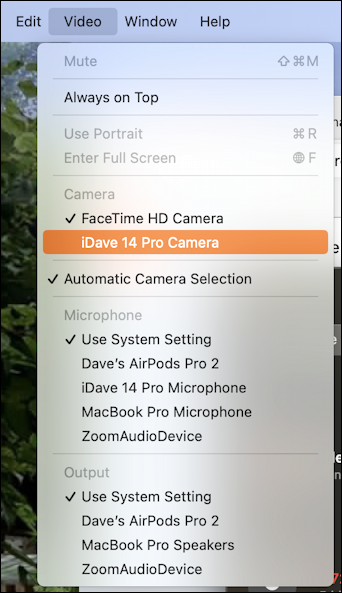
This is the official way to change camera and microphone within FaceTime, and instead of just having “FaceTime HD Camera” (which is really just “MacBook Webcam”) it lets me choose “iDave 14 Pro Camera”, the rear-facing camera on my phone! I can also switch microphones, or stick with the Mac microphone, and even change the audio output if I want to listen through my AirPods Pro 2s. Lots of choices, for sure, but fortunately FaceTime remembers your settings so the next time you launch the program, it’ll use the same configuration.
And suddenly I’m on camera, live, from the iPhone. On my Mac!

You can see that it’s a significantly better camera and since I have it tilted against my computer screen, it’s a different angle too. Meanwhile, on the iPhone’s screen is this display, which stays on the entire time it’s being used as a Continuity Camera:
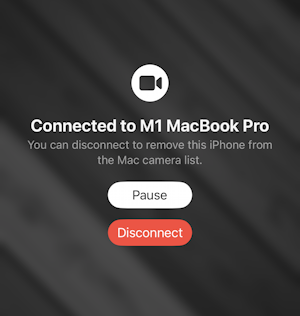
When you’re done with your Mac video chat or meeting, simply quit the program and the iPhone will go back to its usual lock screen. Tap on “Pause” and you can use your phone as needed, but there’s no video signal being sent to the Mac. Tap on “Disconnnect” and, well, I’ll explain how you need to essential re-pair your phone and computer for your next Continuity Camera adventure.
That’s it. That’s how you can use your iPhone as a webcam within FaceTime on your Mac. But there’s more to learn…
CONTINUITY CAMERA AND ZOOM FOR MAC
Once you have the camera pairing set up, it turns out to be really easy to set that up in Zoom too. You don’t even need to be in a meeting to test things out. Here I am in the Video preferences settings in the Zoom app:
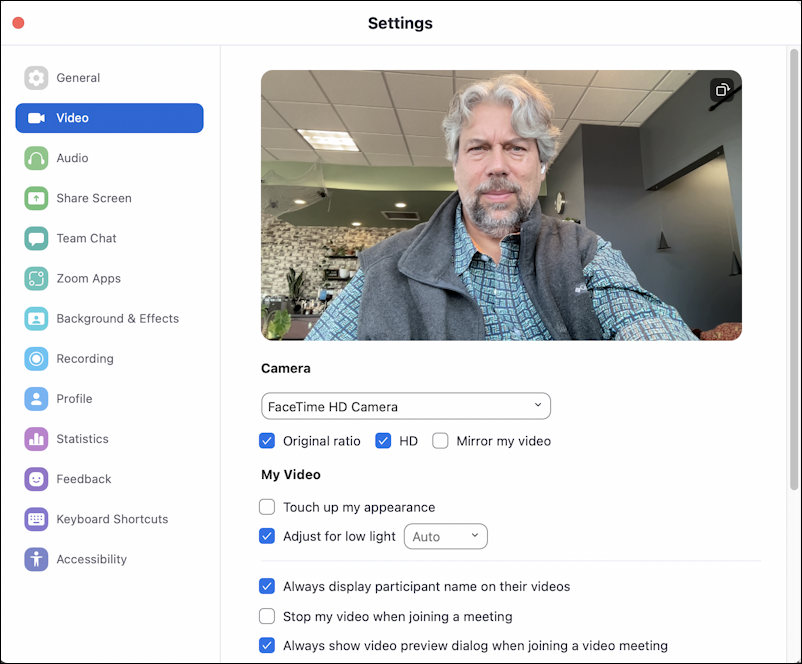
Hopefully, you’ve checked out these settings before (tip: Enable “HD” and you’ll look way better, even with just the regular Webcam).
There’s nothing to indicate it’s changed, but now that Camera menu has two options, not just the “FaceTime HD Camera”:

Easy enough. If I choose my iPhone from the list, it’ll instantly switch the preview video image:
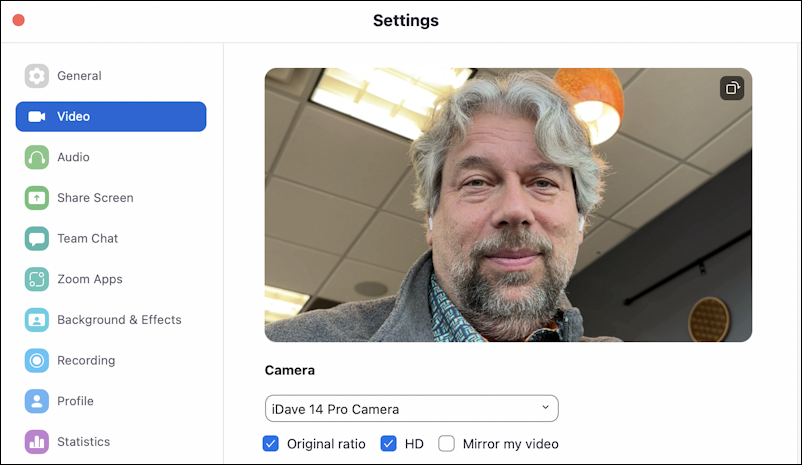
That’s all you have to do to change things up within Zoom. Now the real challenge of Continuity Camera: Figuring out where to position your iPhone for the best possible results.
But wait, there’s more!
HOW TO ENABLE OR DISABLE CONTINUITY CAMERA ON AN IPHONE
Let’s say you’d rather not use this feature, or you used it and now are worried that your apps are going to spy on you through your iPhone. Not a legitimate concern, but still, let’s see how to disable it. At this point, it turns out that there are no settings or preferences on the Mac side, so you’ll have to go onto your iPhone to block things. Go into “Settings” and search for “continuity”:

Choose “Continuity Camera”, the first option, and here are the settings you can access:
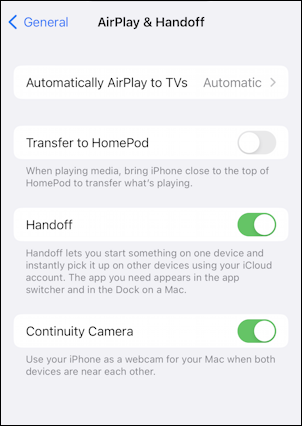
That’s right. One setting. On or off. If you don’t want to use it ever again, simply turn it off here.
Now, what if you tapped on the “Disconnect” button on the iPhone while you were using it as a camera? The next time you try to use a video app on the Mac, it simply won’t show up. But you can’t go into the Mac settings to fix it, so what should you do? Plug in your iPhone to your Mac via a cable. Nothing happened? Make sure your phone is locked, not sitting on the home screen. That should fix it, and the next time you want to use it everything should be wireless and automatic, no fuss, no hassle.
WHAT ABOUT THOSE VISUAL EFFECTS?
It’s clear that the Mac developers haven’t been able to really figure out how Continuity Camera can smoothly integrate into the Mac experience yet when you learn that the way to get to the few visual effect options with the iPhone camera is through the Control Center. What’s that? It’s the two tiny ovals on the right side of your Mac menu bar. Click on it while you’re using that Continuity Camera and there are some new options:
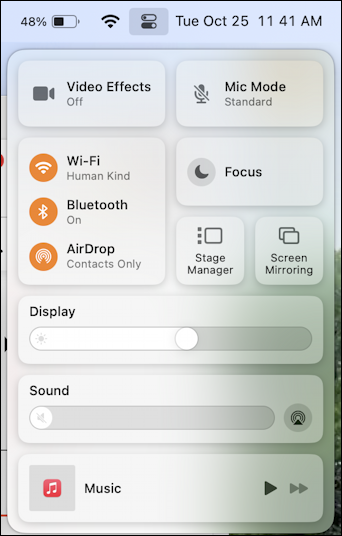
I have Video Effects off, but a click on that particular area produces a menu of some pretty slick options:
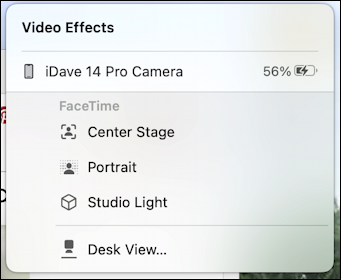
I’ll let you play with them to see how each works, and notice this is how you can access Desk View if you want to try it. Suffice to say, there’s a marked difference with all three enabled:

I’m going to default to leaving them off, but the background blur of Portrait is pretty slick and finally brings that effect to FaceTime.
So that’s it. Lots of new settings and features, and a configuration that’s sprawled across various areas and both devices. Get it all set up, however, and it’s a wonderful new option. I’d just like to see iPhone Front Camera and iPhone Rear Camera as two options, personally, but perhaps we’ll see that as the feature evolves.
Have any questions about Continuity Camera? Leave them in the comments!
Pro Tip: I’ve been writing about the Mac since the very first system was released. Back in the era of the “fishbowl” design! Heck, I started my computing career on an Apple II. Please check out my extensive Mac Help Library while you’re visiting. Thanks!
Hi there, thanks for this article. I can get the continuity camera to work great on zoom, but no such luck on Facebook Live. Any idea how to make that work? It just doesn’t show up as a camera option for me there. Thanks!
Sounds like Facebook Live might not support Continuity Camera, unfortunately. Surprising. Check again after the next major update, perhaps?