
Hey Dave! My cousin is offering me a Chromebook for schoolwork and I’m curious if there’s a way to figure out configuration? He’s covered it with stickers so I can’t see the manufacturer’s label or model info on the bottom!
Stickers on laptops. I’m as guilty as the next person and have had at least a few laptop computers that had the back of the display portion covered in layers of stickers. Coffee shops, pop culture, tech companies, even my own long-obsolete AskDaveTaylor stickers, it was a statement, right? When it covers the important info on the unit, however, that’s a bit more frustrating. Fortunately, most operating systems include a built-in hardware configuration reporting tool, including ChromeOS.
Shortcuts: Finding CPU | Diagnostics & Configuration | Changing Release Channel
In fact, Chromebooks have one of the best and most easily understood hardware report systems available. I’m comparing it to Windows PCs and Apple Mac systems, if you’re curious, but its combination of configuration and activity monitoring makes ChromeOS “Diagnostics” pretty darn useful. Let’s have a look.
FINDING YOUR CPU TYPE IN CHROMEOS
Start by launching the Settings window. You can do that most easily by clicking on the time and date display on the Shelf (what ChromeOS calls the taskbar along the bottom of the screen). This brings up a notifications and control window, and along the top is a gear icon. Click on it. You’ll go to the main Settings screen:
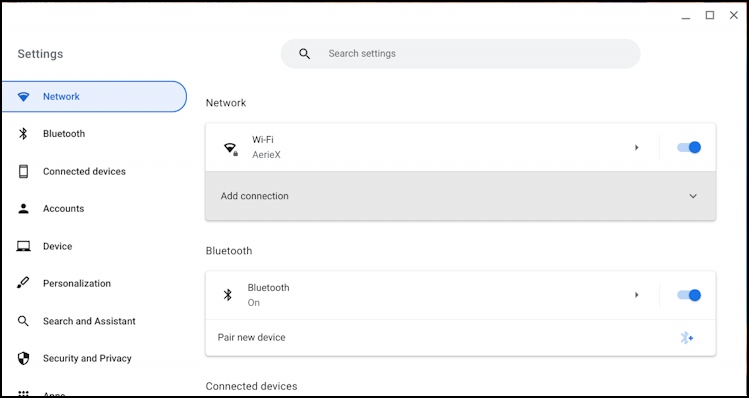
Notice on the right that it shows the current wireless Wi-Fi network, along with Bluetooth status (including the all-important “Pair new device”). These aren’t what we want, however, so scroll down on the left menu until you get to the very last option “About ChromeOS“. Click on it.
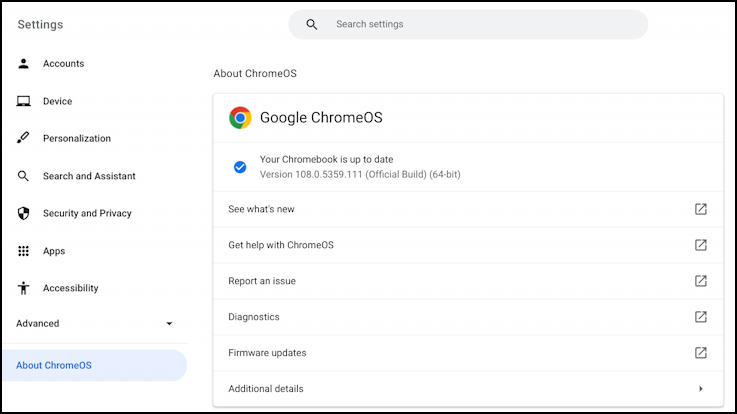
Almost there. From this menu, you can check for updates (which it does automatically after a few moments), get help from Google’s terrific online help system, or click on “Diagnostics” to identify the hardware and configuration.
CHROMEOS DIAGNOSTICS AND CONFIGURATION
Click on “Diagnostics” to proceed…
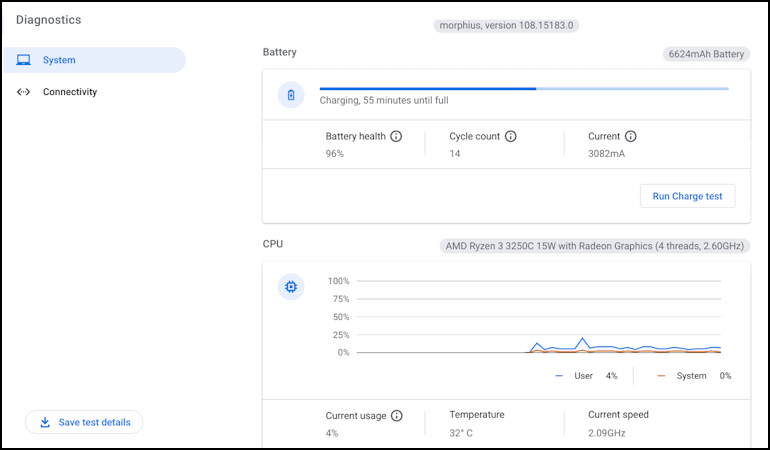
The info you want is in the grey bubbles. This Lenovo Chromebook, for example, has a 6624mAh battery (a decent size that translates to many hours of use while unplugged) and is powered by an “AMD Ryzen 3 3250C 15W with Radeon Graphics (4 threads, 2.60Ghz).”
Notice also that ChromeOS has code names and that this release is known as “Morphius”. Pretty cool, most people don’t realize that the different releases have their own code names! There’s an entire Web page dedicated to all of the codenames too, if you’re curious: Chrome OS Code Names.
Scroll down just a bit and you’ll get the RAM memory configuration too:
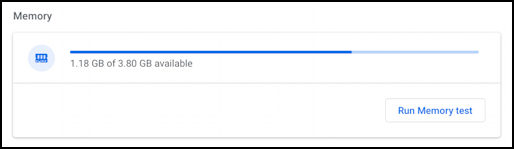
A modest 4GB, but plenty of memory for basic system use like Web browsing, using Google Docs to write a term paper, or checking your email. If you’re going to be using more demanding apps, 4GB might be insufficient: You can see that the system is already using about 70% of the memory without much of anything running.
The information on Diagnostics – and the real-time graphs as you run different programs – will give you a lot of insight into whether the specific Chromebook you’re being offered will work for your needs.
CHANGING CHROMEOS RELEASE CHANNEL
While we’re in “About ChromeOS” it’s worth pointing out that if you want to be a bit more adventurous, you can change your release channel for the device from the safe, thoroughly tested “Stable” channel (what most people use) to the “Beta” channel that offers a chance to try out new features early or even to the riskier “Developer” channel. If you rely on the system working perfectly every day, probably Stable is best, but if you don’t mind an occasional glitch in return for being able to try out new features before anyone else, this can be a fun way to add some zest to your Chromebook experience too.
Simply click on the rather ambiguous “Additional details” link and it’ll show your current channel:
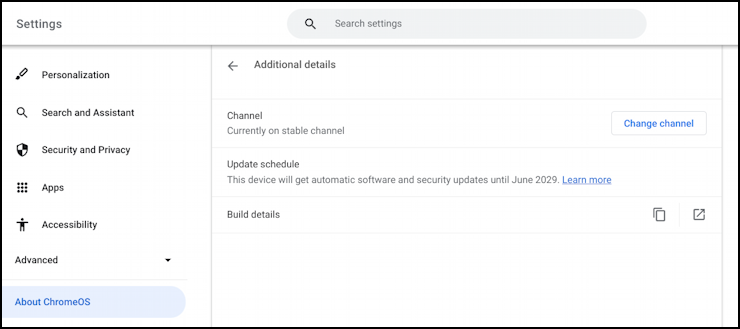
Nice to see that this system will get OS updates for many years into the future, but notice that this unit is “Currently on stable channel”. To change that, click on “Change channel“:
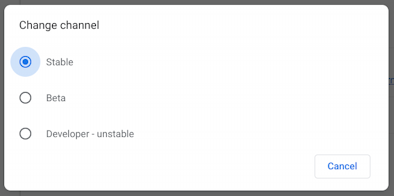
Here you can see the three levels. Again, I don’t recommend this for everyone, but if you don’t mind the occasional glitch or restart, “Beta” can be pretty darn interesting, and if you’re a developer and know what it’s like to have systems crash and are okay with that, “Developer – unstable” might be a revelation!
Whatever channel you pick, you now know how to quickly ascertain the OS and hardware configuration of a Chromebook.
Pro Tip: I’ve been writing about Chromebook systems for many years! Please check out my extensive Chromebook help area for hundreds of useful tutorials and guides! Thanks.