
I’m coming from a Linux environment at school and am finding that WIndows 10 is missing lots of features. My biggest pet peeve: Virtual desktops. Is there a way to get virtual screens working on a Windows PC?
You’re not the only person that appreciates virtual desktops, actually. It’s been built-in to Linux since almost the very beginning (in The X Window System, which underlies all the various window managers) and it’s been a part of the MacOS X system forever too (go back far enough and the graphical interface is built on top of the NeXT window system which definitely borrowed code from X too). And… it’s been available for Microsoft Windows on and off for many years too. The thing is, Microsoft doesn’t seem to be able to make a firm commitment to having it easy and functional for the vast majority. So now it’s incorporated into the Timeline feature which you get to from Task View. A feature very few people realize was added to Win10 in the last year!
For those of you that don’t know what a Virtual Desktop looks like, it’s really quite useful. Imagine if you had multiple screens on your computer and could assign specific programs to one screen or another. You could have games in one, social media in a second and the document you’re creating in a third. No overlapping windows, no confusion about what’s going on, you just look at a specific monitor and that’s what you’re focused on. Now imagine they’re all screens sharing a single display and you could just swipe left or right to zip between them. That’s what virtual desktops are. Nifty, eh?
So, to get started, the easiest way is probably to click on the tiny Task View icon on the TaskBar. It’s near the left:

This is called Task View, but it’s actually taking you to the Timeline view. Confusing? Yeah.
Timeline, however, is really quite interesting and worth checking out:
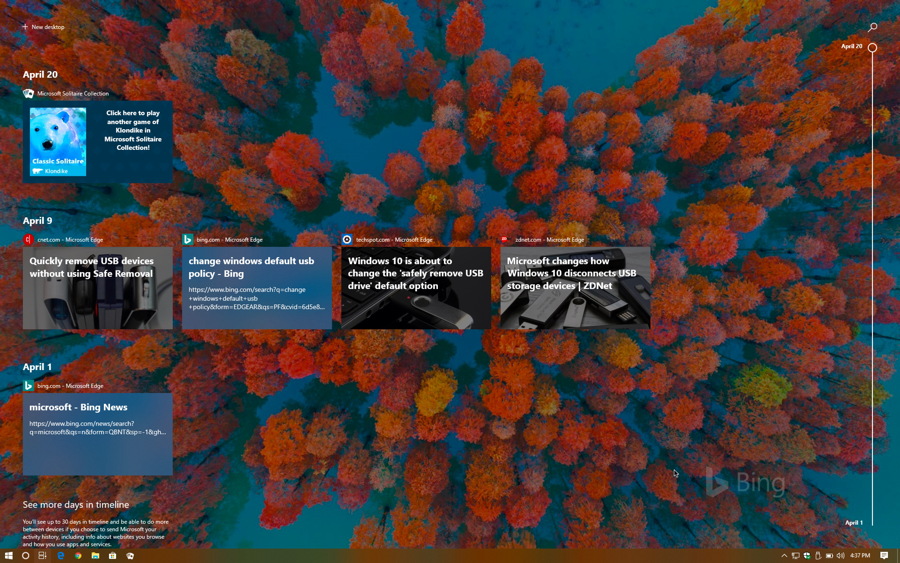
Basically it’s like the history feature in your Web browser, but it shows you what you were doing instead of just a line on a list, and it can include programs and utilities you run too, not just Web pages. I’m a big fan and look forward to Timeline evolving as more people use it.
What you want, however, is tucked in the top left corner and so small that it’s basically unreadable. Here’s a closer look:

Even here it’s as subtle as it could get and doesn’t even say “virtual desktop”. If you click “+ New desktop” to add one, however, you suddenly go from a single desktop (nothing virtual about that, I suppose) to multiple desktops. It’s represented like this:
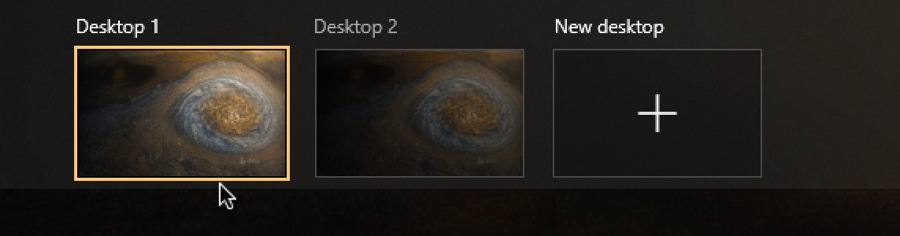
Since I don’t have any programs running in either of the active spaces – Desktop 1 and Desktop 2 – it’s a bit hard to visualize what’s going on. Click on Desktop 2, however, and everything that was shown in Desktop 1 vanishes off screen. Launch a program like Solitaire in Desktop 2, however, and you’ll see a tiny thumbnail representation of it:

If you can have two desktops, you can have more, of course. This time I’ve launched Bing News in Desktop 3, Solitaire is still sitting, ready to go in Desktop 2 and Desktop 1 is nice and empty, ready to use:

Now, let’s talk about how to work with Win10 Virtual Desktops, because it’s still a bit rough around the edges. You can quickly move between virtual desktops by going to Timeline and clicking, as shown above, but the cool kids all use the keyboard shortcut Windows Key + Control + Right Arrow to move “upwards” in the list, and Windows Key + Control + Left Arrow to move “downward” on the list. Handy to remember when the boss walks in and you need to leap away from your game or Facebook news stream. 🙂
When you’re in Timeline view, you’ll see big thumbnails of all currently running windows in that particular virtual space. A right-click on the thumbnail and you can actually tweak quite a bit in terms of where that window shows up:
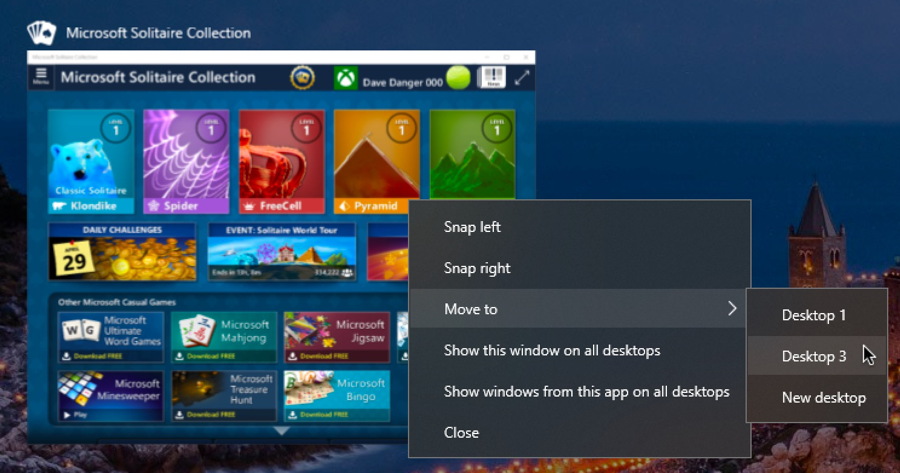
Since it’s already in Desktop 2, there’s no reason for that to be listed on the Move to menu, but notice you can launch a program and choose “New desktop to create a new Virtual Desktop with that program, app or window already assigned. Quite handy.
What I most wish is that there was a way in the Taskbar that I could get a list of all Virtual Desktops and that I could assign them specific names, so instead of “Desktop 3” it might be “Fun & Games”. I know, pretty minor requests given that the vast majority of the functionality is terrific.
So now you know how to work with Virtual Desktops on Windows 10. Go forth and have some productive fun!
Pro Tip: I’ve been writing about Windows since Win3.1. Which means I have a lot of Windows help, so please do check it out while you’re here on the site. Thanks.