
None of my work colleagues have said anything, but I notice that when I get email from them, their profile photo is included. On my Outlook.com toolbar, however, I just see my initials in a circle. How do I add my own profile photo so they see my pic too?
With the impersonal nature of the online world, we all need to go through additional steps to personalize our communication. It’s not just a way to increase the chance of you getting responses, it’s just a nice thing to do. I teach at the University of Denver and we’re a big Outlook and Office 365 organization with everyone using Outlook.com for their email, Office 365 apps, OneDrive and SharePoint for shared files and data, and much more. The organization also keeps things pretty tightly locked down for security reasons; I can’t even edit my own profile.
But not to worry, there’s a quick and easy way to add a photo to your Outlook profile even if your organization has also similarly locked down your user profiles for security (or privacy). It’s not a mission critical update, but it is nice to look like you’re tech savvy to others, right? So let’s do it!
IDENTIFY YOUR OUTLOOK.COM PROFILE PHOTO
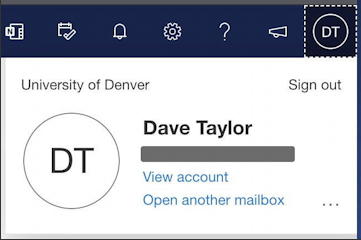
It’s so easy to see if you have a profile photo that you’ll laugh. Just look at the top right corner of any page on Office 365 or Outlook.com. On mine, for example, it looks like this:

As you have indicated with your profile too, mine is still showing “DT” in a circle rather than a tiny photo. No bueno. Meanwhile, my colleagues are all set up, so their email has their pics as a quick memory jog of their identity. For example, my colleague Cindy has her profile picture all set up for her account, so my email from her includes it:
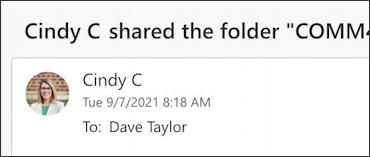
Presumably, when she gets email from me it’s that default “DT” instead.
Click on your initials in that circle on the toolbar and a tiny info card pops up:
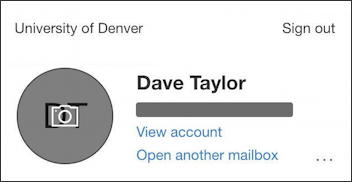
Again with the initials! 🙄
ADDING A PHOTO TO YOUR OFFICE.COM ACCOUNT
What isn’t obvious is that you can add a photo directly to this info card window! Move your cursor over the bigger initials in the circle and the clue will appear:
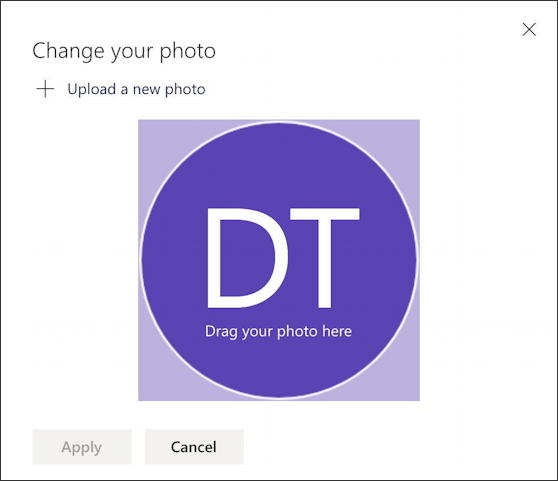
Click on the camera icon that’s magically appeared and a new window appears:
As an aside, I am not a big fan of hidden features like this; we users shouldn’t have to move our cursor around on the screen to find secret links, buttons and features. Do you agree?
Anyway, anyway. At this point you can either drag a photo from your Desktop onto the circle or click on “+ Upload a new photo” to choose one with a more typical file select window. Once you choose the photo, it appears with a zoom and position control:
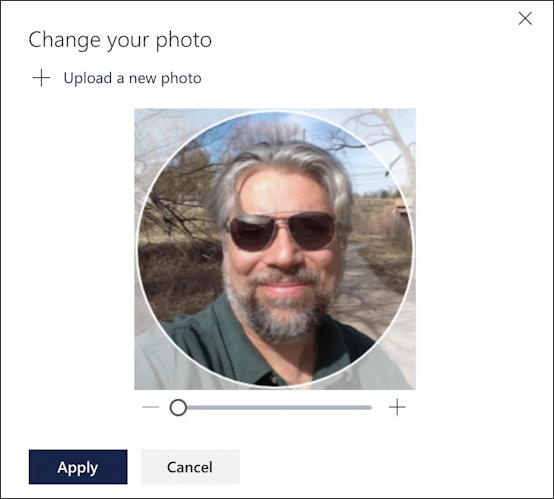
The slider lets you zoom in to get the crop just right, and you can also click and drag (hold the mouse button down while you’re dragging) to center your face in the circle.
Looks good? Click on “Apply” and you’ll get an affirmation that it worked!
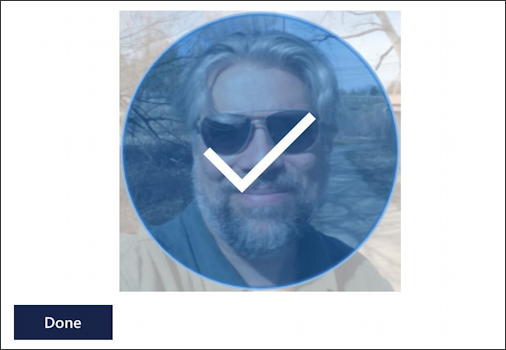
If you’re the kind of person who seeks feedback then having a big checkmark over your photo should bring you at least a tiny warm fuzzy. 🤓
OUTLOOK.COM WITH A PROFILE PHOTO SET
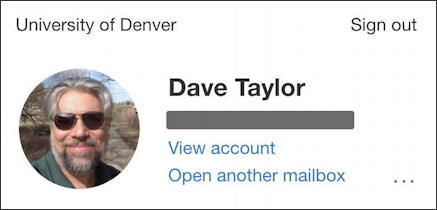
Now that you’ve set your new profile photo for Outlook and Office 365, it shows up on the toolbar, replacing your initials:

More importantly, click on your tiny pic and you’ll see a larger version of it in that info card window:
That’s it. Done. Not too bad once you know about that hidden camera button.
Pro Tip: I’ve been using and writing about Microsoft’s Office Suite for many years. Please check out my Outlook help library for plenty of useful tutorials, as well as additional Office 365 help pages! Thanks.