I’m ready to take my YouTube experience to the next level by creating custom thumbnails for my videos. Can you step me through the process on an iMac, please?
Props to you for not only being a YouTuber and posting videos on YouTube, but on realizing that there’s a lot you can do to make your videos more popular and findable and to increase the chance that someone who sees the video in a search result will click on it. Why bother? Because eyeballs; YouTube search has what I call “momentum” so videos that are getting lots of views are ranked higher in search results, which cause them to get more views, which raises their rank even further. End result: To get lots of views on your videos you need to start out with as much in your favor as possible.
The obvious ones are a great title and smart description, along with lots of keywords (always at least ten, if not double that), but since the site is so visually oriented, it’s really the thumbnail, the preview image that’s going to help drive clicks and views to your content.
Fortunately YouTube makes that something you can create without too much work. To start, you’ll need to have a verified account so you can have access to this feature. If you haven’t done so yet, start at youtube.com/verify for the hoops to jump through.
Now when you upload a video and it’s processed, you’ll see the three usual options for thumbnails and a link that allows you to upload a custom thumbnail. Here’s an example from my review of the 1More Dual Driver ANC lightning headphones:

If you look closely, you’ll see that it’s already defaulted to the second of the three possible automatic thumbnails. But we don’t want that!
We’ll eventually click on “Custom thumbnail”, but not yet: we need to build it first.
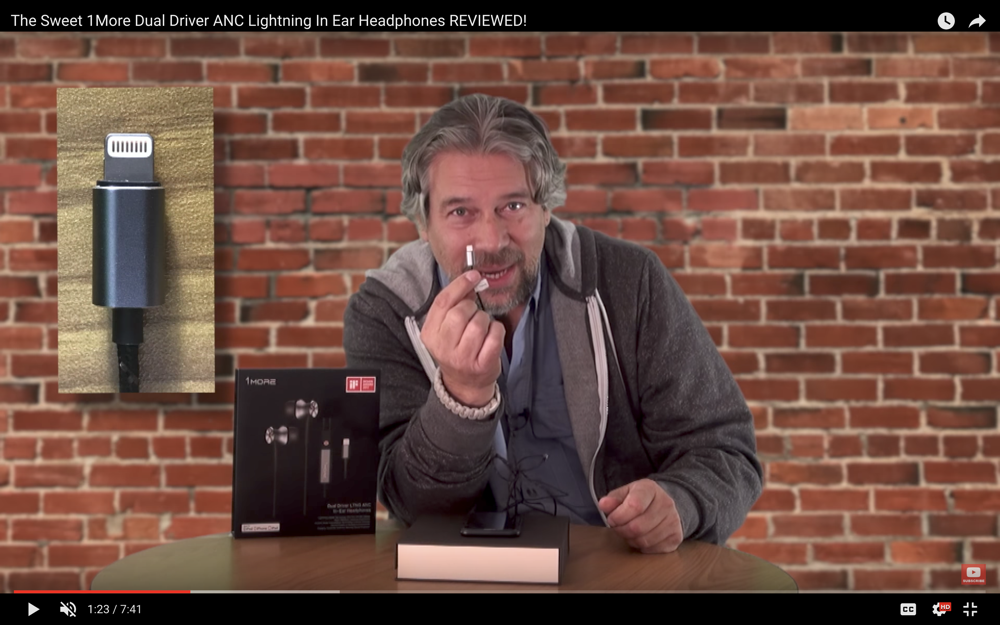
The way I build thumbnails is that I go ahead and watch the video full screen, pausing often until I can get a still frame that I like. Here’s the one I got from about 42 seconds into this particular video:

Ultimately the magic dimensions for a thumbnail are 1920 x 1080, also known as the “1080p” HD resolution. The above is definitely not that set of dimensions, but it’s a starting point, so I use Command-Shift-3 to take a screen capture.
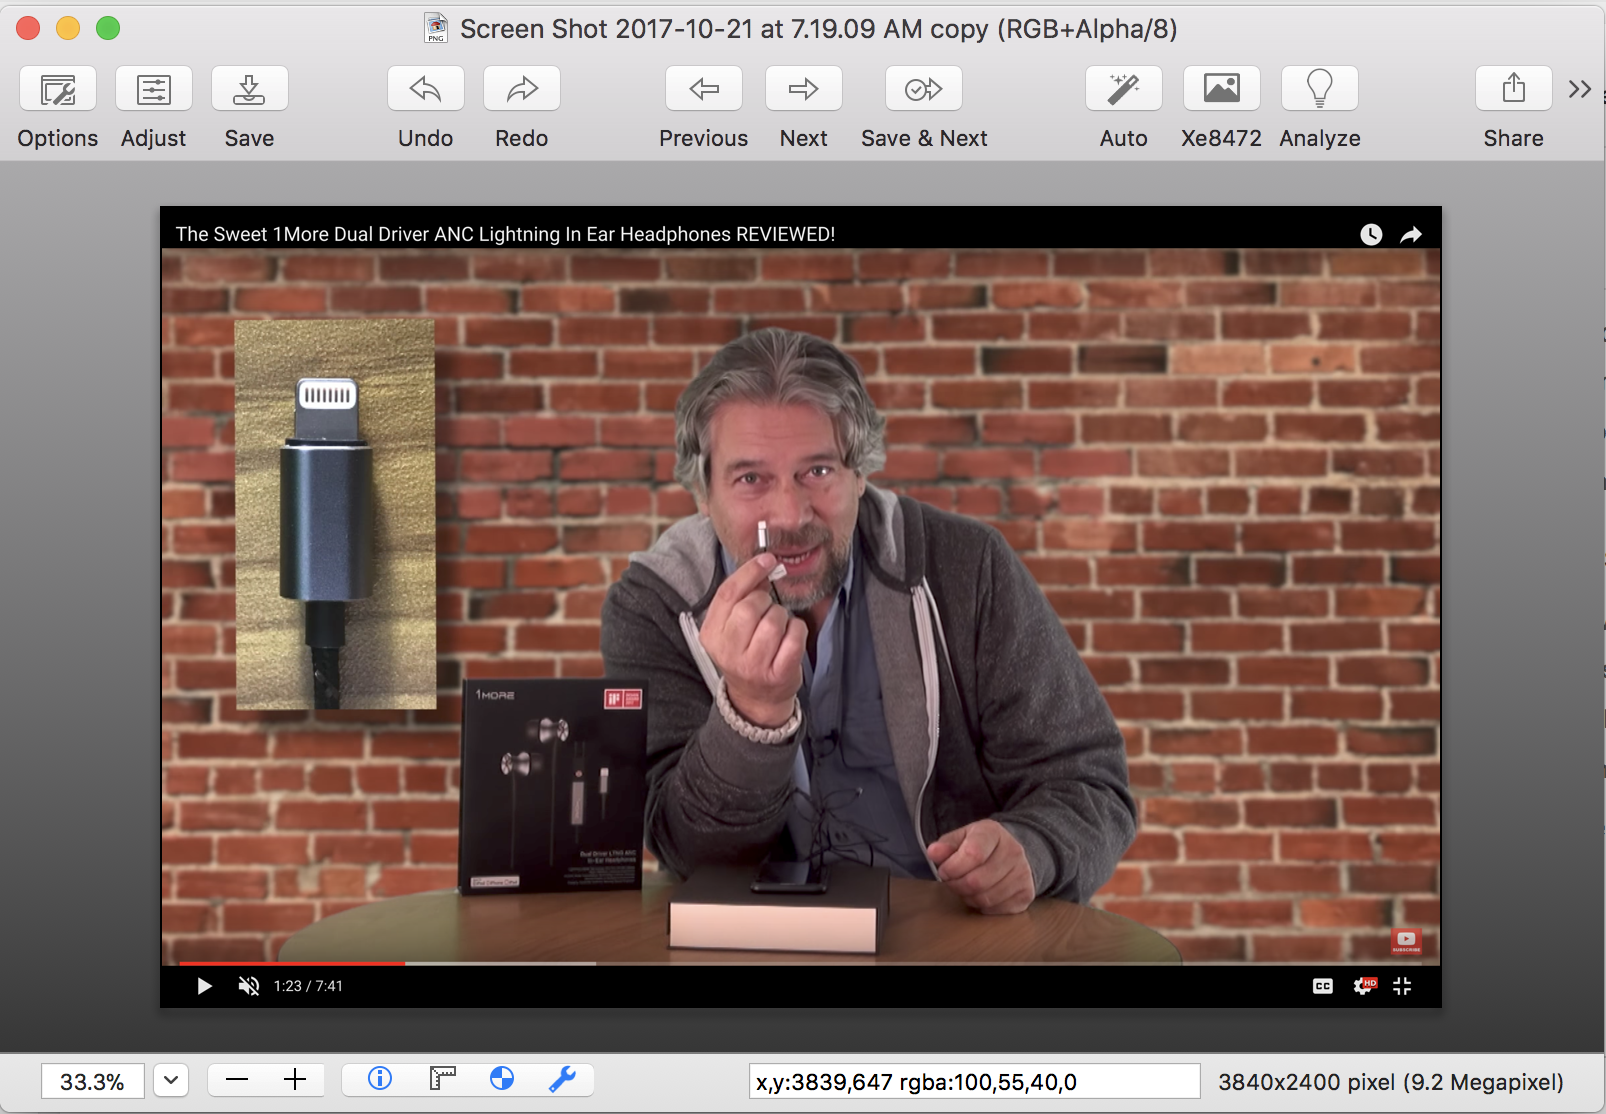
The program I like to use for this sort of graphical manipulation is a terrific piece of shareware called GraphicConverter. It has plenty of power for this particular task and is straightforward to use. To start, I simply open up the screen capture in the program:

Notice on the bottom frame it shows me the dimensions of the image: 3840 x 2400. That’s huge. Way too huge. More importantly, it’s not quite the right proportions, particularly when I get rid of the top and bottom bars and the YouTube video player controls.
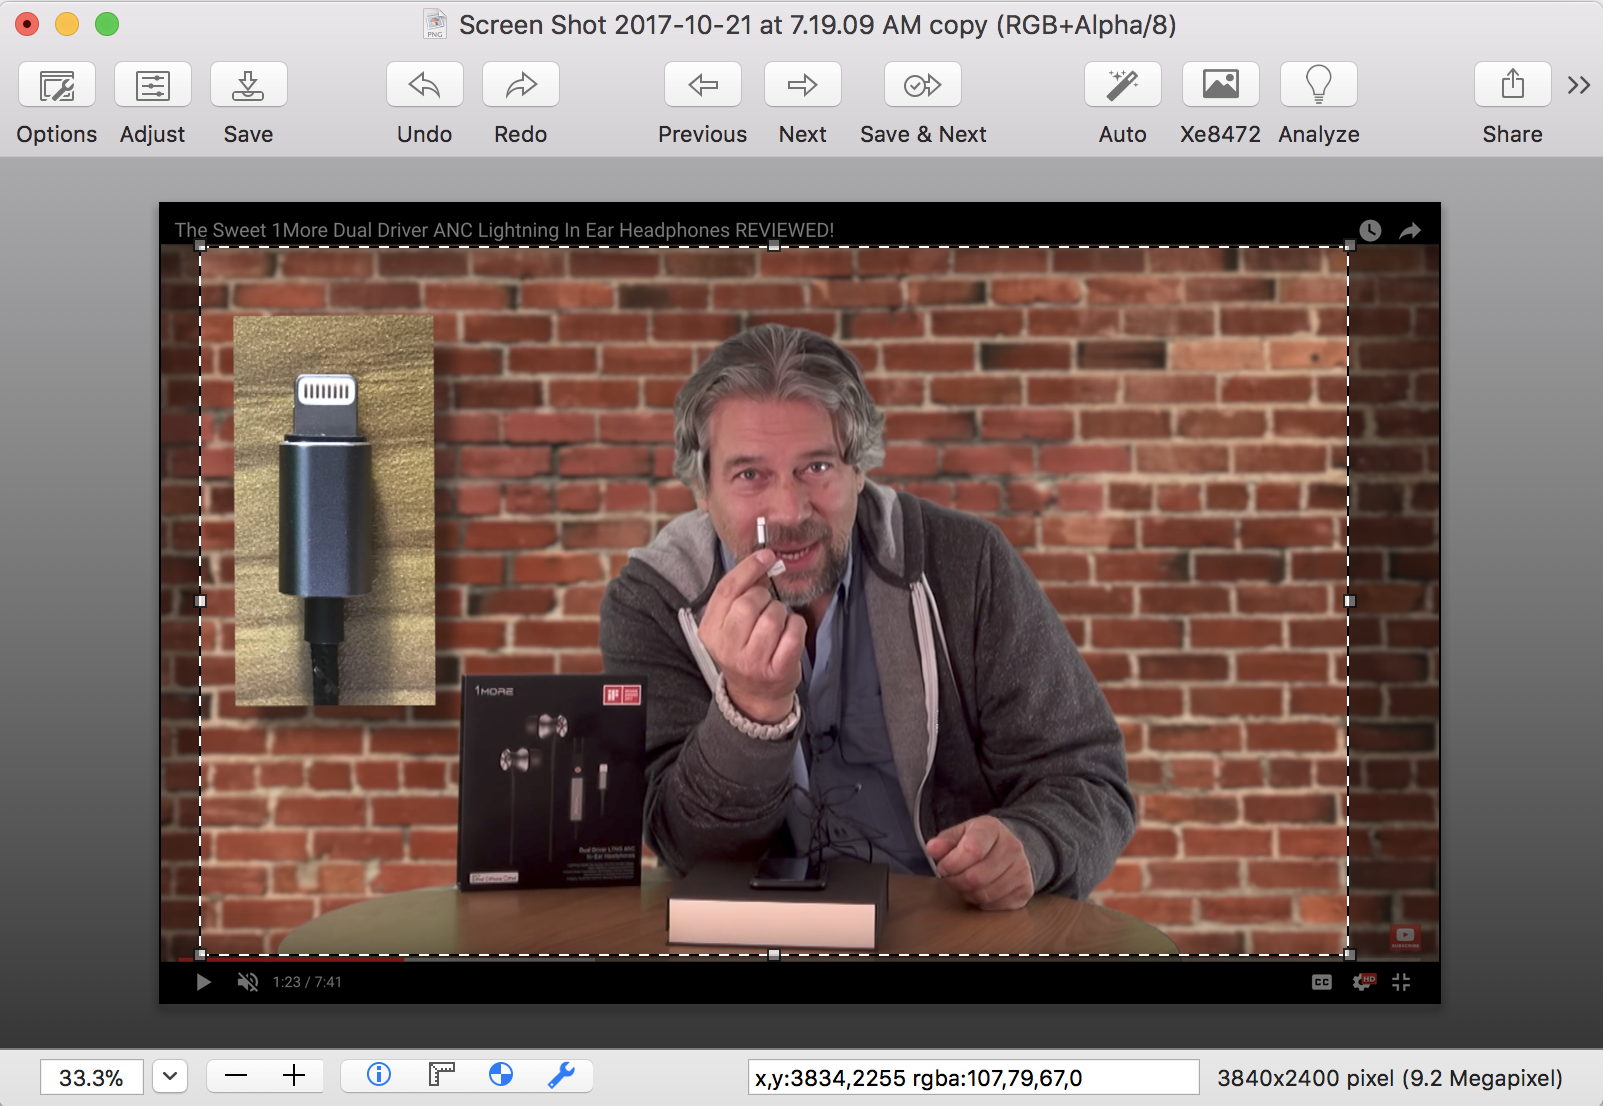
To start, think about the dimensions. 1920 x 1080 is almost 2:1, so choose a subset of the image that’s approximately those dimensions. Here’s what I chopped out of the screen capture:

I crop to the selection, then since I’m going to add a bright, colorful frame I want to actually resize the resultant image to be a bit smaller than 1920×1080, actually 20 pixels smaller in each direction. It’ll also slightly distort to fit exactly the dimensions, even if it’s a wee bit out of proportion. If it’s too weird looking, you can always backup and try a different crop that’s closer to the 2:1 dimensions.
In GraphicConverter this is known as an image scale and you can see my 1910×1070 crop specification here:

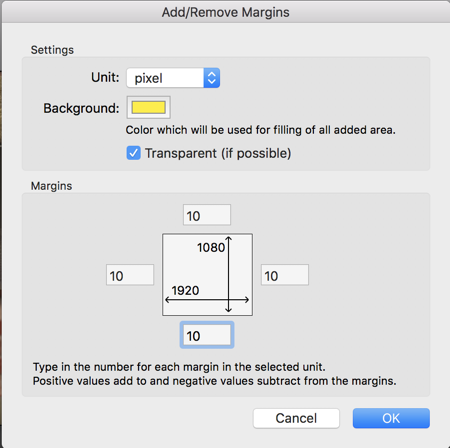
That gets the image to the size I want. Then the next step is to add a frame so that it ends up the full dimensions desired. That’s done with yet another tool in GraphicConverter: Add Margins.

This adds a bright yellow margin on all four sides of the shrunken image. In addition, I add three or four words that I hope will jump out at the YouTube user and make them really want to click on my video. Here’s how it looks with the lettering added and the yellow border:

Looking good! Now it’s just a matter of saving it as a JPEG — YouTube can’t work with PNG thumbnails — and making sure it’s under the specified 2MB maximum file size. That’s done within the File > Save As… dialog box. Give it a mnemonic name like “thumbnail” (I know, no expense has been spared on coming up with fantastic names for this tutorial) and go back to YouTube.
Now it’s time to click on that lovely “Custom thumbnail” button and select the new thumbnail we’ve just created.

Looks great. Way better than the generic ones! And now you know how to create custom thumbnails.
For your edification, here’s the video too. See if you can figure out exactly where I grabbed the image for the thumbnail!
Hope that helps you out!
Please don’t forget to subscribe to the AskDaveTaylor YouTube channel and check out all our YouTube help here on the site too.
