
I run both Linux and Windows 8 in a VMware Fusion virtual machine on my Mac Pro and it works really well. Except I just bumped into a problem: My Windows virtual disk is too small. How can I make it larger?
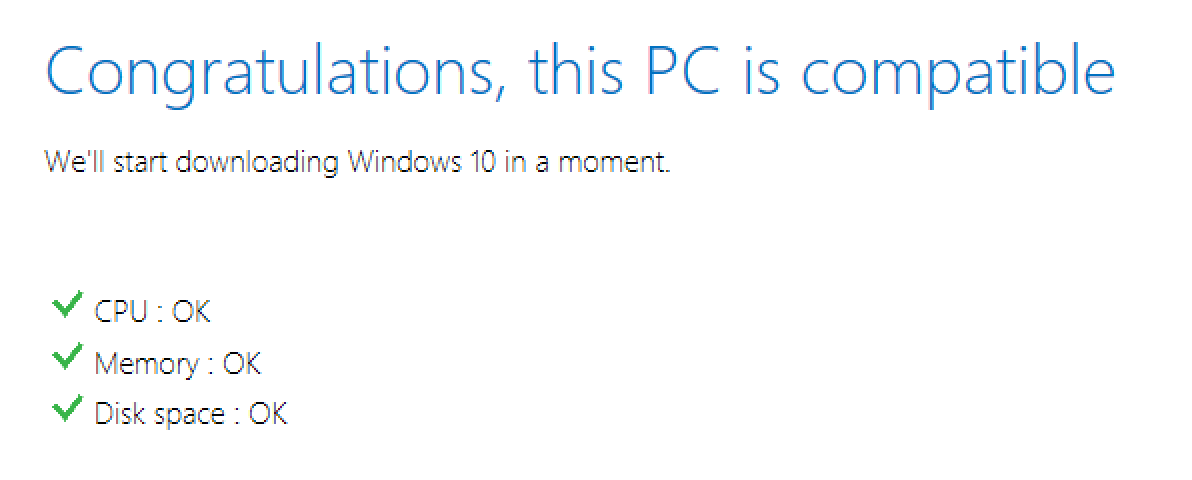
Unlike a real, physical disk, virtual disks have a really cool capability: you can just make ’em bigger whenever you want! I encountered an issue with upgrading to the preview edition of Windows 10 on one of my Mac systems too – also with VMWare Fusion – and was surprised to find that I had insufficient disk space to apply the update. Apparently you need 20GB of free space for this particular transition and I had 19GB. Ugh.
You will need the available disk space on the Mac side but with 500GB – 1TB drives the norm, that’s usually not a problem and if you ‘re running on a Mac Pro, I’d guess a few dozen gig isn’t a huge issue for you either. You can also use the VMWare Fusion settings to shrink down your disk, but since files and data are likely to be laid out somewhat randomly on the space, you do that facing a potentially corrupt operating system and I definitely don’t recommend it.
But larger? Easy.
Here’s the process I went through, starting with the $@$# error message from the Windows Updater:
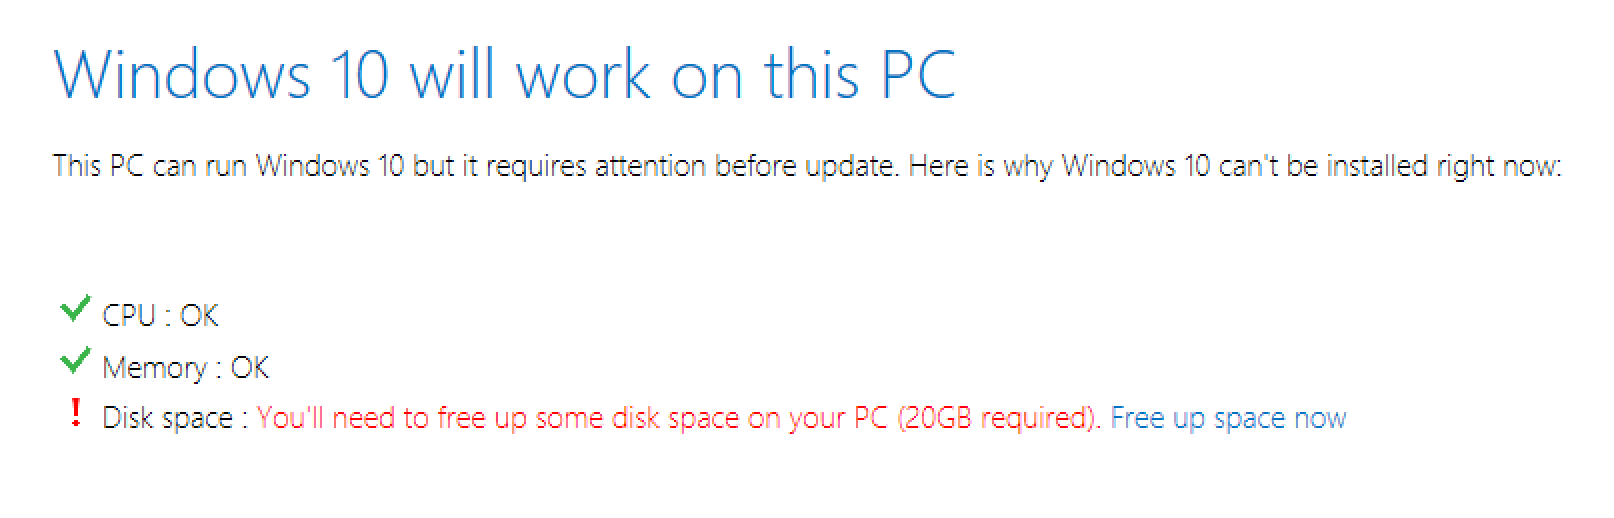
Unfortunately it doesn’t say “you need 20GB, you only have 18GB” or similar, but I’m going to bump up my size quite a bit, from 60GB to 75GB, still quite a small partition for a modern Windows system. To do that, I need to completely shut down the virtual machine. In this instance, I’ll need to Power > Shut Down within Windows so that the OS isn’t running.
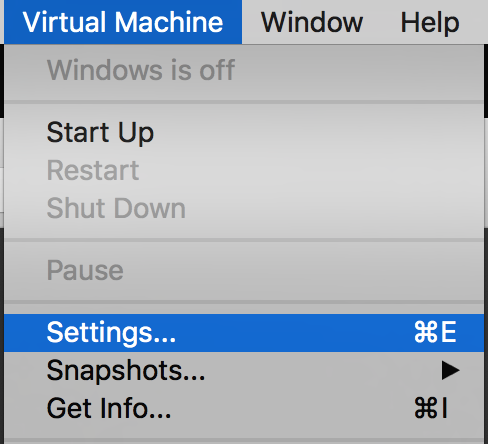
Don’t get confused here, however: You still need VMware Fusion running. It’s just the virtual machine that you’ll need to spin down as if you’d powered down that particular computer.
Now, from the Virtual Machine menu, choose Settings…
There are lots and lots of different things you can tweak to get maximal performance and best match your target environment, as you can see:
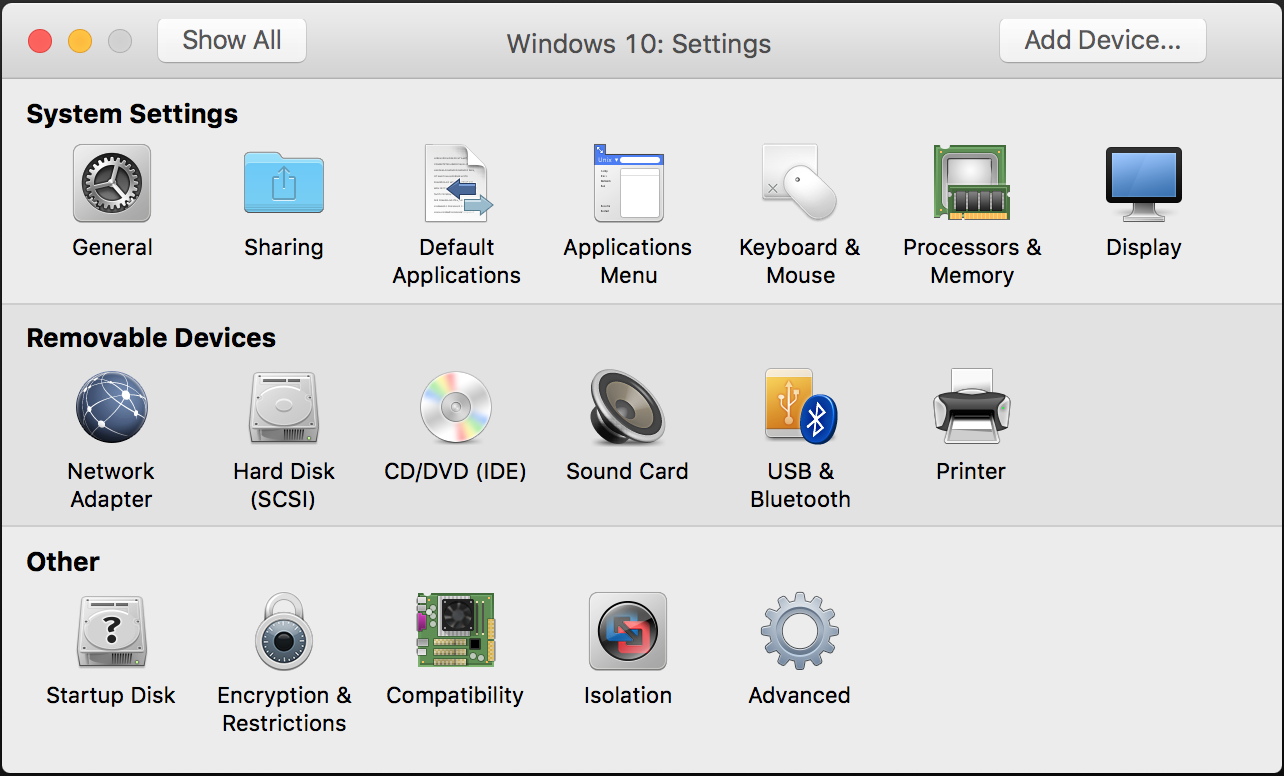
You’ll want to click on Hard Disk (SCSI), which is located on the second row. Now it’s just a slider showing you the current allocated drive size:
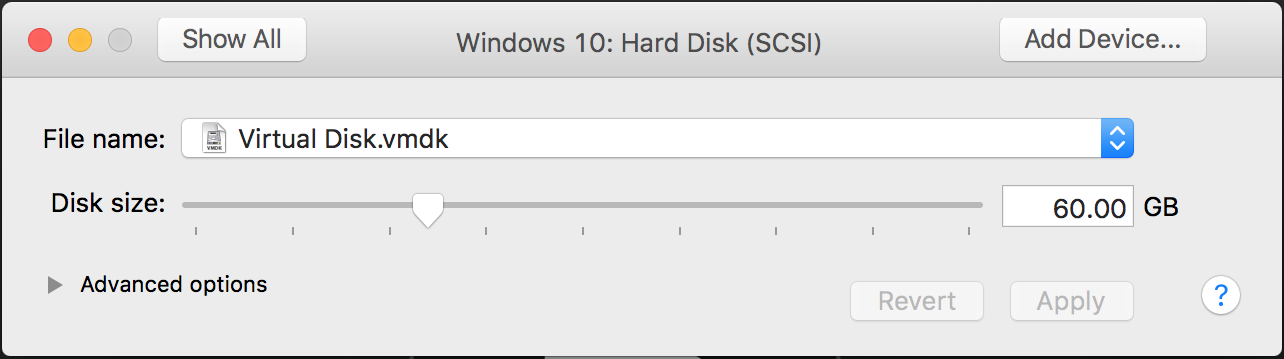
To make it larger is ridiculously simple: Click and drag the arrow on the slider to attain the size desired.
For me, it’s 75GB. Once I’ve done that, I click on the Apply button and it grabs all that space from the Mac system:
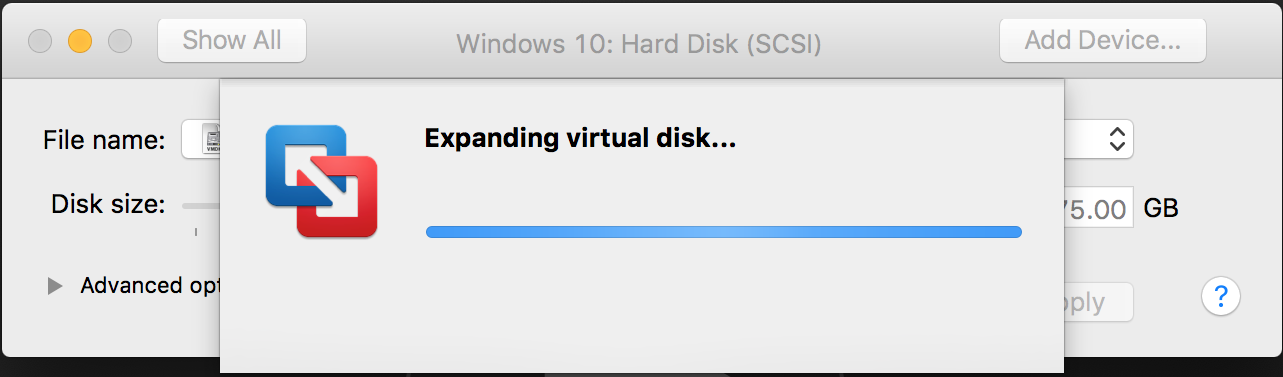
Takes just a few seconds and once it’s done, you can restart your virtual machine.
Want to check? No worries, I’m going to do the same by typing disk space into the Win10 search menu, which pops up this information:
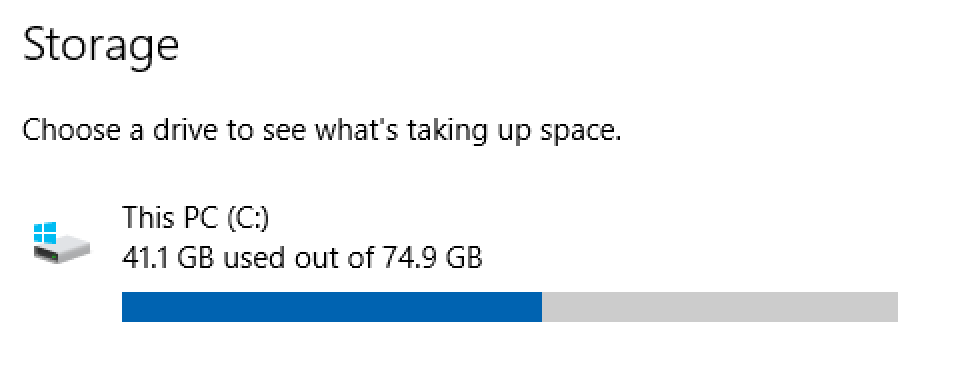
There ya go, from 60GB to 75GB. Now the Win10 upgrade will work just fine…
I’m a huge fan of VMware Fusion and this tutorial demonstrates one reason why: it’s just really easy to work with and offers exact compatibility with a hardware Windows PC. Perfect for testing and project work!