
I write about Web site design and my standard approach has always been to capture the screen and edit the resultant image to include in an email or document. But I noticed Microsoft Edge has both “Web Capture” and “Web Select”. What’s the difference and how do I get started using them?
It used to be that Web browsers were focused on rendering and displaying Web pages, and if you wanted to have a screen capture, you’d use the tools built into the operating system. Wanted a full web page capture? Either you were “printing to PDF” or assembling it, image by image, as required. Third-party tools even appeared for just this task, but the latest generation of Web browsers actually have lots of built-in image capture and annotation tools that make ’em all obsolete. Google Chrome, Safari, and, yes, Microsoft Edge all have pretty slick features.
Shortcuts: Capture options | Web Select | Web Capture | Full Page Capture
I’m also a bit old school, however, so I know what it’s like to use that keyboard sequence that has worked forever, then edit. But it’s inefficient and if you’re doing it for an image or two, no big deal, but once you move to dozens or hundreds of images, having a faster solution has obvious benefits. The good news is that as you master all the tools, you can more accurately choose which works best for your application, though it’s hard to beat the in-browser full-page capture feature!
FINDING WEB PAGE CAPTURE OPTIONS IN MICROSOFT EDGE
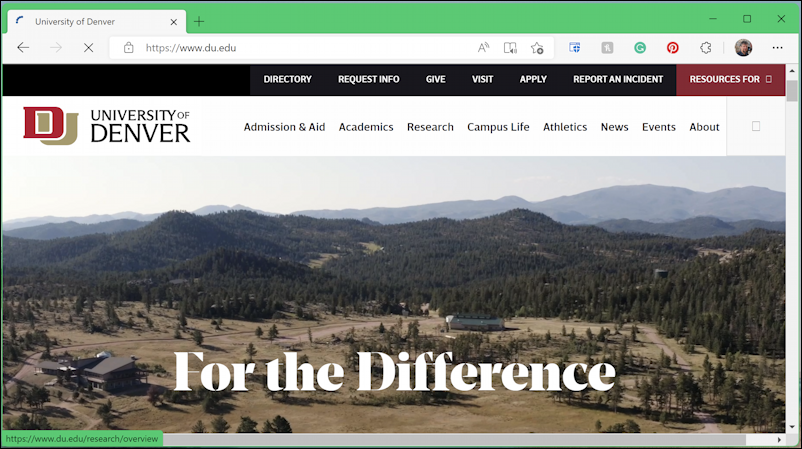
To start out, let’s jump to the University of Denver’s Web site for our examples. It’s a very pleasant, straightforward page:
Click on the “•••” link on the right edge and the usual big menu appears, with oodles of options:
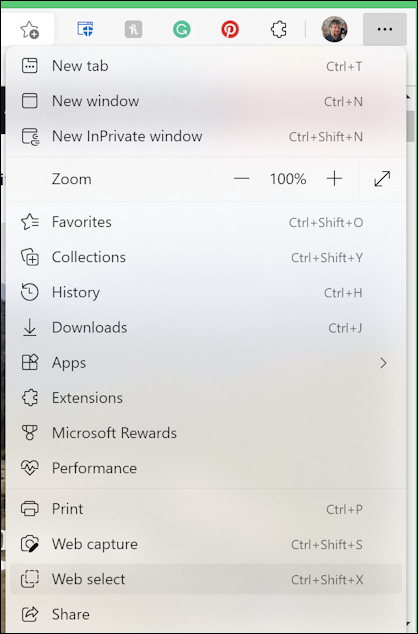
It’s confusing that there are two capture options near the bottom (of this truncated menu): Web capture and Web select. Each has its handy keyboard shortcut, but what’s the difference? Let’s try them both to find out.
HOW TO USE WEB SELECT IN EDGE
Go ahead and choose Web select from the menu and you’ll be presented with this big prompt:

Okay, so I’m going to click at the top left corner and drag the selection box to the lower right corner of the portion of the image I want to select. Once I let go of the button, the selection is confirmed and a tiny window pops up with the one option available:
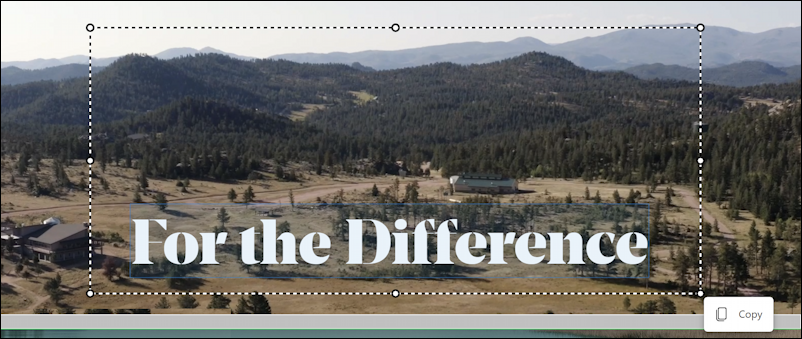
Click or tap on “Copy” and that image is in the copy/paste buffer, ready to be pasted directly into an email, text message, or document. The task really doesn’t get any easier than Web Select.
HOW TO USE WEB CAPTURE IN EDGE
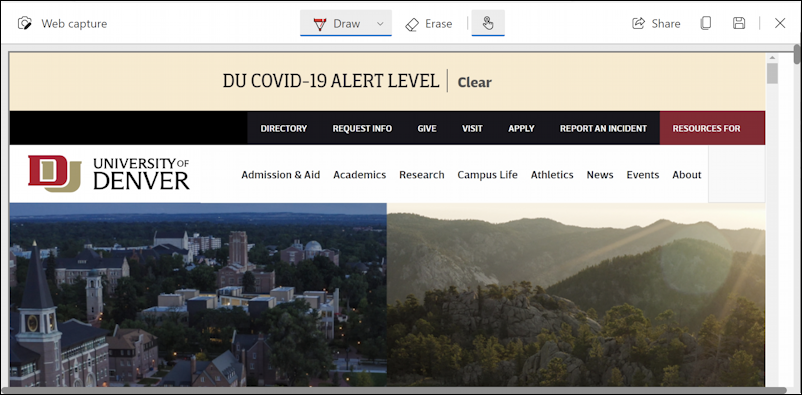
So what happens if you choose Web Capture instead? Instead of that big prompt to click and drag, a small window with a pair of options appears instead:

Let’s start with Capture area, we’ll come back to the terrific Capture full page in just a moment. Choose “Capture area”, and, again, you’ll be clicking and dragging to identify a rectangular region you want to capture. This time, though, when you release the mouse button, you get two options for what to do next, not just the “Copy” choice:

You can guess what “Copy” does, so let’s choose “Markup capture” instead. It drops you into a very rudimentary markup editor with the image already loaded:

This makes it really easy for me to circle the building in the image, as an example, though you could use the (rather primitive) tools to add additional markup as desired. Once you’re done, you can “Share”, “Copy”, or “Save” using the icons on the top right (which leads to the question; why are they still using a floppy disk icon to denote saving to disk?)
CAPTURE FULL WEB PAGES IN EDGE
What about if you would have clicked or tapped on “Capture full page” earlier, however? In that instance, you’re moved into the Markup editor again, but with an image of the entire Web page, however long it is. Here’s what I get:
Notice the scroll bar on the far right and how the portion of the image I’m seeing is just a small fraction of the content of this image. So convenient! So much easier than splicing images together to create a long capture. Want to save this image? No worries, a click on the floppy disk icon (sorry while I snicker!) saves it to your Downloads folder like any other download in Microsoft Edge:
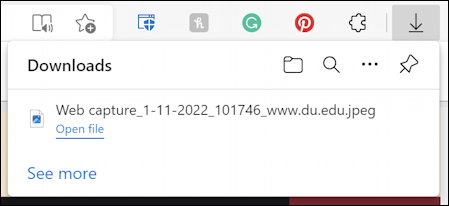
It’s even conveniently saved with the time and date along with the base URL as a JPEG image. That you can then open up in any app and share, or just archive if you want a historical snapshot of a home page or similar. Neatly done, and well worth knowing about!
Power Tip: I’ve been writing about Windows for many years and have an extensive Windows Windows 11 help area. Please check it out to find lots of additional tutorials and guides while you’re here. Thanks!
Hi Dave,
Thanks for the tutorial on web capture vs. web select. Can you tell me how to post a link in a MS Forms survey? I can’t seem to figure it out.
Thanks,
Peggy