
All my friends work at companies where they use Zoom, but my firm prefers Google Meetings. Is there a way in Google Meet where I can still share a program or app screen as I demonstrate something? I’m using it on my Mac system, but most of my audience are on PCs…
There’s no question that right now is the great moment for Zoom usage and it’s hard to find people that haven’t used Zoom to at least catch up with grandma at this point. Whether it’s for a personal, social, or business use, Zoom seems to be the most popular video chat program. However, there are other solutions out there with their own strengths and features too! It’s worth checking out Skype, for example, which a lot of people seem to have forgotten about. Microsoft has Meetings, which can work great and offers tight integration into the Windows environment. GoToMeeting has been a mainstay in business for many years. And Google has its own video meeting system that has evolved from its earlier “Hangouts” offering and is now called Google Meet.
All of these offer live multi-person video chat with a separate chat window and individual user controls for mute and turning on and off the video camera, as well as document sharing, window sharing, white boards for shared annotation, recordings and even transcripts. Google Meet is one of the very few that doesn’t require its own program or app be downloaded, which is a huge boon: everything happens within your Web browser. I’ve always used Chrome as my own browser, but it works in other browsers too. In fact, the Windows screenshot later in this tutorial is from Microsoft Edge, not Chrome!
HOW TO SHARE A WINDOW IN GOOGLE MEET
So let’s have a look at how it’s done. To demonstrate, I’ll use one of my favorite features in Google Meet: An “instant” meeting! Simply go to meet.google.com and you’ll see this:
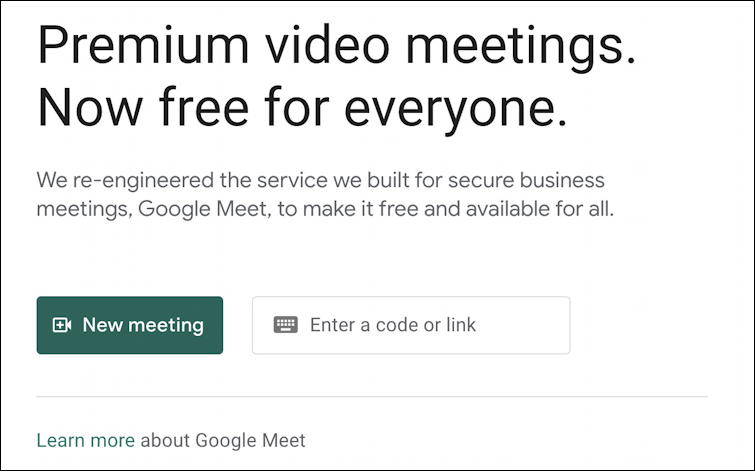
If someone’s sent you a code, you can enter it in the box, or just click on the green “New meeting” button. A menu pops up:
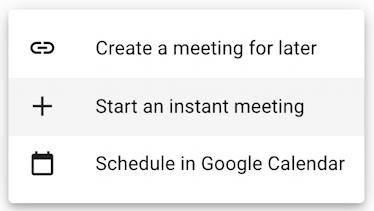
Choose “Start an instant meeting” and you’re up and running. Well, you might need to grant permission for the browser program to access your camera and microphone, but once you’ve done that, you’re on screen and lookin’ goooood:
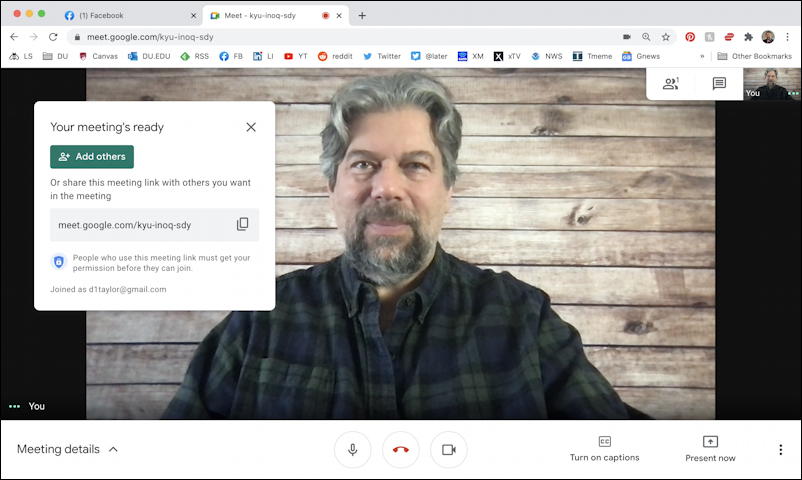
As it shows, your instant meeting is assigned a special code link – mine is kyu-inoq-sdy – that you can now share on social media, via text message, email, whatever, so you can have others join you. Or you can click on the green “Add others” to send invites directly.
It’s worth having a quick tour of the toolbar along the bottom too. First, notice on the lower left, but against the black background, the “•••” and “You”. Turns out those dots will turn green to offer feedback that your microphone is working! Try talking and watch what happens. Neat, eh? On the lower portion of the toolbar are some meeting details, a microphone icon to allow you to click-to-mute, the red end meeting button, a video camera icon that allows click-to-disable-camera if you want to be off camera, the ability to turn on captions, the button we’re most interested in, Present now, and another three dot icon, this time vertically oriented. Note also the top right shows the number of participants and offers easy access to the chat window. It also gives you a tiny monitor window for your own camera, which is helpful.
Okay, click on the two vertical dots on the lower right. It brings up a menu full of useful settings:
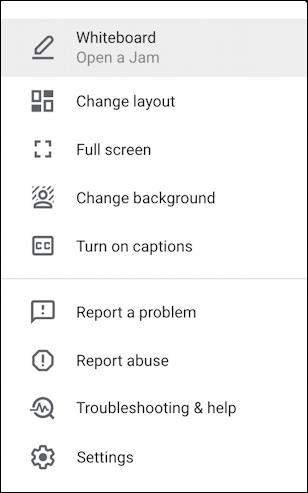
Lots to explore (which you can do in your own instant meeting solo), notably Change background if you want to play with blurring your background or having a whimsical graphic, Troubleshooting & help if something’s not working correctly and Settings to fine tune which camera, mic and other preferences you’d like.
Ready to proceed? Good. Click on Present now and a window pops up with your three basic computer window sharing options:
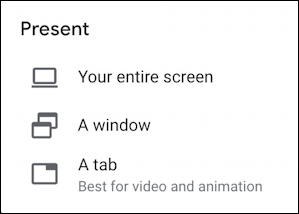
I generally discourage sharing your entire screen because people typically have private files and content on their Desktop. Plus it’s great to have a specific program or app window because it lets people focus on that and not be distracted. Choose “A window” to proceed and now, assuming you already have the program you want to share running, it’ll show up in the gallery:
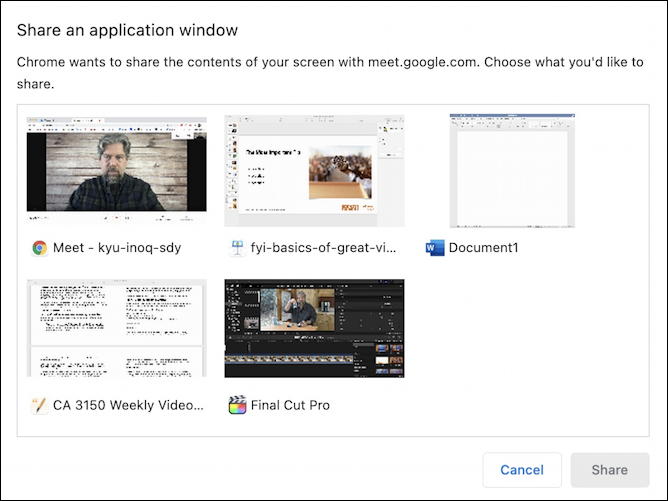
I’ve got a lot going on between Word, Pages, Keynote, Chrome and Final Cut Pro. Let’s share the Final Cut Pro video editing window. That’s easily done with a click to select it, then choosing Share on the lower right.
Unfortunately, Google Meet doesn’t show you any feedback that it’s actually working, you instead see something like this:
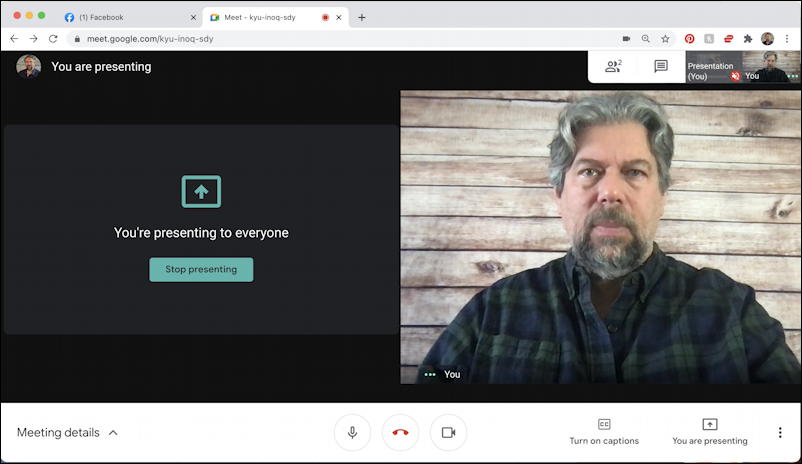
So yes, you’re presenting, but what? Competitors like Zoom do a nice job of framing the currently shared window with a graphic to make it obvious, but Google’s a lot more subtle. It is working, though, as can be seen if I pop over to another computer – this time a PC – and join the instant meeting:
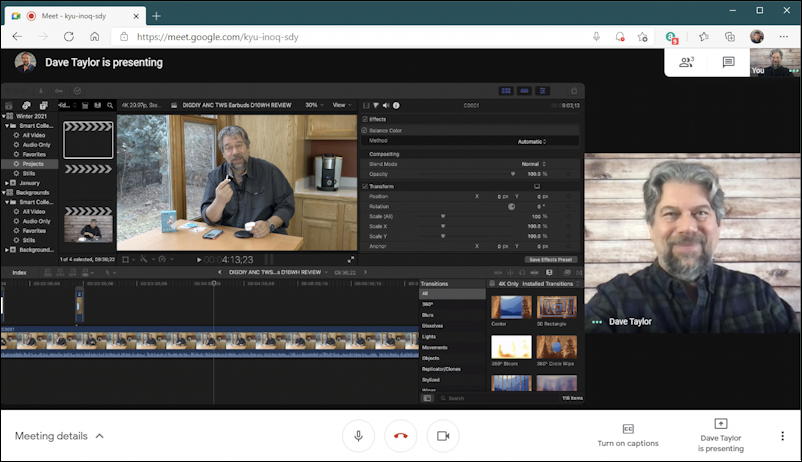
In fact, it’s a great way to talk through what you’re doing in a program window, whether you’re editing, composing or just moving around to explore the features. Users who are attending the Google Meet have a variety of options to change the layout, minimize the video screen of the presenter or even go full screen for the best possible experience. Very nice!
Done with your sharing? There’s a tiny window along the bottom of your screen:

When you’re done sharing, easy enough, click on “Stop sharing“.
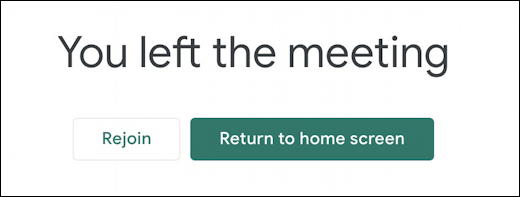
Done with the entire meeting? Click on the red telephone handset icon centered on the lower bar and…
That’s it. Pretty easy, overall, and as you can see, Google Meet is definitely a strong contender for your next meeting. In your case, it’s already the program of choice, and now you know how to change your background, adjust your settings, troubleshoot and, most importantly, share program windows as you go!
Pro Tip: I’ve been publishing how-to content about video conferencing for years, including detailed tutorials on how to get started with Zoom, Microsoft Meeting and Google Meet. Please check out my video conferencing help area for lots of useful tutorials while you’re here. Thanks!